
Hey y’all, pull up a chair! So, let me tell you, Southern Lemon Pie has a bit of a reputation in my family—mostly because I ate half of one straight form the pie dish at a family reunion when I was eight. (Sorry Aunt Thelma, but you left me unattended near dessert, so, honestly, what did you expect?) Now every summer, someone brings up “the incident” and we laugh ourselves silly—it’s that sort of pie. Sticky, tangy, and bright, it manages to taste like sunshine in a crust, even when it’s raining buckets outside, which it usually is around here.


Why You'll Love This Pie (And Maybe Yell at Your Oven)
I make this when I need to chase away a gray Monday, or whenever I notice a bag of lemons looking a little forlorn in the fruit basket. My crew goes wild for this pie; it disappears faster than you can say "bless your heart". (Though, confession, zesting lemons used to drive me bonkers—until I learned not to use the chunky side of the box grater.) And honestly, sometimes I even make it for myself after a rough day; pie pairs just as well with self-care as with Sunday dinner, don’t you think? I mean, I may or may not have eaten a slice for breakfast more than once…
Here’s What You’ll Need (Nothing Too Fancy)
- 1 prepared 9-inch pie crust (store-bought is fine, but hush, don’t tell my grandmother)
- 1 ¼ cups granulated sugar (sometimes I use a little less if the lemons are extra sweet, but Granny’d call that a crime)
- 3 large eggs (room temp, or whatever, I forget half the time and it still works out)
- ⅓ cup fresh lemon juice (about 2-3 lemons, depending if they’re stubby or the size of softballs)
- 1 tablespoon finely grated lemon zest (you can skip this but the flavor’s brighter—just avoid the bitter white pith!)
- ¼ cup unsalted butter, melted (I’ve used salted butter in a pinch—just skip the pinch of salt in that case)
- 2 tablespoons all-purpose flour (or, truth be told, I’ve even subbed in cornstarch when I ran out, worked fine)
- Pinch of salt
- Optional: whipped cream (my cousin swears by the kind in a can, but make it yourself if you’re feeling genuine)
Let’s Make This (No Need to Stand on Ceremony)
- Preheat your oven to 350°F (around 180°C). Roll out your pie crust and pop it into a 9-inch pie plate. If it looks a little craggy, just call it rustic—no one will care once they taste it.
- In a medium bowl, whisk together the sugar and eggs until everything is smooth. It’s okay if your arm gets tired; take a break for a second, poke at your phone, then get back to it.
- Add the lemon juice and zest, mixing it in. I usually sneak a taste right here (quality control, right?).
- Whisk in the melted butter, flour, and salt until the mix is shiny and flecked with zest. Don’t panic if there are a few stubborn bits of flour—they’ll sort themselves out in the oven.
- Pour the filling into your pie crust, scraping down the sides so you get every optimistic drop. Give the dish a gentle shake so the filling spreads evenly.
- Bake for 30-35 minutes, or until the center is almost set—give it a wiggle and if it’s just a little jiggly (like a chubby baby’s cheek), you’re good. If it starts to brown too quickly, toss some foil on top. This is where I overbaked it once—don’t do that. The top shouldn’t be dark.
- Cool on a rack. (Or don’t, if patience isn’t your strong suit, but it does cut cleaner if you wait about 2 hours.)
- Top generously with whipped cream before serving, or skip it if you want pure lemon bliss.


A Few Honest Notes from My Kitchen
- If your pie cracks a little on top, just pile on the whipped cream and call it a day. Nobody’s ever complained.
- I sometimes add a spoonful of vanilla for a more mellow vibe—try it if you’re feeling wild.
- Actually, I find it works better if you use freshly squeezed lemon juice, but bottled will work in a pinch. Pie is forgiving.
Variations I’ve Dared to Try (Plus That One Mistake)
- Once swapped in limes instead of lemons. Tastes real nice, just a bit tarter.
- A neighbor tried it with a graham cracker crust. I honestly prefer regular, but, hey, to each their own.
- I foolishly thought coconut flakes would be a good idea. It wasn’t. They burned and made the whole house smell weird for two days.


What You’ll Need to Get the Job Done (Or Not)
- Standard pie plate
- Zester or the small holes on a cheese grater (a fork does not work, in case you wondered)
- Mixing bowls and a whisk (I’ve used a fork in a pinch—just whisk a bit harder)
- Oven (unless you want to eat raw batter, which, you know, don’t)
Storage: Don’t Blink or It’ll Be Gone
Technically, you can store this beauty in the fridge for up to three days, well wrapped. But honestly, in my house it never lasts more than a day—although pie for breakfast is a perfectly reasonable life choice if you ask me.
How We Serve It (Yes, There’s a Ritual)
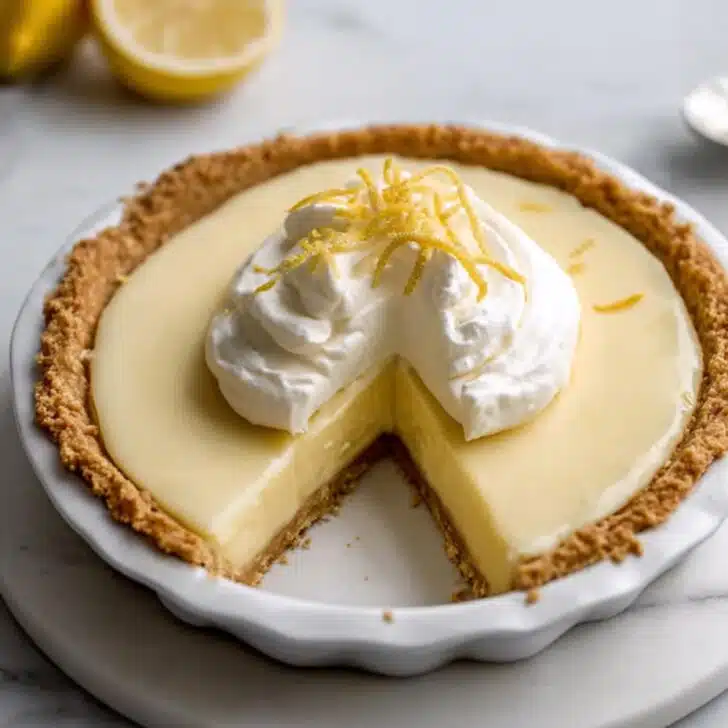
Usually, I slice generous wedges and plop them on whatever plates I grab first. Sometimes with extra lemon zest sprinkled over the whipped cream if I want to impress guests. And okay, sometimes we eat it straight from the pan with spoons after everyone’s left.
Little Lessons Learned (a.k.a. Don’t Be Like Me)
- Don’t try to rush chilling. I once cut in too early and everything sort of puddled all over. Now I just stare at it longingly while it sets.
- My best pies come when I actually measure the flour instead of eyeballing it. Go figure.
FAQ: Bet You’ve Wondered About These
Can I use bottled lemon juice?
Yep, you can—sometimes I do if I’m feeling lazy. It’s a touch different (less bright, maybe?), but still good and mighty convenient.
Do I need to pre-bake the pie crust?
I don’t always—if you want it a bit crisper, blind bake it for about 8 minutes. But usually I skip this. Life’s too short.
Is this pie super tart or more sweet?
Kinda depends on the lemons (and my mood). Mostly it’s nice and bright with plenty of sweetness—though I do sometimes add extra zest for more zing.
Can I freeze it?
Technically, yes, but in all honesty the texture changes a bit. I’d say just eat it fresh—no one’s ever complained about leftovers.
What’s the best way to zest a lemon?
Oh, now, here’s a trick: don’t go digging into the white pith, just scrape the very surface. Or, frankly, sometimes I skip the zest and add a splash more juice—easier when life gets hectic!
And if you get to the end of the recipe and realize you forgot to buy whipped cream, don’t fret—ice cream works too. Or just eat it straight. I won’t tell.
Ingredients
- 1 prepared 9-inch pie crust (store-bought is fine, but hush, don’t tell my grandmother)
- 1 ¼ cups granulated sugar (sometimes I use a little less if the lemons are extra sweet, but Granny’d call that a crime)
- 3 large eggs (room temp, or whatever, I forget half the time and it still works out)
- ⅓ cup fresh lemon juice (about 2-3 lemons, depending if they’re stubby or the size of softballs)
- 1 tablespoon finely grated lemon zest (you can skip this but the flavor’s brighter—just avoid the bitter white pith!)
- ¼ cup unsalted butter, melted (I’ve used salted butter in a pinch—just skip the pinch of salt in that case)
- 2 tablespoons all-purpose flour (or, truth be told, I’ve even subbed in cornstarch when I ran out, worked fine)
- Pinch of salt
- Optional: whipped cream (my cousin swears by the kind in a can, but make it yourself if you’re feeling genuine)
Instructions
-
1Preheat your oven to 350°F (around 180°C). Roll out your pie crust and pop it into a 9-inch pie plate. If it looks a little craggy, just call it rustic—no one will care once they taste it.
-
2In a medium bowl, whisk together the sugar and eggs until everything is smooth. It’s okay if your arm gets tired; take a break for a second, poke at your phone, then get back to it.
-
3Add the lemon juice and zest, mixing it in. I usually sneak a taste right here (quality control, right?).
-
4Whisk in the melted butter, flour, and salt until the mix is shiny and flecked with zest. Don’t panic if there are a few stubborn bits of flour—they’ll sort themselves out in the oven.
-
5Pour the filling into your pie crust, scraping down the sides so you get every optimistic drop. Give the dish a gentle shake so the filling spreads evenly.
-
6Bake for 30-35 minutes, or until the center is almost set—give it a wiggle and if it’s just a little jiggly (like a chubby baby’s cheek), you’re good. If it starts to brown too quickly, toss some foil on top. This is where I overbaked it once—don’t do that. The top shouldn’t be dark.
-
7Cool on a rack. (Or don’t, if patience isn’t your strong suit, but it does cut cleaner if you wait about 2 hours.)
-
8Top generously with whipped cream before serving, or skip it if you want pure lemon bliss.
Approximate Information for One Serving
Nutrition Disclaimers
Number of total servings shown is approximate. Actual number of servings will depend on your preferred portion sizes.
Nutritional values shown are general guidelines and reflect information for 1 serving using the ingredients listed, not including any optional ingredients. Actual macros may vary slightly depending on specific brands and types of ingredients used.
To determine the weight of one serving, prepare the recipe as instructed. Weigh the finished recipe, then divide the weight of the finished recipe (not including the weight of the container the food is in) by the desired number of servings. Result will be the weight of one serving.
Did you make this recipe?
Please consider Pinning it!