
If You're Craving a Breakfast Hug, Start Here
Sometimes you just wake up on a Sunday (or, actually, a Tuesday, who are we kidding?) and nothing but a warm, fluffy, slightly decadent biscuit will do. The first time I made these Breakfast Butter Swim Biscuits, I'd just moved to this tiny city flat with the world's most suspicious oven and thought, "Alright, let's see if you can mess this up for me." Spoiler: The oven lost. These are embarrassingly simple—like, the kind of recipe you make while half awake, hair sticking up like a cartoon character, and you still look like some sort of breakfast champion. My sister jokes that I'm 'allergic' to fussy baking, which... fair enough! Anyway, every time I make these, the smell alone pulls my partner out of bed, which is saying something because he's the definition of a night owl.
Why You'll Love This (No, Seriously)
I make this when it's chilly out and I'm feeling a bit blah, or when friends crash last-minute (after a night out, so you know something greasy and comforting is essential). My family? Gone in a flash. We basically start fighting over the crispy corners before anyone even sits down—my niece once called dibs while brushing her teeth, for crying out loud. Plus, they're the antidote to dishes that use every bowl in the house. (I used to dread recipes with 1,000 steps and a sinkful of utensils. Never again, mate!) If you're after something fussy or low-fat, move along. But if you want buttery, biscuit-y magic, stay.
What You'll Need (and a Few Cheeky Swaps)
- 2 ½ cups all-purpose flour (Sometimes I sub in ½ cup of whole wheat for a nuttier thing. Don't ask my kids though—they don't love it!)
- 2 tablespoons white sugar (Granulated, but honestly, raw sugar works. Just not brown. Too molasses-y.)
- 1 tablespoon baking powder (My gran always insisted on Clabber Girl, but store brand works too. I can't taste the difference, personally.)
- 1 teaspoon salt (I've even used flaky sea salt once—wouldn't repeat it. Just use table salt.)
- 2 cups whole milk (When I'm being virtuous—rarely—I go half and half with 2%.)
- ½ cup unsalted butter (that's a stick, by the way), melted. Salted is okay too, just ease up a bit on the salt earlier, or don't and live dangerously!
How I Actually Make These (No Judgement Please)
- Preheat your oven to 450°F. I always mean to get the oven mitt out before starting, but inevitably don't. So, fair warning.
- Pour the melted butter all over the bottom (and sides, maybe, if you like drama) of an 8x8 inch baking dish. I usually just jam the whole stick in a glass bowl and nuke it 'til melted. Wash the spoon later.
- In a bowl, mix the flour, sugar, baking powder, and salt. A fork works for me, but use a whisk if you like to live fancy. Don’t fuss about sifting unless you’re baking for royalty.
- Pour in the milk. Stir gently until just barely combined—it’ll look lumpy and weird, and this is where I always second guess myself. Fight the urge to overmix or your biscuits will be tough as old boots.
- Spoon (or plop, let’s be honest) the dough into the buttery dish. Swirl it around a bit so the butter kinda floats up and over. It’ll look like a swamp; it’s fine, truly!
- Take a butter knife and score the top into squares—so you’ve got a fighting chance at tidy pieces later. I usually don’t bother to be exact, but go wild if that’s your jam.
- Bake for 22-25 minutes, or until the top is nicely golden. My oven likes to go rogue, so I start checking at 20ish minutes. If the whole kitchen smells like a croissant exploded, you’re good.
- Let ‘em sit for a minute or two. Otherwise, you will regret trying to grab a piece (ask my fingertips).
Some Things I've Learned the Hard Way
- If you overmix, they get heavy—just embrace the lumps.
- Browning happens kinda fast at the edges. One time I got distracted texting my mate and…let’s just say the birds had a feast that morning.
- If your butter looks like it’s separating, don’t panic. It forms this outrageously crispy layer at the bottom. Silver linings, right?
- I tried almond milk once and, eh, not a fan. Might work for others though.
If You Like to Tinker: Variations That (Mostly) Worked
- Cheesy – Stir in a big handful of sharp cheddar before baking. Absolute heaven.
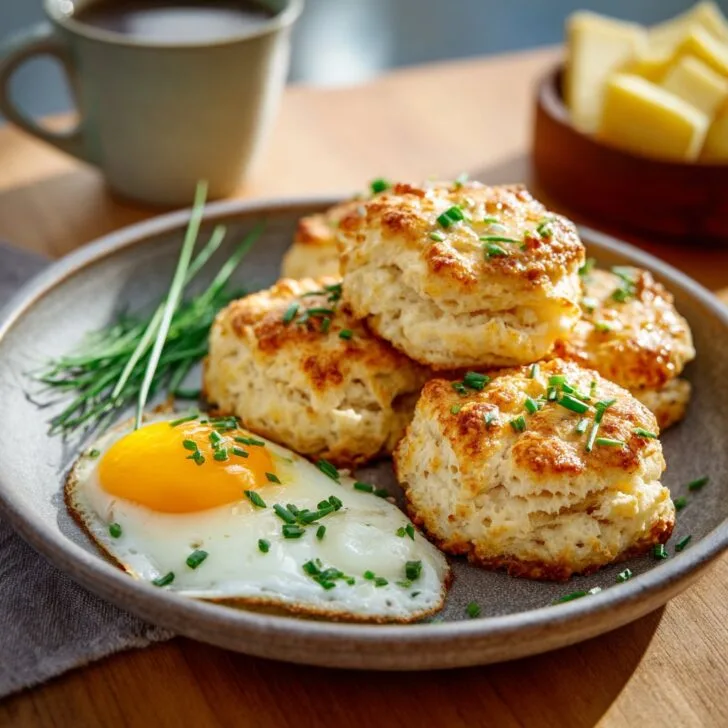
- Herby – Chopped chives or a bit of dried rosemary: lovely. But thyme overpowers, in my opinion.
- Sweet – Sprinkle cinnamon sugar over the top before baking. Actually tastes better the next day, which surprised me.
- Once, I tried adding blueberries. Wouldn’t do that again. They just sort of melted into a weird, sad puddle.
Basic Kit, With Workarounds
- An 8x8 baking dish (If you’ve only got a 9-inch round pan, just use that. The edges will get a little extra-crispy, which I sort of love.)
- A mixing bowl (Salad bowl, soup pot—anything will do in a pinch. I once used a Dutch oven.)
- Basting brush. Or, just sling the butter in with a spoon. No one’s watching.


Will They Keep? (lol, probably not)
Officially, just pop any leftovers in a sealed container in the fridge. Microwave for 10-20 seconds to revive. Though honestly, in my house, it never lasts more than a day. One time I found a single, sad square left the next morning, and even the dog looked disappointed.
How I Serve 'Em (and Some Quirks)
If it’s just me, I slather on more butter and drizzle with honey. My sister goes for raspberry jam. Occasionally, we do a build-your-own breakfast sandwich bar—egg, cheddar, bacon, the works. Makes even Monday feel hopeful. You could get all fancy and pair it with this easy sausage gravy (if you want next-level comfort, highly recommend this). Oh, and for brunch crowds, I’ll put out extra jam jars—usually one’s gone missing by the end. Never fails.
Learned These Pro Tips (the Real Way… by messing up)
- Once I tried to cut them immediately—total disaster. Let them hang out for 3-5 minutes first or they will collapse, trust me.
- Softened butter for greasing, not cold—that was a slippery mistake. Kitchen floor was not impressed.
- Don't skip preheating the oven. I got lazy once and they started out gluey.
FAQ (People Actually Ask Me These!)
- Can I use self-rising flour? Yep! Just skip the baking powder and salt. I did this once out of pure laziness—it works a charm.
- Will it freeze? I'd say maybe, but in my house, they never last long enough to try. But if you do, let me know, yeah?
- Can I double the recipe? Oh, for sure. Use a 9x13 pan and add just a few minutes to the bake time—start checking at 25 min.
- What if I only have salted butter? Go wild! Actually, sometimes I like it better that way. Just ease off on the extra salt.
- How do I know they’re actually done? Golden top, slightly pulling from edges, and that addictive buttery smell. If you poke the middle and it springs back, you’re solid.
- Any good biscuit-y side dishes? For a proper Southern breakfast vibe, pair with soft scrambled eggs. Or just dunk ‘em in soup, like my gran did (even for breakfast, which…questionable, but tasty).
That’s it—Breakfast Butter Swim Biscuits, my go-to for lazy days and rescue remedy for stressful ones. If you give them a whirl, let me know. Or just send a biscuit. Either works for me!


Ingredients
- 2 ½ cups all-purpose flour
- 1 tablespoon baking powder
- 1 tablespoon granulated sugar
- 1 ½ teaspoons salt
- 2 cups buttermilk
- ½ cup unsalted butter (melted)
- 2 tablespoons unsalted butter (for greasing)
- Nonstick cooking spray (optional)
Instructions
-
1Preheat the oven to 450°F (230°C). Grease an 8x8-inch baking dish with 2 tablespoons of butter or nonstick cooking spray.
-
2In a large bowl, whisk together the flour, baking powder, sugar, and salt.
-
3Pour the buttermilk into the dry ingredients and stir until combined. Do not overmix; the dough will be sticky.
-
4Pour the melted butter into the greased baking dish. Gently drop the biscuit dough evenly over the melted butter and spread it to fill the dish.
-
5Use a knife to score the dough into 8 squares. Bake for 20-25 minutes, or until the tops are golden and the butter is bubbling around the edges.
-
6Let cool slightly before serving. Enjoy warm for breakfast.
Approximate Information for One Serving
Nutrition Disclaimers
Number of total servings shown is approximate. Actual number of servings will depend on your preferred portion sizes.
Nutritional values shown are general guidelines and reflect information for 1 serving using the ingredients listed, not including any optional ingredients. Actual macros may vary slightly depending on specific brands and types of ingredients used.
To determine the weight of one serving, prepare the recipe as instructed. Weigh the finished recipe, then divide the weight of the finished recipe (not including the weight of the container the food is in) by the desired number of servings. Result will be the weight of one serving.
Did you make this recipe?
Please consider Pinning it!!