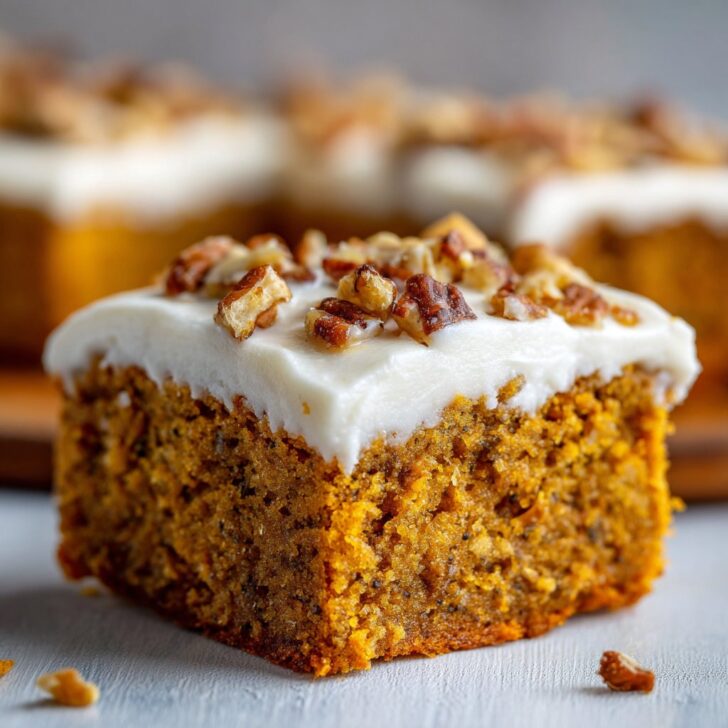
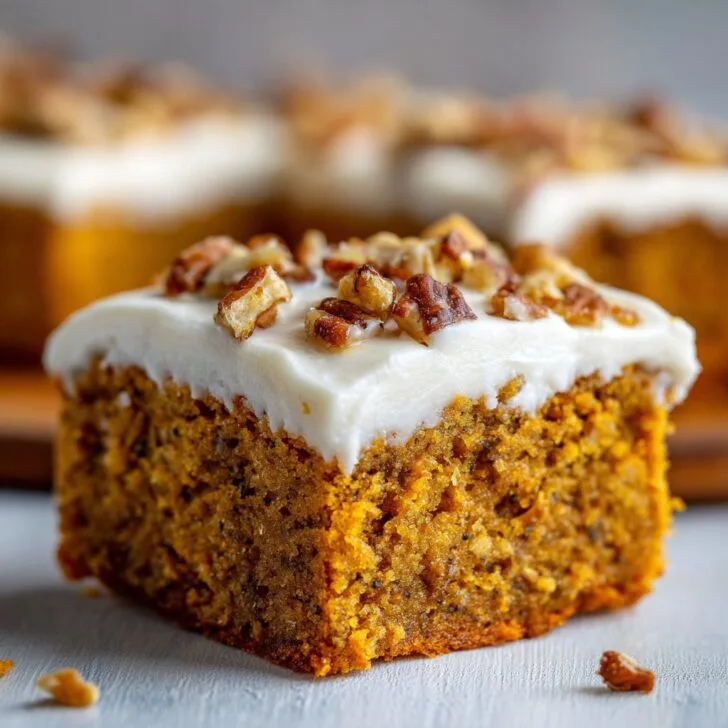
Let Me Tell You About These Pumpkin Bars
Okay, story time—so last October, when the leaves were doing their whole crunchy, golden carpet thing and I was feeling a bit restless, I decided to bake something that actually tastes like autumn. I’m talking about these pumpkin bars with cream cheese frosting, which, by the way, saved my sanity during a family reunion where everyone was arguing over whether to watch football or a rom-com. (Spoiler: the bars, not the TV, won them over.) I don’t make these just for special occasions, either. Honestly, they’re the kitchen equivalent of pulling on a soft jumper when it’s chilly. Plus, who can resist that cream cheese frosting? Not me. Not ever.
Why You'll Love This (Seriously, You Will)
I make this when I need a break from the same-old apple pie, or when my kid brings home a pumpkin from school and expects me to do something, you know, magical with it. My family goes a bit bonkers for these, especially because the bars are super-moist and not too fussy. My partner says it’s like eating pumpkin pie you can pick up (which probably says more about their eating habits than the recipe itself, but still). Oh, and you don’t need a fancy mixer or anything. I get a little annoyed when a recipe wants three bowls and a separate trip to the shop for obscure ingredients—I mean, come on. This one? Nope, just the basics. The one thing I used to mess up was overbaking (guilty), but as long as you keep an eye out, you’re golden.
What You'll Need (Plus My Swaps and Shortcuts)
- 1 ⅔ cups (about 400ml) pumpkin puree (I admit, I use canned most times; if I’m feeling cheffy, I’ll roast and mash a real pumpkin. Both work fine.)
- 1 cup granulated sugar (Sometimes I use light brown sugar for a bit of caramel flavor. My grandmother always insisted on pure cane sugar, but honestly, any sugar is fine.)
- ½ cup neutral oil (like canola or sunflower; olive oil if you’re desperate, but the flavor can kind of crash the party)
- 2 large eggs
- 1 cup all-purpose flour (Gluten-free blend works if you need it. We tried that once for my cousin’s girlfriend—still tasty!)
- 1 teaspoon baking powder
- ½ teaspoon baking soda
- 2 teaspoon pumpkin pie spice (If you’re in the UK and can’t find this, just use 1 teaspoon cinnamon, ½ teaspoon ginger, a pinch each of nutmeg and cloves. It’s close enough.)
- ¼ teaspoon salt
- For the frosting:
- 225g (8oz) cream cheese, softened (Philly or supermarket own brand, honestly can’t tell the difference)
- ¼ cup (60g) unsalted butter, softened
- 1 ½ cups (180g) icing sugar (plus a bit more if you like it sweeter—sometimes I do, sometimes I don’t)
- 1 teaspoon vanilla extract
How to Make These Pumpkin Bars (Don’t Stress, It’s Easy)
- Preheat your oven to 350°F (about 180°C); line a 9x13 inch baking tin with parchment. Or just butter it if you’re out of parchment—no biggie.
- Grab a big bowl. Dump in the pumpkin puree, sugar, oil, and eggs. Whisk until smooth-ish. (This is where I usually sneak a taste. Judge me if you must.)
- In another bowl, toss together the flour, baking powder, baking soda, pumpkin pie spice, and salt.
- Pour the dry stuff into the wet stuff. Stir gently—don’t over-mix, or your bars might get a bit tough. If the batter looks a little lumpy, it’s fine. (Mine often does, and they turn out great.)
- Spread the batter in your tin; it’ll look thinner than you expect, but it puffs up. Pop in the oven and bake for 23-28 minutes, until a toothpick comes out clean. (Though sometimes I get lazy and just poke with a fork. Works.)
- Let cool completely before frosting. I tried to rush once—big mistake, melted frosting everywhere.
- For the frosting: Beat the cream cheese and butter with a spoon, hand mixer, or even a fork if you’re determined. Add icing sugar and vanilla, beat until fluffy. Taste test is required (obviously).
- Slather icing over the cooled bars. Slice into squares or rectangles or, if you’re my son, uneven blobs. All good.
A Few Notes (Or, What I Learned the Hard Way)
- If you use fresh pumpkin, roast it long enough so it’s not watery. I once didn’t, and the bars were sort of…slippery. Not ideal.
- Don’t skip the salt in the frosting. I forgot once—tasted kind of flat (but still edible, let’s be honest).
- And yes, you can halve the recipe and use an 8-inch square dish, but you’ll need to watch the bake time. I always forget and end up with a slightly crunchy edge, which I secretly love.
How I’ve Tweaked It (The Good, the Bad, and the Yikes)
- I tried swapping in half whole wheat flour once, and it was okay—sort of heartier. Not my favorite, but if you’re feeling virtuous, go for it.
- Adding chocolate chips was surprisingly great (I was skeptical, turned out decent enough for a repeat performance).
- Once I put orange zest in the frosting. Eh, not my best idea. It just overpowered everything. Live and learn, right?
What You Need (But You Can Improvise)
- 9x13 inch tin (no worries if you’ve only got a round pan; bake a bit longer and cut creatively)
- Mixing bowls—just two. I’ve used salad bowls in a pinch. No one knew.
- Whisk or wooden spoon (I’ve even used a potato masher. It worked!)


How to Store (But Good Luck Having Leftovers)
Technically, you can keep these in an airtight box in the fridge for three days. In my house, though, there’s never anything left after about 18 hours. If you do end up with leftovers, the flavors kind of mingle and mellow (I actually think this tastes better the next day, but don’t quote me on that). You can freeze the bars (without frosting) for a month, just thaw and frost later.
How I Serve These (And You Can, Too)
Honestly, just cut into bars, put on a plate, and let everyone dig in. Sometimes I add a sprinkle of cinnamon or a handful of roasted pepitas on top if I’m feeling fancy. My cousin loves them with coffee—me, I’ll take a cuppa tea and a quiet corner. Once, for a Halloween party, I stuck little candy eyes on each square. The kids were delighted. Adults, less so. Oh, I almost forgot: these go brilliantly with a scoop of vanilla ice cream (I found that tip on Sally’s Baking Addiction—worth a look if you love pumpkin treats).
Pro Tips (Stuff I’ve Messed Up So You Don’t Have To)
- Don’t try to frost while bars are warm. I once did this in a rush and had a puddle instead of icing. Never again.
- If you bake right up to the time limit and take them out, let them sit for at least 10 minutes in the tin before moving. Otherwise, they crack (not the end of the world, but you’ll know).
- Using low-fat cream cheese is fine, but your frosting won’t hold its shape as well. Tastes good though, so swings and roundabouts.
FAQ (Real Questions, Real Answers)
- Can I use homemade pumpkin puree? Yep! Just make sure it’s nice and thick; otherwise, you’ll get soggy bars. Actually, I find it works better if you roast the pumpkin first to dry it out.
- Do these need to be refrigerated? Technically, yes—because of the cream cheese. But they’ll be okay on the counter for a few hours if it’s not too hot.
- What if I don’t have pumpkin pie spice? Just use cinnamon and a pinch of whatever warm spices you’ve got. Nutmeg, ginger, allspice—even five spice works in a pinch, though that’s a bit wild!
- Can I make these ahead? Sure thing. I actually think they’re even better the next day; just keep the frosting in the fridge and slather it on right before serving.
- Are these cake or bars? Funny one! They’re sort of both—dense and moist like cake, but you can pick them up. Call them whatever you want (as long as you invite me round).
Random side note: while I was testing this recipe, my cat managed to swipe a bit of frosting, so I can confirm it’s apparently irresistible to pets, too. Not recommended, though—cream cheese plus cats equals chaos.
If you’re looking for more pumpkin ideas, this pumpkin bread from King Arthur Baking is also a winner (not sponsored, just genuinely good).


Ingredients
- 1 ¾ cups all-purpose flour
- 1 cup granulated sugar
- ½ cup vegetable oil
- 2 large eggs
- 1 cup canned pumpkin puree
- 1 teaspoon baking soda
- 1 teaspoon ground cinnamon
- ½ teaspoon salt
- 4 ounces cream cheese, softened
- ¼ cup unsalted butter, softened
- 1 cup powdered sugar
- ½ teaspoon vanilla extract
Instructions
-
1Preheat the oven to 350°F (175°C). Grease a 9x13-inch baking pan.
-
2In a large bowl, whisk together flour, sugar, baking soda, cinnamon, and salt.
-
3Add eggs, pumpkin puree, and vegetable oil to the dry ingredients. Mix until well combined and smooth.
-
4Pour the batter into the prepared pan and spread evenly. Bake for 30 minutes or until a toothpick inserted in the center comes out clean. Let cool completely.
-
5For the frosting, beat together cream cheese, butter, powdered sugar, and vanilla extract until creamy and smooth.
-
6Spread the cream cheese frosting over the cooled pumpkin bars. Cut into squares and serve.
Approximate Information for One Serving
Nutrition Disclaimers
Number of total servings shown is approximate. Actual number of servings will depend on your preferred portion sizes.
Nutritional values shown are general guidelines and reflect information for 1 serving using the ingredients listed, not including any optional ingredients. Actual macros may vary slightly depending on specific brands and types of ingredients used.
To determine the weight of one serving, prepare the recipe as instructed. Weigh the finished recipe, then divide the weight of the finished recipe (not including the weight of the container the food is in) by the desired number of servings. Result will be the weight of one serving.
Did you make this recipe?
Please consider Pinning it!!