
This Pecan Pie Bars Recipe Always Brings a Crowd
So, I have to tell you upfront—Pecan Pie Bars are kind of my secret party weapon. For years, I was the person who'd show up to family get-togethers with something half-burnt or mysteriously undercooked (I still swear the oven was lying that time). But these bars? Even my Uncle Joe, who's usually suspicious of anything that isn't straight up pie, once ate three in a row and asked if there were more. If that doesn't sell it, nothing will.
Actually, I think part of my obsession with these comes form my mom. She made pecan pie every year, but I always liked more crust and less filling. Taking her recipe, turning it into bars with just the right crust-to-gooey-stuff ratio, and then eating them before she'd notice...that's my kind of nostalgia. And, okay, sometimes I make them just so I have an excuse to buy that big bag of pecans at the shop.
Why You'll Love These (Trust Me, I Make These When...)
- I honestly break this out whenever I need to win over a tough crowd. Also: it's less stressy than making an actual pie. Much less pastry anxiety!
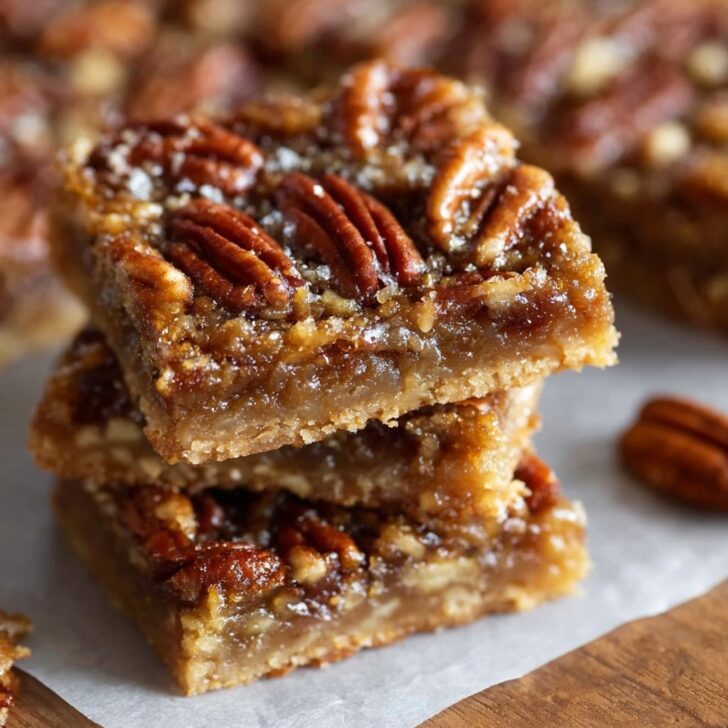
- My family goes a bit bonkers for these because they're easier to eat with your hands—and the edges always get that perfectly chewy thing going on (the middle ones are gooier; choose wisely).
- If you can't get pecans, walnuts work in a pinch. One time I even used a mix of random "baking nuts"—not my finest hour, but everyone still inhaled them.
- For folks who hate the fiddly bits of pie crust, this shortbread-style base is a breeze. No rolling pins, no drama, just squish it in and crack on.
- (Personal confession: I've tried making them "healthier"...but honestly, you're better off just enjoying them as they are!)
What You’ll Need (And What I Swapped Once or Twice)
- For the crust:
- 2 cups (250g) plain flour (sometimes I use the self-raising version just because I grabbed it by mistake — no big disaster so far)
- ½ cup (110g) granulated sugar (my gran always used caster sugar, but any old sugar works fine honestly)
- 1 cup (225g) unsalted butter, cold and cubed (salted works if that's what you've got, maybe skip the pinch of salt then)
- Pinch of salt
- For the filling:
- 3 large eggs
- 1 cup (200g) brown sugar (light or dark—I usually do a mix because consistency is for robots)
- ⅔ cup (200g) golden syrup or light corn syrup (I've tried honey, but it gets weirdly chewy. Maple syrup? Pretty good, just go easy on it or it's a sugar hammer.)
- ½ cup (115g) unsalted butter, melted and cooled slightly
- 2 cups (about 200g) pecans, roughly chopped (or, as mentioned, walnuts if you've run out of pecans—just don't tell anyone from Texas!)
- 1 teaspoon vanilla extract
- Optional: pinch of cinnamon or nutmeg (my mum liked cinnamon, but it's not everyone's cuppa tea)
How To Make 'Em (No Stress, I Promise)
- Set up your tin: Line a 9x13 inch (23x33cm) baking dish with parchment. Actually, you can just butter it if you're out of parchment—I've done both, one cleans up easier.
- Make the base: Chuck the flour, sugar, and salt in a bowl. Add those cold butter cubes. Now, you can use a pastry blender or just rub it in with your fingers—if it's hot in the kitchen, I put the bowl in the fridge halfway through so the butter stays cold. Mix till you get crumbly bits, kind of like breadcrumbs but chunkier. Press that into the tin—firm, but don’t pack too much. My kid likes to help with this bit (usually means more crust ends up on the floor, ha!).
- Bake the crust: Pop in a 350°F (175°C) oven for 20ish minutes. You want it pale gold, not brown. Don’t wander off and get too distracted—it happens!
- Meanwhile, filling time: In a big bowl, whisk the eggs until just blended (over-beating = weird texture). Stir in brown sugar and syrup until more or less smooth (this is where I steal a spoonful – don't judge).
- Add in the melted (but not hot) butter, vanilla, and if you’re using, cinnamon or nutmeg. Last, fold in those pecans (or walnuts, or random “nut bits”).
- When the crust is ready: Give it a sec out of the oven; pour filling over while it's warm but not piping. If you pour when it's ice-cold, sometimes the filling doesn’t sink in properly.
- Bake again: Slide it back in for 25-30 minutes. If it jiggles slightly in the center but doesn’t slosh around, you’re good. (Don't worry if the top cracks a little; that’s character!)
- Cool fully before cutting. Actually, I find it works better if you chill them a bit—makes nice, tidy squares (unless you don’t care, then just go at it with a knife about an hour after baking).
Stuff I’ve Learned (So You Don’t Have To)
- If you use too much golden syrup, everything goes syrup swamp (been there, cleaned that up).
- Letting it cool all the way really does help—warm slicing = sticky disaster.
- Weirdly, if you use a mix of white and brown sugar, the bars get this nice lighter flavor. On second thought, just use what’s in the cupboard and see what you like.
Variations I’ve Tried (and One Dud)
- Threw in some chocolate chips once—family loved that one! Makes it a bit like a cross between pecan pie and brownies. Dangerous combo.
- Replaced half the pecans with chopped dried cranberries for a festive spin. Cool idea, though my brother complained it was "too healthy." (He’s not wrong?)
- Used honey instead of syrup out of desperation—not recommended unless you like tooth-tugging bars. I mean, maybe you're braver than me?
What You’ll Need (But Don’t Sweat If You Don’t Have…)
- Baking dish—9x13 inches. If you’ve only got an 8x8, just cut the batch down a bit (or embrace extra-thick bars, which is what I do!)
- Parchment paper is handy, but I’ve MacGyvered it with foil or… honestly, just a bit of extra butter. Whatever works.
- A whisk and a strong arm—stand mixers are fancy, but honestly I never bother. Fingers do for the crust.


Stashing The Leftovers (Not That There Are Many)
Pop 'em in an airtight container, and they’ll stay fresh for 3-4 days. If you’ve got fridge space and the weather’s muggy, that works too. Best bit: they freeze pretty well—just layer parchment so they don’t glue together. Though honestly, in my house, it never lasts more than a day. No joke.
The Only Way To Eat Them (Or, How We Serve ’Em)
You can fancy things up with a scoop of vanilla ice cream or a dollop of whipped cream (my cousin calls that the “pie à la mode move,” which cracks me up). But most times, we just eat them cold from the tin, sometimes while standing in front of the open fridge—it’s tradition now. Come Christmastime, they land on the snack table with literally everything else. Maybe next to a plate of chocolate cranberry cookies if I’m feeling ambitious.
Mishaps & Pro Tips, Straight From My Messy Kitchen
- I once tried rushing the cooling—bad move; bars turned to sweet soup. Patience, grasshopper.
- If it looks a bit wobbly when you pull it out, don’t panic! It’ll set as it cools (unless it’s still sloshing, then give it a few more minutes).
- Cutting with a hot, clean knife = neater squares. Cold butter for the crust really does make a difference, but I’ve gotten away with slightly melty in a pinch.
Some FAQs I’ve Actually Been Asked
- Can I make these gluten free? Yeah, just sub in any decent GF flour blend. I’ve got pals who swear by this guide for gluten-free swaps if you need notes.
- Do I have to use golden syrup? Nah—light corn syrup is standard in the States, but if you’ve only got maple, that’s fine; just expect a maple-y punch. Don’t try straight molasses unless you like your bars a bit bitter. (Trust me!)
- Help! My crust came out crumbly! Happened to me—the trick is to really pack it in. If it’s still falling apart, maybe a tablespoon more butter next time. Or, just act like you meant it “rustic.”
- Can I use pecan halves instead of chopping? Sure! The texture’s chunkier and looks fancier—though in my house, it’s just as likely to end up a glorious mess anyway.
- How do I bring these to a party? Honestly? I whack the cooled slab onto a wooden cutting board, score it at the last second, and try to make it out the door before the family spots me. I mean, you can box them up, but what’s the fun in that?
And if you need another bar recipe for the pile, I’m a big fan of these lemon bars from King Arthur Baking. Not pecan, but nice if you want something brighter!
Right, I think that about covers it. If you try 'em, let me know how you go—or just send me one, because my kitchen's always open for more taste tests. Cheers!


Ingredients
- 1 cup unsalted butter, softened
- 2 cups all-purpose flour
- ½ cup granulated sugar
- ¼ teaspoon salt
- 1 ½ cups chopped pecans
- 3 large eggs
- 1 cup light corn syrup
- 1 cup light brown sugar, packed
- 2 teaspoons vanilla extract
Instructions
-
1Preheat the oven to 350°F (175°C). Line a 9x13-inch baking pan with parchment paper and lightly grease.
-
2In a medium bowl, mix together softened butter, flour, granulated sugar, and salt until a crumbly dough forms. Press the dough evenly into the bottom of the prepared pan.
-
3Bake the crust for 18-20 minutes, or until lightly golden. While the crust is baking, prepare the pecan filling.
-
4In a large bowl, whisk together eggs, corn syrup, brown sugar, and vanilla extract until well combined. Stir in the chopped pecans.
-
5Pour the pecan mixture evenly over the pre-baked crust. Return the pan to the oven and bake for 20-22 minutes, or until the filling is set and golden.
-
6Allow the bars to cool completely in the pan before lifting out and slicing into squares.
Approximate Information for One Serving
Nutrition Disclaimers
Number of total servings shown is approximate. Actual number of servings will depend on your preferred portion sizes.
Nutritional values shown are general guidelines and reflect information for 1 serving using the ingredients listed, not including any optional ingredients. Actual macros may vary slightly depending on specific brands and types of ingredients used.
To determine the weight of one serving, prepare the recipe as instructed. Weigh the finished recipe, then divide the weight of the finished recipe (not including the weight of the container the food is in) by the desired number of servings. Result will be the weight of one serving.
Did you make this recipe?
Please consider Pinning it!!