
Let Me Tell You About These Maple Brown Sugar Cookies…
Oh hey, friend! So, let me just start by saying these maple brown sugar cookies are basically the reason my kitchen smells like fall for half the year. I remember the first time I made them — it was one of those dreary November afternoons; my neighbor popped over when the cookies were cooling and swiped two "just for the road" (she's one of those polite but shameless cookie thieves). The recipe has evolved — with a few wandering detours and a little bit of me just winging it sometimes. Frankly, the real memory is the sugar stuck to my fingers… and the time I dropped an egg mid-mix, but that's another story. Anyway, let’s get into it before I get too sidetracked.
Why I Keep Making These
I make these when the world feels grey and I need some comfort food that practically hugs you back (is it okay if I say cookies give hugs? Because they kind of do). My family goes absolutely nuts for them, especially when I make a double batch — actually, sometimes I end up regretting making a double batch because, somehow, they're all gone faster? Oh, and when the house is freezing cold, these cookies warm up the place (and my soul). The only problem is, sometimes the dough looks kind of funny halfway through, and I used to freak out, but I've learned that a little cookie weirdness is part of the charm.
What You'll Need (with Suggestions, Because Life)
- 1 cup (225g) unsalted butter, softened — but honestly, I sometimes use salted and just dial back the salt later. Grandma swore by Kerry Gold, but store-brand works in a pinch (promise).
- 1 ½ cups packed light brown sugar — dark brown is fine if you want a deeper molasses note. I use whatever I have left over, tbh.
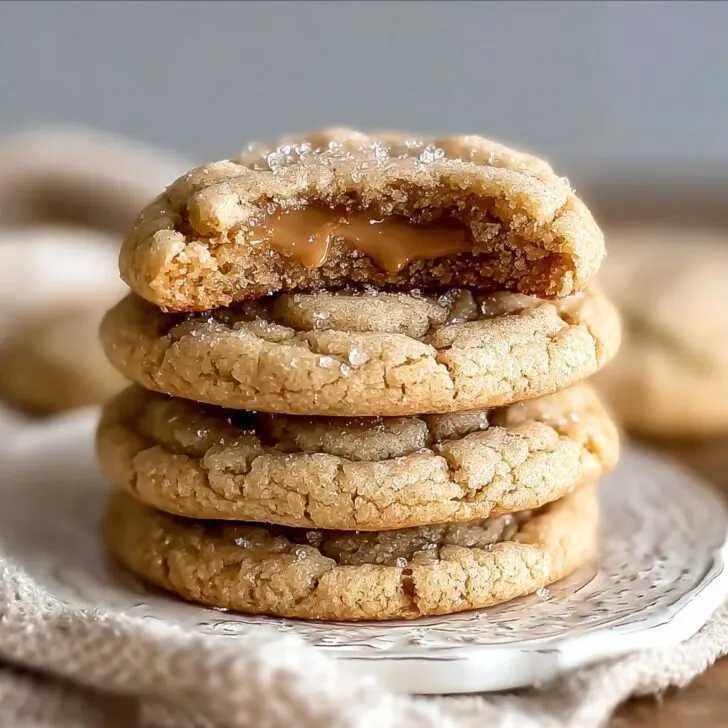
- ¼ cup pure maple syrup (don’t use pancake syrup unless you like artificial flavor; on second thought, it’s not the end of the world if that’s what you’ve got — just go light on it)
- 2 large eggs (free range if you can swing it, but I’ve used those tiny ones from the farmers’ market and it was fine)
- 2 ¾ cups (330g) all-purpose flour. Whole wheat works in an emergency, cookies just come out a bit... denser.
- 1 teaspoon baking soda
- ½ teaspoon salt (honestly, sometimes I toss in a bit extra; I like the sweet-salty hit)
- 1 teaspoon vanilla extract (I sometimes forget this but shh — no one’s noticed yet)
- Optional: ½ teaspoon cinnamon for a cozy twist; ½ cup chopped pecans or walnuts if you’re feeling wild
Directions, More or Less
- Get your oven going at 350°F (180°C). Line a baking sheet with parchment (if you forget, the cookies will mostly survive!).
- Cream the butter and brown sugar together in a big bowl. I use my old hand mixer — but if you only have a wooden spoon and some elbow grease, go for it. The mixture should get really smooth and fluffy. (This is usually when I taste it because, well, who can resist?)
- Beat in the eggs, maple syrup, and vanilla. The mixture might look a bit split at first. Don’t worry. I promise it sorts itself out when you add the flour.
- Mix together your flour, baking soda, and salt in another bowl (if you’re not into extra dirty dishes, just sprinkle them right into the wet mix. I do sometimes. No big drama).
- Gently fold flour mixture into the butter bowl — don’t beat it to death. Stir until just combined. If you’re adding cinnamon or nuts, now’s the moment!
- Drop heaping tablespoons (or a cookie scoop if you’re fancy) onto the lined tray. Don’t fuss about perfection. Leave a little space — cookies love to stretch out.
- Bake 10 to 13 minutes, until the edges go golden and the centers still look a tad soft. Yes, you can poke one and check. Or steal a hot cookie (I do — but careful, they’re like lava at this point).
- Cool on the baking sheet for a few minutes. Transfer to a rack if you have one, or just a plate (I usually just let them cool enough so I can grab them without scalding myself).
Little Notes I’ve Learned Along the Way
- The dough is sticky. It’s normal. Actually, I think the stickier, the better texture you get later. If it’s too wild, stick it in the fridge for 15 min.
- Don’t worry about perfect shapes. Mine always end up a bit lopsided. They’re homemade. Embrace the chaos.
- I thought doubling the recipe would just double my cookies. Nope; somehow it just means more disappear during the "taste test" phase.
The Variations That (Mostly) Worked
- I once swapped in honey instead of maple — good flavor, but less oomph. Wouldn’t really call it a win.
- Adding a handful of oats gave a chewier cookie, which my kids loved, but my spouse called them "confused oatmeal" cookies.
- Trying with vegan butter was fine (honestly couldn’t tell except for maybe a little less crisp edge).
Don’t Sweat the Equipment Stuff
You can use a stand mixer if you feel posh, but a bowl and a fork really work, too. No cooling rack? Just flip over the muffin tin and cool your cookies across that. I always say, where there’s a will, there’s a cookie.


How to Store These (But Will You Even Need To?)
Just chuck them in an airtight container. Supposedly they keep for 3-4 days (I read that on King Arthur Baking). But, honestly, I've never had leftovers after day one unless I sneak a few into the back of the freezer; they taste surprisingly good straight form there, too. For longer storage, freeze layers between wax paper — they defrost in about 30 minutes (if you can actually wait).
Our Favorite Ways to Serve ‘Em
Okay, you can’t go wrong with a mug of maple latte and a pile of these cookies. Sometimes I sandwich ice cream between them — a little messy, a lot of wow. Oh, and my cousin dunks 'em in coffee (controversial, but not bad). We once let the kids decorate them with a maple glaze — it was sticky chaos, but fun.
The (Non-Expert) Pro Tips
- I once tried to rush chilling the dough in the freezer — disaster; they baked like little rocks. So, fridge is better — or just work with sticky dough and accept fate.
- If you accidentally overbake, just microwave a cookie for 10 seconds with a damp paper towel. They come back to life. Magic, right?
FAQ (Real Qs from Friends & Family)
- Can I use fake maple syrup? Sure, if you must — but it’ll taste a bit, um, different. Like those hotel breakfast maple packets. Have I done it? Once. Wasn’t my finest.
- My dough was crazy sticky — what gives? Welcome to the club! Chill it for a bit, or just use slightly wet hands to scoop. Works for me.
- Can I freeze the dough? Absolutely. Roll into balls, freeze, then bake from frozen (add a min or two). Actually, sometimes they come out even puffier this way.
- Do I have to use nuts? Nope, but I do if I’m feeling fancy. Or just leave them out; tastes just as good.
- Can I halve the recipe? You could, but why would you want fewer cookies? Kidding — yes, you can. I’ve done it when low on butter (which happens a lot lately). Just watch your egg measuring — I usually whisk one and eyeball half.
Phew, if you made it this far you probably deserve a cookie (or six). If you give these a go, let me know how yours turn out — or if you have an epic fail, at least we can laugh about it together. Happy baking, friend!


Ingredients
- 2 ¼ cups all-purpose flour
- ¾ cup unsalted butter, softened
- 1 cup light brown sugar, packed
- ¼ cup pure maple syrup
- 1 large egg
- 1 teaspoon vanilla extract
- ½ teaspoon baking soda
- ¼ teaspoon salt
Instructions
-
1Preheat the oven to 350°F (175°C) and line two baking sheets with parchment paper.
-
2In a large bowl, cream together the butter and brown sugar until light and fluffy.
-
3Mix in the egg, maple syrup, and vanilla extract until well combined.
-
4In a separate bowl, whisk together the flour, baking soda, and salt. Gradually add dry ingredients to the wet mixture, mixing until just combined.
-
5Scoop tablespoon-sized balls of dough onto prepared baking sheets, spacing them about 2 inches apart.
-
6Bake for 10–12 minutes until the edges are lightly golden. Cool on the baking sheet for 5 minutes before transferring to a wire rack to cool completely.
Approximate Information for One Serving
Nutrition Disclaimers
Number of total servings shown is approximate. Actual number of servings will depend on your preferred portion sizes.
Nutritional values shown are general guidelines and reflect information for 1 serving using the ingredients listed, not including any optional ingredients. Actual macros may vary slightly depending on specific brands and types of ingredients used.
To determine the weight of one serving, prepare the recipe as instructed. Weigh the finished recipe, then divide the weight of the finished recipe (not including the weight of the container the food is in) by the desired number of servings. Result will be the weight of one serving.
Did you make this recipe?
Please consider Pinning it!!