Let Me Tell You About My Apple Cobbler (and That One Disaster)
You know how some recipes feel like a warm hug? This homemade apple cobbler is that dish for me—well, except for the one time I forgot the sugar, but we don't talk about that. My mum used to make this when the apples from our backyard tree were so ripe they practically launched themselves at you. I swear, the smell alone could make a cranky neighbor pop by 'just to say hello.' If you’ve ever wanted to win over a crowd with something that's simple, cozy, and has just the right amount of stick-to-your-bones goodness, grab a mug of tea and let's get into it. Actually, make that two mugs. This one’s a bit of a ramble (in the best way, I hope).
Why You’ll Love This (Or: Why I Keep Making It)
I pull out this apple cobbler recipe when I've got apples that are starting to look a bit dodgy, or when family is coming over and I want something that feels fancy even though it's dead simple. My family goes completely bonkers for this because the topping gets all golden and slightly crunchy on top, but stays soft where it touches the fruit—basically, it’s the best of both worlds. (And yes, sometimes I eat it straight from the baking dish. No judgment.) I used to find the peeling and slicing a pain, but I’ve learned to just stick on a podcast and get on with it. It’s honestly worth it in the end. Plus, if you mess up the topping a bit, no one will notice once there’s ice cream on top. True story.
What You’ll Need (with a Few Shortcuts)
- 6-8 apples (Granny Smith for tartness, but sometimes I use whatever’s in the fruit bowl—even pears snuck in once!)
- ⅔ cup white sugar (or brown sugar if you like it extra cozy—my gran swore by muscovado, but honestly, use what’s handy)
- 1 teaspoon cinnamon (I might add a dash more, especially on chilly days)
- ¼ teaspoon nutmeg (optional, but I love it)
- 2 tablespoon lemon juice (or just use a good glug if you’re feeling rebellious)
- 1 cup plain flour (all-purpose—sometimes I swap in half whole wheat if I’m feeling virtuous, but nobody ever notices)
- ½ cup sugar (for the topping; white or brown, no need to fuss)
- 1 ½ teaspoon baking powder
- ½ teaspoon salt
- ½ cup unsalted butter (cold, diced; I have used margarine in a pinch, but it’s not quite the same)
- ½ cup milk (whatever’s in the fridge—almond works too, believe it or not)
- Optional: a handful of chopped pecans or walnuts (I usually forget these, but they're great if you remember!)
How To Actually Make It (the Real-Life Version)
- Preheat your oven to 180°C (350°F). No, I never remember to do this first either.
- Peel, core, and slice your apples. Honestly, don’t stress if you miss a bit of peel or the slices aren’t uniform. Toss them into a big bowl.
- Add ⅔ cup sugar, cinnamon, nutmeg, and lemon juice to the apples. Stir it all around. This is where I usually sneak a slice, just to check the seasoning, obviously.
- Tip the apple mix into a baking dish (something like 8x8in, but I’ve used a roasting pan before—just don’t use anything too shallow or the juice will bubble over).
- For the topping, in another bowl, mix flour, ½ cup sugar, baking powder, and salt. Add the cold butter and rub it in with your fingertips until the mix looks like thick sand, but don’t fuss—clumps are fine.
- Pour in the milk and stir until just combined. If it looks like lumpy pancake batter, you’re on the right track. Spread (or sort of plop) this over the apples; it’s not supposed to cover every bit—those gaps let the apples bubble up and caramelize.
- If you’re using nuts, sprinkle them over now. I forget this step about half the time.
- Bake for 40-50 minutes, until the top is golden brown and maybe even a little craggy. If you get impatient and take it out early, the middle will be doughy (ask me how I know).
- Let it cool for at least 15 minutes. Or don’t—and risk burning your mouth like I do every single time.
Notes I’ve Picked Up (Mostly From Oopsies)
- Don’t skip the lemon juice, even if you’re tempted. It just brightens up the whole thing (I forgot it once and wondered why it tasted flat).
- If you use really juicy apples, you might want to add a tablespoon of flour with the apples to avoid a soupy bottom.
- I think this tastes even better the next day, but that’s only if you have the willpower to wait.
- Oh, and sometimes I just throw in a handful of raisins if I’m feeling wild.
Variations I’ve Tried (and a Flop or Two)
- Pear Cobbler: Swapped half the apples for pears. Actually delicious and a bit more floral. Would 10/10 recommend.
- Berry-Apple Combo: Tossed in a cup of frozen raspberries. It went a bit runny but tasted brilliant.
- Gluten-Free: Used a 1:1 gluten-free flour blend. Came out fine, if a little denser. Not bad though.
- My Not-So-Great Idea: Tried once with bananas (don’t do it—turns out weirdly mushy and oddly bland. My brother still teases me about "banana cobbler night").
Do You Need Fancy Gear?
Honestly, all you need is a baking dish and a bowl. If you don’t have a pastry cutter for the butter, just use two forks or your (clean!) hands like I do. I’ve even made this in a cast iron skillet on a camping trip, and it worked a treat, though it took a bit longer to bake.


How To Store It (If You Have Any Left!)
Cover leftovers with foil or pop them in a container in the fridge. It’ll keep for about 3 days, but honestly, in my house it never lasts more than a day—someone always sneaks the last bit for breakfast (sometimes that someone is me, but let’s keep that between us).
Serving It Up—My Favorite Ways
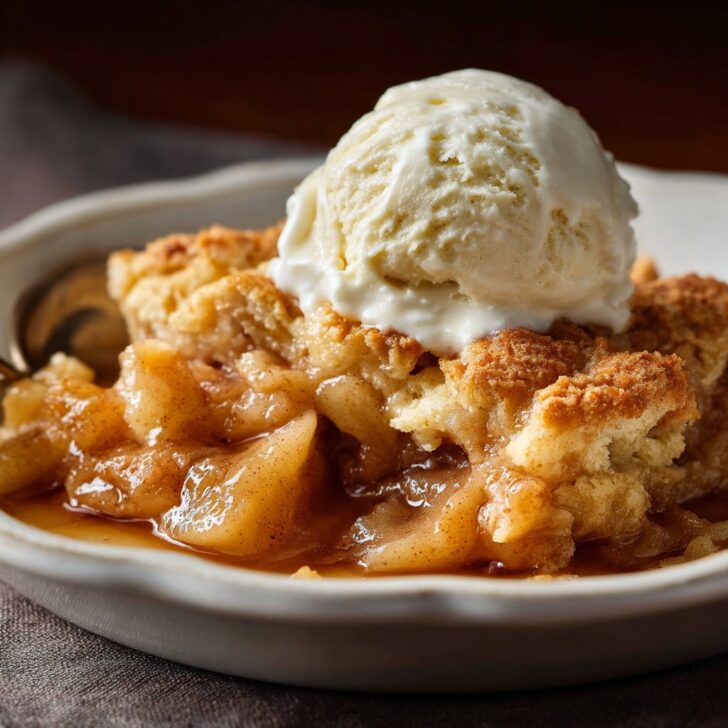
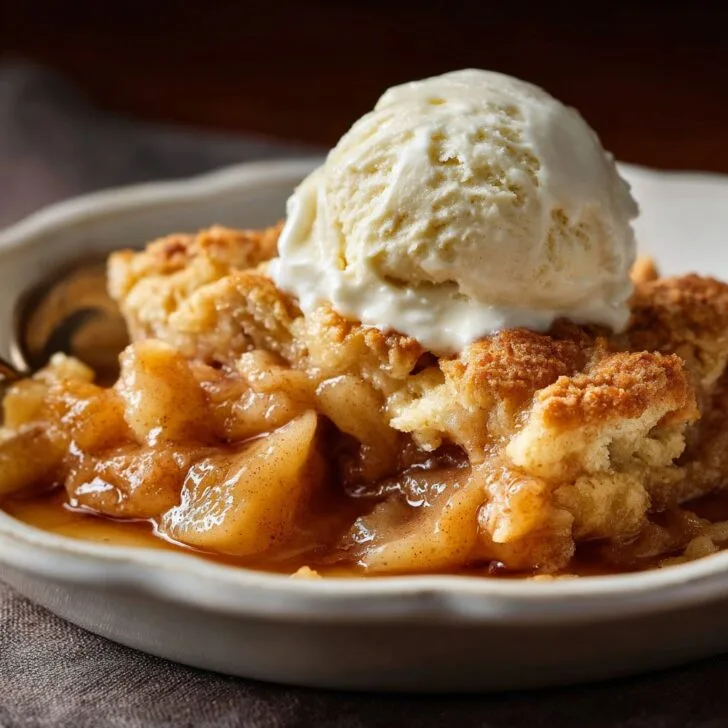
My lot likes this served hot with vanilla ice cream. Sometimes we go all-out and whip up some homemade whipped cream (highly recommend if you’ve got a few extra minutes). If it’s morning, try it cold with Greek yogurt and call it breakfast (hey, apples are fruit!).
A Few Pro Tips (Aka Lessons From My Mistakes)
- I once tried to rush the butter step by melting it, thinking it would save time. It didn’t—just made the topping weirdly dense. Cold butter is key.
- Don’t cut the apples too thin or they’ll almost disappear; thick chunks give you that lovely bite.
- If you don’t have enough apples, pad it out with a couple extra handfuls of whatever fruit is lurking in the fridge. Just avoid banana. Seriously.
FAQ—Stuff Folks Always Ask Me
- Q: Can I use canned apples?
A: Sure, if you’re in a pinch. Just drain them well or you’ll get soup, not cobbler. I much prefer fresh, though—tastes brighter. - Q: Can I make this ahead of time?
A: Yep, and I honestly think the flavors mesh better overnight. Just reheat gently in the oven to crisp the top again. - Q: What if I don’t have lemon juice?
A: You can skip it, but maybe add a splash of vinegar or orange juice. Actually, I find it works better if you just use whatever citrus you have, even a bit of zest. - Q: Is there a way to make it vegan?
A: Yup—swap the butter for plant-based margarine and use your favorite non-dairy milk. Works a charm! - Q: Can I freeze it?
A: Technically yes, but the topping can get a bit soggy. I’ve done it, but I’d only recommend if you’re really desperate.
And if you want to see someone do a fancier version with caramel, check out Bigger Bolder Baking’s recipe—though mine’s simpler, for sure. Now, if you’ll excuse the tangent, isn’t it odd how cobbler gets its name? I read somewhere it’s because the topping looks ‘cobbled together’—which, in my kitchen, is usually exactly what happens. Anyway, happy baking!


Ingredients
- 6 cups peeled and sliced apples (about 5 medium apples)
- ¾ cup granulated sugar
- 1 teaspoon ground cinnamon
- 1 tablespoon lemon juice
- 1 cup all-purpose flour
- ½ cup unsalted butter, melted
- ½ cup milk
- 1 ½ teaspoons baking powder
- ¼ teaspoon salt
Instructions
-
1Preheat the oven to 375°F (190°C). Grease a 9-inch baking dish.
-
2In a large bowl, toss the sliced apples with ¼ cup sugar, cinnamon, and lemon juice. Spread evenly in the prepared baking dish.
-
3In another bowl, whisk together flour, remaining ½ cup sugar, baking powder, and salt. Stir in melted butter and milk until just combined.
-
4Spoon the batter evenly over the apples, spreading gently to cover most of the fruit.
-
5Bake for 40 minutes, or until the topping is golden brown and the apples are tender. Let cool slightly before serving.
Approximate Information for One Serving
Nutrition Disclaimers
Number of total servings shown is approximate. Actual number of servings will depend on your preferred portion sizes.
Nutritional values shown are general guidelines and reflect information for 1 serving using the ingredients listed, not including any optional ingredients. Actual macros may vary slightly depending on specific brands and types of ingredients used.
To determine the weight of one serving, prepare the recipe as instructed. Weigh the finished recipe, then divide the weight of the finished recipe (not including the weight of the container the food is in) by the desired number of servings. Result will be the weight of one serving.
Did you make this recipe?
Please consider Pinning it!!