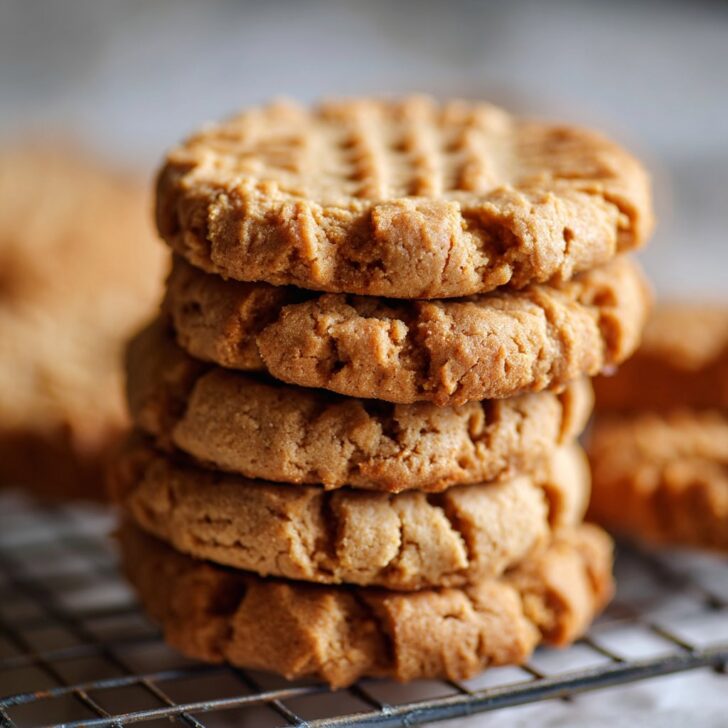

Let Me Tell You About These Peanut Butter Cookies…
Alright, pull up a chair (or just lean on the counter with a cup of tea—no judgment). So, these Gourmet Thick Peanut Butter Cookies have a bit of a reputation in my circle. I started making them after a rainy weekend years ago, when the only thing in my pantry was a sad-looking jar of peanut butter and, for some reason, three types of sugar. My partner wandered in, sniffed the air, and said, "Is that peanut butter, or did you finally attempt that candle project again?" (Let’s not revisit that particular craft disaster.) But anyway, these cookies came out of that afternoon, and now they’re requested at every family get-together, office potluck, and, oddly, even once at a baby shower. Go figure.
Why You'll Love This Recipe (Like, Really)
I make these whenever I want a cookie that feels a bit fancier than it probably is. My family goes a bit wild for them because they’re thick—like, no sad, thin, floppy biscuits here. And the best part? They’re not overly sweet or dry. (You know when you bite into a cookie and it’s basically dust? Yeah, none of that.) Actually, the last time I made a double batch, the only frustration was watching them disappear before I’d even cleaned up the mixing bowl. Sometimes, I even hide a couple in a Tupperware—call it a baker’s tax.
Ingredients: All the Good Stuff (With Swaps!)
- 1 cup creamy peanut butter (I sometimes use crunchy if I’m feeling rebellious—works just fine)
- ½ cup unsalted butter, softened (salted is okay in a pinch, just skip adding extra salt later)
- 1 cup light brown sugar (my gran swears by dark brown, but honestly, both are grand)
- ½ cup white granulated sugar (I’ve even swapped in coconut sugar—didn’t hate it)
- 2 large eggs
- 2 cups all-purpose flour (I’ve used whole wheat flour before, but it’s a bit earthier)
- 1 teaspoon baking soda
- ½ teaspoon baking powder
- ¼ teaspoon salt
- 1 teaspoon vanilla extract (homemade is best, but the store-bought stuff’s fine)
- Optional: A handful of chopped peanuts or dark chocolate chips (sometimes I add both… why not?)
Let’s Make Some Cookies (My Way)
- Get your oven going: Preheat to 350°F (180°C). I almost always forget this step, so reminder to do it now.
- Mix the butter and sugars: In a big bowl, cream together the butter, peanut butter, brown sugar, and white sugar until it’s light and fluffy. This is where I usually sneak a taste, just to “test” for quality.
- Add eggs & vanilla: Crack in the eggs one at a time and splash in the vanilla. Beat until smooth. If it looks a bit split, don’t panic—it all comes together in the end.
- Dry stuff time: In another bowl, whisk together the flour, baking soda, baking powder, and salt. (Confession: Sometimes I just dump it straight in, but sifting makes a difference. Probably.)
- Combine: Add the dry ingredients to the wet, bit by bit, mixing gently. Don’t overdo it or you’ll have tough cookies. Fold in peanuts or choc chips if you’re using them.
- Scoop & shape: Grab a big spoon or a cookie scoop and plop hefty mounds onto a parchment-lined baking sheet. I like them tall so they bake up thick. Gently press each one with a fork for that criss-cross pattern (or, honestly, use your hand if you’re in a rush).
- Bake: Pop in the oven for about 12–14 minutes. The edges should look set, but the middle will still be a bit soft. Don’t overbake! They firm up as they cool.
- Cool: Let them sit on the tray for 5 minutes (so they don’t fall apart), then move to a rack. Try to resist eating them all while still warm—good luck with that one.
Some Notes (Learned the Hard Way)
- If you chill the dough for 30 minutes first, the cookies bake up even thicker. I only do it when I actually remember—so, not always.
- Microwaving cold butter is… dicey. It melts unevenly and messes with the dough. Let it soften at room temp if you can.
- If the dough seems crazy sticky, add a tablespoon or two of flour. Or just embrace the mess—life’s too short.
Variations I’ve Tried (and a Regret)
- Sometimes I swap half the peanut butter for almond butter. Makes it nuttier and a bit lighter (also, if you’re out of peanut butter, it’s a lifesaver).
- Adding white chocolate chips sounded great, but it’s a bit too sweet for me—maybe you’ll like it?
- I once tried sandwiching marshmallow fluff between two cookies. It was a hot mess, but fun (and very sticky).
Don’t Have a Stand Mixer? No Problem
Honestly, I’ve made these with just a big bowl and a wooden spoon when my mixer was on the fritz. Elbow grease works just fine, though your arm might feel like jelly by the end. Or use a hand mixer if you’ve got one hiding in a cupboard somewhere.


How to Store (If You Have Any Left)
Pop them in an airtight tin or container and they’ll keep for up to 4 days, but honestly, in my house, they vanish by day two. You can freeze the dough balls, too—just bake them right from the freezer, adding two extra minutes. (I read about this over here and it actually works!)
How I Like to Serve ‘Em
Honestly, fresh out of the oven with a glass of cold milk is classic. Or, sometimes I sandwich a bit of vanilla ice cream between two for a proper treat (my niece calls this “cookie magic”). For a slightly grown-up twist, I once crumbled a few over this banana bread—bit odd but tasty.
Lessons Learned (My Pro Tips)
- Don’t rush the creaming step; I tried once when I was in a hurry and the cookies turned out flat and sad. Take the extra minute.
- If your dough’s too warm, the cookies spread. Chill it for 10 minutes if your kitchen’s a sauna.
- And don’t skip the cooling on the tray part—seriously, they’ll break. I learned that the messy way.
Your Questions (For Real!)
- Can I make these gluten-free?
Yep! I’ve swapped in a 1:1 gluten-free flour blend (I used Bob’s Red Mill) and it worked like a charm. - Do I have to use two kinds of sugar?
Nah, but I think the mix gives a better flavor. If you’re out, just use all brown or all white—no one will call the cookie police. - Do they really stay thick after a day?
Actually, yes! Maybe even better the next day. If they go a bit soft, a quick minute in the oven perks ‘em right up. - What if I only have natural peanut butter?
Works, but the cookies don’t hold shape quite as well. Stir it up good before using, and maybe add a pinch more flour. - Can kids help?
Absolutely, but get ready for flour everywhere. And probably some finger-licking (from them, not you... or maybe both?).
And one last thing—I don’t know if it’s just me, but cleaning peanut butter off spoons is an actual hobby around here. If you have a trick, send help.


Ingredients
- 1 ½ cups all-purpose flour
- ½ teaspoon baking soda
- ¼ teaspoon salt
- ½ cup unsalted butter, softened
- 1 cup creamy peanut butter
- ¾ cup packed brown sugar
- ½ cup granulated sugar
- 1 large egg
- 2 teaspoons pure vanilla extract
Instructions
-
1Preheat the oven to 350°F (175°C) and line a baking sheet with parchment paper.
-
2In a medium bowl, whisk together the flour, baking soda, and salt.
-
3In a large bowl, beat the butter, peanut butter, brown sugar, and granulated sugar until creamy and smooth.
-
4Add the egg and vanilla extract to the wet mixture and mix until well combined.
-
5Gradually add the dry ingredients to the wet mixture, mixing just until incorporated. Do not overmix.
-
6Scoop large balls of dough onto the prepared baking sheet, spacing them 2 inches apart. Bake for 12-14 minutes, or until the edges are golden but the centers are still soft. Cool on the baking sheet for 5 minutes before transferring to a wire rack.
Approximate Information for One Serving
Nutrition Disclaimers
Number of total servings shown is approximate. Actual number of servings will depend on your preferred portion sizes.
Nutritional values shown are general guidelines and reflect information for 1 serving using the ingredients listed, not including any optional ingredients. Actual macros may vary slightly depending on specific brands and types of ingredients used.
To determine the weight of one serving, prepare the recipe as instructed. Weigh the finished recipe, then divide the weight of the finished recipe (not including the weight of the container the food is in) by the desired number of servings. Result will be the weight of one serving.
Did you make this recipe?
Please consider Pinning it!!