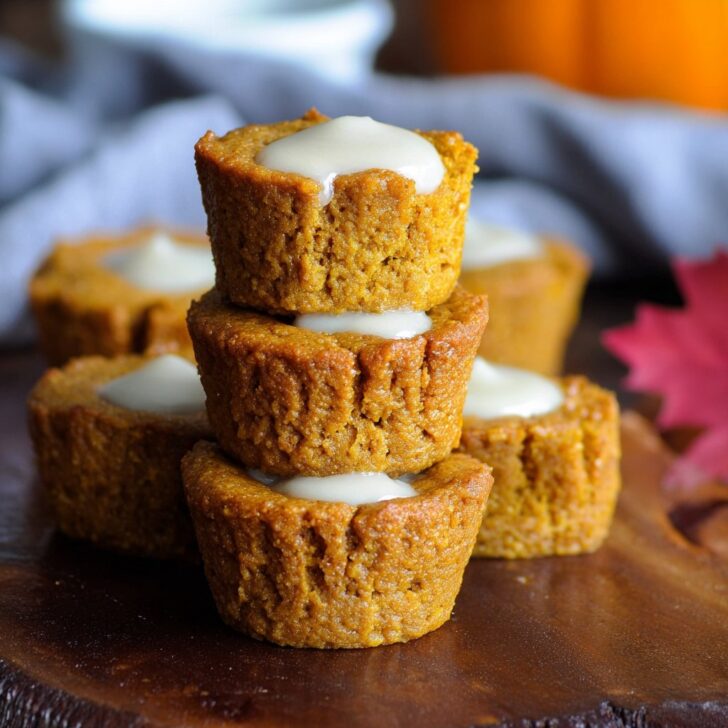

Well, Here's the Scoop on My Flourless Pumpkin Muffins
Okay, so let me just say right off the bat: I'm not the world’s tidiest baker (are any of us, really?), and flourless things always sounded a bit... suspicious to me. Like, who’s hiding the flour and why? But one chilly morning, after a complete pantry meltdown—no flour, not even a spoonful left—I found myself improv-ing with a can of pumpkin and a bit of wishful thinking. Long story short? These flourless pumpkin muffins were born, and they disappeared faster than my favorite socks in the dryer (still haven’t found those, by the way). If you can wield a whisk and stand a little mess, you’re halfway there.
Why You'll Probably Love These (I Sure Do!)
Honestly, I make these flourless pumpkin muffins whenever I want something that feels a tiny bit indulgent but doesn’t flatten me with a heavy, wheaty coma (I mean, who wants that before 10am?). My family goes a bit bananas for them—actually, banana in these is good too—because they’re not super sweet. Also, and this is weird, they somehow taste almost better the next day? I dunno why. Oh, and if you’re chasing after kids or, I dunno, a cat with boundary issues, these muffins won’t slow you down; you just grab and go. (By the way, if you use those fancy muffin liners, let me know if they ever come off clean, because mine never do—minor gripe.)
So, Here’s What You’ll Need
- Heaping 1 cup pumpkin purée (canned or homemade—my mum swears by Libby's, but any will do, honestly)
- 2 large eggs (room temp is ideal, but have I always remembered? Nope.)
- ½ cup nut butter (Peanut, almond, even cashew—whatever you’ve got. Sunflower seed butter worked for me when I made these for a pal with nut allergies.)
- ¼ cup maple syrup or honey (Or chuck in brown sugar if you must—I've done it in a pinch)
- 1 teaspoon vanilla extract
- ½ teaspoon baking soda (Not baking powder—one time I mixed them up and, uhh, it was very... flat)
- ½ teaspoon cinnamon (Or pumpkin pie spice if you want extra punch)
- Pinch of salt
- Handful of chocolate chips or chopped nuts (totally optional, but why not?)
How I Throw Them Together (Don't Overthink It)
- Preheat your oven to, mm, 350° F (180° C-ish). Grab a muffin tin and grease it or stuff it with those tricky liners.
- In a big enough bowl (big is relative, until you start spilling), whisk together all the wet things—pumpkin, eggs, nut butter, syrup, vanilla. If it looks gross, that’s fine. This is where I usually sneak a taste to see if the sweetness seems right (do with this info what you will!).
- Add the baking soda, cinnamon, and salt. Stir; don't beat it up. If you’re unsure, under-mix is better than making it tough.
- Fold in choc chips or nuts, if you like. Frankly, some days I just toss extras on top after spooning.
- Spoon batter into your muffin tin. Fills about 8-9 normal ones. Don’t stress if some look bigger—those are just the lucky muffins.
- Bake for 18 to 22 minutes, or until they don’t jiggle and a toothpick comes out sort of clean (that’s the technical term). PS: Don’t panic if they puff then sink a bit. Happens all the time.
- Let cool a few minutes unless you’re hungry. Then, y’know, try not to burn your tongue (I never learn).
What I’ve Learned (aka Notes from Many Muffin Fails)
- Once I forgot the salt and, wow, big difference. It really balances things. Don’t skip it unless you absolutely have to.
- Sometimes, the muffins stick; just run a knife around the edge. Or just eat them with a spoon—no judgment.
- I keep telling myself to mash a banana in for more sweetness, but then I forget. One day.
Variations I’ve Messed Around With
- Added a sprinkle of ginger or nutmeg for spicy autumn vibes (works a treat).
- Mini chocolate chips = more choc per bite, but they all migrated to the bottom once. Not sure why.
- Tried coconut flakes once; textures got a bit weird. Maybe don’t do that.
- Once swirled in a little cream cheese—pretty great, but a faff to clean the bowl afterwards.
What You Need Equipment-Wise – Or Not
- Muffin tin (but, hey, in a pinch, I’ve baked these in ramekins or a loaf pan and just cut chunks out—rustic, right?)
- Mixing bowl, whisk or fork (fork works if you’re feeling a bit rustic or your whisk's missing)
- Spoon or scoop (old ice cream scoop is grand, but a regular spoon's fine)


How to Store Them (But Good Luck)
Supposedly, you let them cool and keep in an airtight container for up to 4 days at room temp. Maybe the fridge if it’s hot out. But, honestly, they’ve never lasted more than, like, a day and a half in my house. Reheat for a few seconds in the microwave if you want them warm again, but...do as you fancy.
How We Like to Serve 'Em
Best with a dollop of Greek yogurt and a drizzle of extra maple syrup, if you ask me. My youngest insists on peanut butter (lunchbox gold). And for tea? Wouldn't say no. Sometimes we eat them on a picnic blanket, sometimes at the counter; depends on the day.
Tales from the Trenches (Pro Tips I Learned the Hard Way)
- Don’t skip greasing the tin unless you want to chip out muffin fossils later. Trust me, I’ve done it.
- If you try to rush them by turning up the heat, only the tops cook; middles stay gooey. It's not the good kind of gooey, either.
- Don’t be afraid to tweak the sweetener—I once made these with too little maple and they just tasted, well, sad.
Things Folks Actually Ask About These Muffins
- Can I freeze these muffins? Yep! Just wrap 'em tight, chuck 'em in the freezer, and warm when you need a fix. (I forget about mine until way too late, though.)
- What’s the texture supposed to be like? Kinda moist, a bit custardy, not crumbly like regular muffins. If you want more structure, toss in a spoonful of oats.
- Do you need a fancy mixer? Not at all; I use a lazy fork most of the time.
- Are these actually gluten-free? Yep—for sure, unless you mess about with flour or certain choc chips (oh, always check those labels if that's an issue for you). Here's a decent list of GF-friendly baking tips if you want to nerd out.
- Could I use sweet potato instead of pumpkin? Actually, yes! The flavor’s a bit richer, but so good. Mash it smooth. Sometimes I think I prefer it?
- Why do mine fall flat on top? Probably over-mixed or maybe your oven’s running hot. Or, you know, muffins just like to be quirky sometimes. I read more about this on Sally’s Baking Addiction—she’s a pro for a reason.
If you’re after more snacky ideas (or looking to avoid another bland store-bought GF treat), have a scroll through Minimalist Baker’s breakfast ideas—lots of flourless inspiration.
Phew! Just realized I forgot to mention—if you ever accidentally double the nut butter, the muffins are weirdly rich and pretty good cold, so...enjoy experimenting? And don’t be shy about making a mess; half the fun is licking the spoon after, right?


Ingredients
- 1 cup canned pumpkin puree
- 2 large eggs
- ½ cup creamy almond butter
- ¼ cup pure maple syrup
- ⅓ cup rolled oats
- 1 teaspoon baking powder
- ½ teaspoon baking soda
- 1 teaspoon ground cinnamon
- ½ teaspoon ground nutmeg
- ¼ teaspoon salt
- ½ teaspoon vanilla extract
- ⅓ cup mini chocolate chips (optional)
Instructions
-
1Preheat your oven to 350°F (175°C) and line a 12-cup muffin tin with paper liners or spray with nonstick spray.
-
2In a large mixing bowl, whisk together pumpkin puree, eggs, almond butter, maple syrup, and vanilla extract until smooth.
-
3In another bowl, combine rolled oats, baking powder, baking soda, cinnamon, nutmeg, and salt.
-
4Add the dry ingredients to the wet ingredients and stir until just combined. If using, fold in the mini chocolate chips.
-
5Divide the batter evenly among the muffin cups. Bake for 20-22 minutes or until a toothpick inserted in the center comes out clean.
-
6Allow muffins to cool in the tin for 5 minutes, then transfer to a wire rack to cool completely.
Approximate Information for One Serving
Nutrition Disclaimers
Number of total servings shown is approximate. Actual number of servings will depend on your preferred portion sizes.
Nutritional values shown are general guidelines and reflect information for 1 serving using the ingredients listed, not including any optional ingredients. Actual macros may vary slightly depending on specific brands and types of ingredients used.
To determine the weight of one serving, prepare the recipe as instructed. Weigh the finished recipe, then divide the weight of the finished recipe (not including the weight of the container the food is in) by the desired number of servings. Result will be the weight of one serving.
Did you make this recipe?
Please consider Pinning it!!