
If You’ve Never Had Chile Colorado, Friend, You’re In For a Cozy Night
Okay, confession time: I actually used to think "Chile Colorado" meant it had something to do with Colorado the state. Nope! (My mom still teases me about that, by the way.) It’s all about those red chiles and that deep, amazing gravy. I started making this Crockpot Chile Colorado when my kids were little because, honestly, who has time to babysit a bubbling Dutch oven all afternoon? And even when I was busy chasing the dog around the backyard (don’t ask), the slow cooker did all the heavy lifting indoors. The smell drifting though the house… I mean, what’s better?


Why I Always End Up Making This Crockpot Chile Colorado
I whip this up when my family’s hovering around the kitchen, poking at me for "real dinner" (not cereal, which apparently doesn’t count). They go nuts for it because the beef basically falls apart and the sauce ends up in every nook and cranny of the rice. And you know what? I used to dread browning the meat before tossing it in the Crockpot—but after skipping that once and making a sorta gray stew (yikes), I just accepted it as part of the magic.
Alright, Here’s the Shopping List (or What’s Left in the Pantry)
- 2 ½ lbs beef stew meat, cut in 1 ½ inch cubes (sometimes I use chuck roast chopped up, or even pork if that’s what I’ve got defrosted—no judgment!)
- 7 dried guajillo chiles, stems and seeds removed (pasilla or New Mexico chiles work in a pinch; my grandma always insisted on guajillo, but I use what’s on sale)
- 3 dried ancho chiles, stems and seeds out (if you can’t find them, just add another guajillo and call it a day)
- 4 cups beef broth (OK to use chicken broth if that’s what’s hiding in your fridge)
- 1 medium yellow onion, roughly chopped
- 4 cloves garlic (fat ones if you’ve got them), peeled
- ½ teaspoon ground cumin
- 1 teaspoon dried oregano (I cheat and sometimes use Italian blend)
- 1 teaspoon salt (or more, honestly, I usually taste and add more later)
- ½ teaspoon black pepper
- 2 tablespoon tomato paste (or ketchup, if you’re desperate—been there!)
- 2 tablespoon vegetable oil
- 1-2 bay leaves
How I Usually Pull it Together (with at Least One Detour Along the Way)
- Heat a big skillet over medium-high and add 1 tablespoon oil. Brown the beef in batches—crowding = boiling, not browning! (Trust me, I tried once.) Toss the browned meat into your slow cooker.
- Toast those dried chiles in a dry skillet for about 2 minutes. Don’t let them burn or your kitchen will smell like sadness. Transfer chiles to a bowl and pour hot beef broth over them, letting them soak for 20 minutes or until nice and pliable.
- Blend soaked chiles, broth, onion, garlic, tomato paste, cumin, oregano, salt, and pepper in a blender. Blend until silky-smooth—this is the part where I usually pause for a sip of coffee. (If you hate blender cleanup, an immersion blender’s fine, just messier!)
- Strain the sauce through a mesh sieve if you’ve got one; if not, just pour it on over the beef (bits and all, extra fiber, eh?).
- Throw in the bay leaves and cover that Crockpot. Cook on low for 7 to 8 hours (yeah, really—you want fall-apart beef). Or on high for 4 to 4 ½ hours if you’re more impulsive. Don’t peek too often, though—I learned this the hard way; it just adds to the cook time.
- Pull out the bay leaves, taste for salt, and give the sauce a little stir. It should be thick-ish and so, so good. This is where I always sneak a bite. Too thin? Just leave it on high with the lid off for a bit.


Notes from Many (Many) Test Runs
- The sauce stains everything, so maybe don’t wear your favorite white tee when you're blending.
- I swear it tastes even better day two—but it’s rarely survived that long at my place!
- If your blender lid doesn't seal right, cover it with a towel or... just get splattered. Ask me how I know.
Things I Tried That You Might Want to Try (Or Not)
- One time I swapped sweet potatoes for beef for my veggie friend. Tastes different, but still yummy (I did miss the meaty chew though).
- I once tried adding cocoa powder thinking it'd be "mole-ish." Turns out, nope.
- Using chipotle chiles for smoky heat? It works, but use maybe just one.


Here’s What You’ll Need – And What I Use Instead When I Can’t Find Stuff
- Crockpot or any slow cooker (if not, a heavy Dutch oven on low heat works too—with more stirring, obviously)
- Blender (or immersion blender, or even just mashing things together, in a pinch)
- Fine-mesh strainer (helpful, but also not mission-critical)
Keeping Leftovers (If There Are Any)
This keeps for three days in the fridge in a good Tupperware container. If you freeze it, use within a month for max flavor. Though honestly, in my house it never lasts more than a day and a half. I did try freezing a batch and found the beef texture changes a bit—but still totally scarfable.
Here’s How We Eat It (And Maybe You Will Too?)
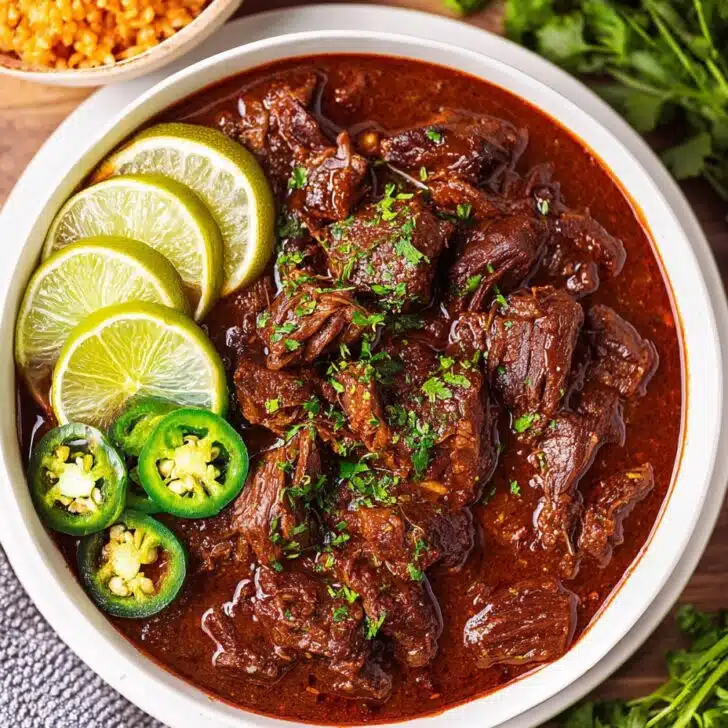
I usually pile mine on fluffy, warm rice and garnish with chopped onions and cilantro. My son likes to stuff his into tortillas (and then make a mess everywhere). Sometimes, we scoop it up with tortilla chips and call it dinner. And, okay, one of my more weird little delights? A fried egg on top—don’t knock it until you try it.
Pro Tips (All Earned the Hard Way)
- Do take the time to brown the meat. I tried skipping once and ended up with sad, pale beef. Lesson learned.
- Taste the sauce before pouring it on – sometimes chiles surprise you and it’s spicier (or milder) than you expect.
- If you get lazy and don’t soak the chiles long enough, they’re hard as rocks and your blender will hate you. Trust me on this.
FAQ From Curious Eaters (and My Nosy Neighbor)
- Can I use chicken instead of beef? You totally can! The texture doesn’t get quite as melt-in-your-mouth, but it soaks up the sauce beautifully. I use boneless thighs when I do this.
- How spicy is this? Not that spicy, honestly; most of the heat is in the seeds (which you’re taking out). If you want some kick, toss in a dried arbol chile or two.
- What if I forgot to buy tomato paste? Hey, I did this last week! Just use a squirt of ketchup or leave it out. The sauce will still be delicious.
- Does it really need to cook that long? Actually, yes. I once rushed it and the beef was weirdly chewy. Low and slow is your pal here.
- Can I make this ahead? I think this tastes better the next day, so go for it. Just reheat gently, maybe add a splash of broth if it’s gotten thick.
And—random tangent, but did you know “Chile Colorado” just means “red chile” in Spanish? Anyway, hope you love this as much as my awkward, loud family does. If you cook it, let me know, or just tell me how yours turns out (for better or for weird)!
Ingredients
- 2 ½ lbs beef stew meat, cut in 1 ½ inch cubes (sometimes I use chuck roast chopped up, or even pork if that’s what I’ve got defrosted—no judgment!)
- 7 dried guajillo chiles, stems and seeds removed (pasilla or New Mexico chiles work in a pinch; my grandma always insisted on guajillo, but I use what’s on sale)
- 3 dried ancho chiles, stems and seeds out (if you can’t find them, just add another guajillo and call it a day)
- 4 cups beef broth (OK to use chicken broth if that’s what’s hiding in your fridge)
- 1 medium yellow onion, roughly chopped
- 4 cloves garlic (fat ones if you’ve got them), peeled
- ½ teaspoon ground cumin
- 1 teaspoon dried oregano (I cheat and sometimes use Italian blend)
- 1 teaspoon salt (or more, honestly, I usually taste and add more later)
- ½ teaspoon black pepper
- 2 tablespoon tomato paste (or ketchup, if you’re desperate—been there!)
- 2 tablespoon vegetable oil
- 1-2 bay leaves
Instructions
-
1Heat a big skillet over medium-high and add 1 tablespoon oil. Brown the beef in batches—crowding = boiling, not browning! (Trust me, I tried once.) Toss the browned meat into your slow cooker.
-
2Toast those dried chiles in a dry skillet for about 2 minutes. Don’t let them burn or your kitchen will smell like sadness. Transfer chiles to a bowl and pour hot beef broth over them, letting them soak for 20 minutes or until nice and pliable.
-
3Blend soaked chiles, broth, onion, garlic, tomato paste, cumin, oregano, salt, and pepper in a blender. Blend until silky-smooth—this is the part where I usually pause for a sip of coffee. (If you hate blender cleanup, an immersion blender’s fine, just messier!)
-
4Strain the sauce through a mesh sieve if you’ve got one; if not, just pour it on over the beef (bits and all, extra fiber, eh?).
-
5Throw in the bay leaves and cover that Crockpot. Cook on low for 7 to 8 hours (yeah, really—you want fall-apart beef). Or on high for 4 to 4 ½ hours if you’re more impulsive. Don’t peek too often, though—I learned this the hard way; it just adds to the cook time.
-
6Pull out the bay leaves, taste for salt, and give the sauce a little stir. It should be thick-ish and so, so good. This is where I always sneak a bite. Too thin? Just leave it on high with the lid off for a bit.
Approximate Information for One Serving
Nutrition Disclaimers
Number of total servings shown is approximate. Actual number of servings will depend on your preferred portion sizes.
Nutritional values shown are general guidelines and reflect information for 1 serving using the ingredients listed, not including any optional ingredients. Actual macros may vary slightly depending on specific brands and types of ingredients used.
To determine the weight of one serving, prepare the recipe as instructed. Weigh the finished recipe, then divide the weight of the finished recipe (not including the weight of the container the food is in) by the desired number of servings. Result will be the weight of one serving.
Did you make this recipe?
Please consider Pinning it!