
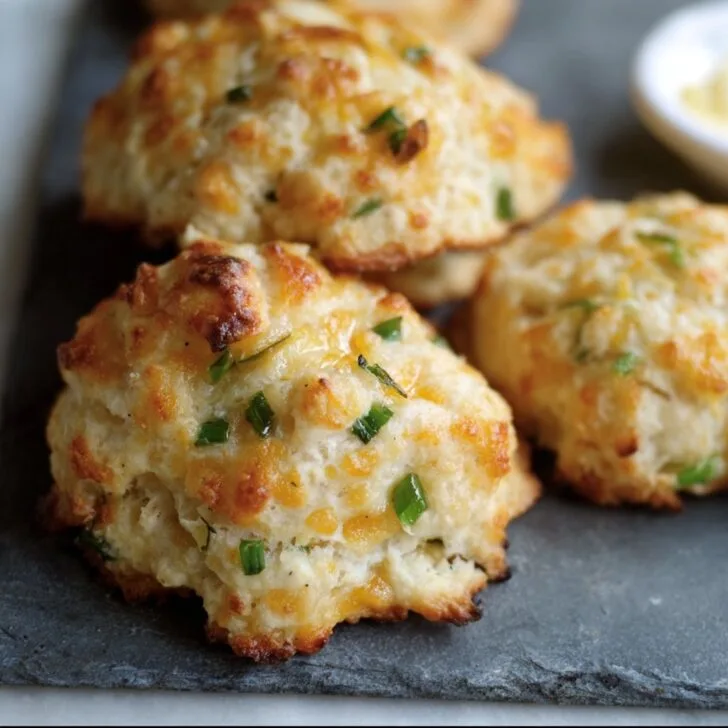
Let's Talk Biscuits — and My Slight Obsession
So, I have to admit, there's something about Cheddar and Green Onion Buttermilk Drop Biscuits that just calls my name on lazy Saturday mornings. Maybe it's the cheese (because let's be honest, who resists cheese?). Or maybe it's the memory of making these with my cousin during a power outage—by candlelight; we nearly set the whisk on fire, but the biscuits came out golden anyway. If you've ever wanted a biscuit that's both a little fancy and totally unfussy, you're in the right place. Oh, and if you spill flour everywhere, welcome to the club.
Why You'll Love This Recipe (at Least I Do!)
I make this when I've got leftover cheese sitting around (not often, but hey, it happens!) or when I've got company and want to impress without actually working that hard. My family goes a bit bonkers for these, especially when they're fresh out of the oven. Sometimes I get annoyed when the dough looks too sticky—seriously, I've almost given up halfway before, but stick with it! Once you get that cheesy, oniony bite, you'll forget any kitchen mishaps. Plus, you don't need to roll anything out, which means less mess on the counter. Win-win.
What You'll Need: Ingredients (Substitutions Galore)
- 2 cups all-purpose flour (I've swapped in whole wheat for half before—decent, but a bit earthy)
- 2 teaspoon baking powder (my gran swore by Clabber Girl, but any works)
- ½ teaspoon baking soda
- ½ teaspoon salt (sometimes I add a dash more if I'm feeling rebellious)
- ¼ teaspoon black pepper, or a pinch more if you like some kick
- ½ cup cold unsalted butter, cubed (I tried margarine once—nope, just don't)
- 1 cup grated sharp cheddar cheese (sometimes I use a mix of cheddar and Monterey Jack—yum)
- 3-4 green onions, sliced thin (scallions work too; honestly, I've used chives in a pinch)
- ¾ to 1 cup buttermilk (start with ¾ and see if it needs more; regular milk with a squeeze of lemon works, but buttermilk gives best flavor)
Optional: pinch of cayenne for a bit of zip. Or not. Totally up to you.
How to Make These Biscuits—No Fuss, No Fear
- Preheat the oven. Set it to 425°F (220°C). Line a baking sheet with parchment, or just butter it up if you're out. I sometimes have to use an old pizza tray—works fine!
- Mix dry stuff. In a big-ish bowl, whisk together flour, baking powder, baking soda, salt, and pepper. If you spill a little flour, just swipe it off the counter later.
- Add the butter. This is where I get my hands dirty—literally. Rub in those cold butter cubes until it looks like chunky crumbs. Or use a pastry cutter if you want to feel pro. (Don't stress if it's not perfectly mixed—clumps are good!)
- Cheese & onions time. Toss in the grated cheddar and sliced onions. Sometimes I sneak a few cheese bits for myself here. Shh.
- Pour in buttermilk. Start with ¾ cup, stir gently with a fork. If it's dry, add more, a splash at a time. The dough should be shaggy and kinda sticky. Don't overmix—lumpy is lovely.
- Drop and bake. With a big spoon or an ice cream scoop (I use whatever's clean), plop blobs onto your baking sheet. Space them out, but don't panic about perfection. Into the oven they go for 13-16 minutes, until tops are golden and edges look crisp.
- Cool (ish) and enjoy. Let them sit a couple minutes. I usually can't wait and burn my tongue, but that's the price of impatience, right?
Some Notes from My Biscuit Adventures
- If your biscuits spread a bit too much, it's probably warm butter. Chill the dough for 10 minutes next time. Or don't, if you like flat biscuits (no judgment!)
- I've made these with pre-shredded cheese and, honestly, I think the hand-grated stuff tastes a smidge better. But if you're in a rush, bagged cheese is fine.
- Don't skip the parchment unless you want a biscuit-pan wrestling match later on.
Variations I've Tried (Not All Winners)
- Bacon bits mixed in? Delicious, but makes the dough a bit greasy—maybe drain them well first.
- Added fresh dill once for a brunch—family loved it, but my neighbor thought dill was "too distracting." Different strokes, I guess.
- Tried swapping cheddar for feta. Wouldn't do it again. Too salty and kinda weird with the onions!
On Equipment (Workarounds Welcome)
I usually use a big mixing bowl, a pastry cutter (but two butter knives work just fine if you don't have one—just crisscross them like you're fencing), and a big spoon. If you don't have parchment, just grease your sheet well and be ready for a little extra scrubbing.


How to Store These (But Will You Even Need To?)
Keep them in an airtight container at room temp for a day or two. Or pop them in the fridge if you must. They freeze well, too—but, honestly, in my house they're gone before I even get a chance. If you want to revive them, 5 minutes in a hot oven does the trick. Definitely not as good in the microwave, though.
Serving Ideas—How We Eat 'Em
We love them warm, split with a smear of salted butter. Sometimes I make a little honey butter on the side (just mash together butter and honey), especially if I'm serving these with soup. Or for breakfast, I sandwich scrambled eggs in the middle—it's a bit indulgent, but hey, you only live once! For special dinners, I've served them alongside chili, which is a match made in comfort food heaven.
Pro Tips (Learned the Hard Way)
- Don't try to rush the butter step; I once used melted butter because I was impatient, and the biscuits were, well, pancake-flat (still tasted good, but not the vibe).
- Actually, I find it works better if you measure your flour by spooning it gently into the cup instead of scooping. Less dense, fluffier biscuits.
- Don't overmix! I know I already said it, but every time I ignore this, I end up with tough biscuits. Listen to your future self.
FAQ—Questions from Real People (and Me)
Can I use milk instead of buttermilk? You can! Just add a little lemon juice or vinegar (about a tablespoon to a cup of milk). But honestly, the tang isn't quite the same.
Help, my biscuits are dry. What gives? Probably too much flour or not enough buttermilk. Or maybe the oven was too hot? I sometimes add a bit more cheese for moisture—cheese fixes a lot, right?
Do I have to grate the cheese myself? Nope, bagged is fine. Grated at home does melt a bit nicer, but who's judging?
Can I make these ahead? Sure. Mix the dry and wet separately, then combine right before baking. Or just bake and reheat briefly in the oven. (Not microwave, unless you like them a bit rubbery—your call!)
What’s the best way to reheat leftovers? Oven, 350°F for 5 minutes. Or, eat 'em cold with jam, which my partner swears by. I don't really get it, but hey, to each their own.
By the way, if you want to geek out on baking science, King Arthur Baking has a cool explainer on baking powder vs. baking soda. Or if you're curious about biscuit history (I fell down that rabbit hole once), Southern Living has a fun read.
Anyway, hope you love these biscuits as much as my crew does! And if you end up with flour in your hair, just say it's a new beauty trend. Happy baking!


Ingredients
- 2 cups all-purpose flour
- 1 tablespoon baking powder
- ½ teaspoon baking soda
- ½ teaspoon salt
- ¼ teaspoon ground black pepper
- ½ cup unsalted butter, cold and cubed
- 1 cup sharp cheddar cheese, shredded
- ½ cup green onions, finely sliced
- 1 cup buttermilk
Instructions
-
1Preheat the oven to 425°F (220°C) and line a baking sheet with parchment paper.
-
2In a large bowl, whisk together the flour, baking powder, baking soda, salt, and black pepper.
-
3Cut in the cold butter using a pastry cutter or your fingers until the mixture resembles coarse crumbs.
-
4Stir in the shredded cheddar cheese and sliced green onions until evenly distributed.
-
5Pour in the buttermilk and gently mix until just combined; do not overmix.
-
6Drop heaping spoonfuls of dough onto the prepared baking sheet, spacing them about 2 inches apart. Bake for 16-18 minutes, or until golden brown. Serve warm.
Approximate Information for One Serving
Nutrition Disclaimers
Number of total servings shown is approximate. Actual number of servings will depend on your preferred portion sizes.
Nutritional values shown are general guidelines and reflect information for 1 serving using the ingredients listed, not including any optional ingredients. Actual macros may vary slightly depending on specific brands and types of ingredients used.
To determine the weight of one serving, prepare the recipe as instructed. Weigh the finished recipe, then divide the weight of the finished recipe (not including the weight of the container the food is in) by the desired number of servings. Result will be the weight of one serving.
Did you make this recipe?
Please consider Pinning it!!