Let Me Tell You About These Brownies...
If you’ve ever been halfway through making brownies and realized you’re out of eggs, or maybe your brain’s just fried from a long day and you’re eyeing that dusty box mix in the pantry, trust me — I’ve been there. Actually, last week I almost caved and used a boxed mix, but something in me wanted to go rogue. So, I whipped up this better-than-box mix brownie recipe instead, and not to get all sentimental, but my sister still texts me for it every time her sweet tooth starts twitching. Oh, and if you ever find yourself hiding the last corner piece behind the orange juice in the fridge, you’re in good company.
Why I Always Come Back to This One
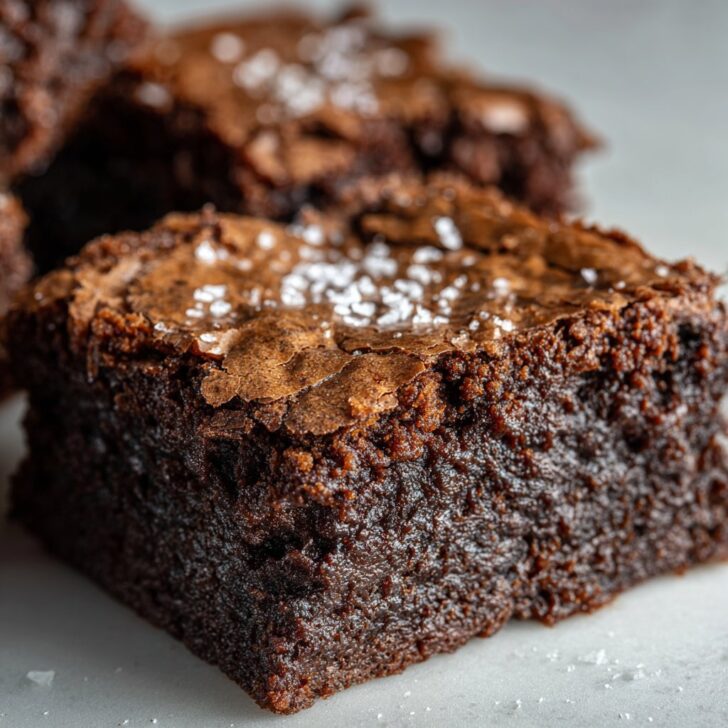
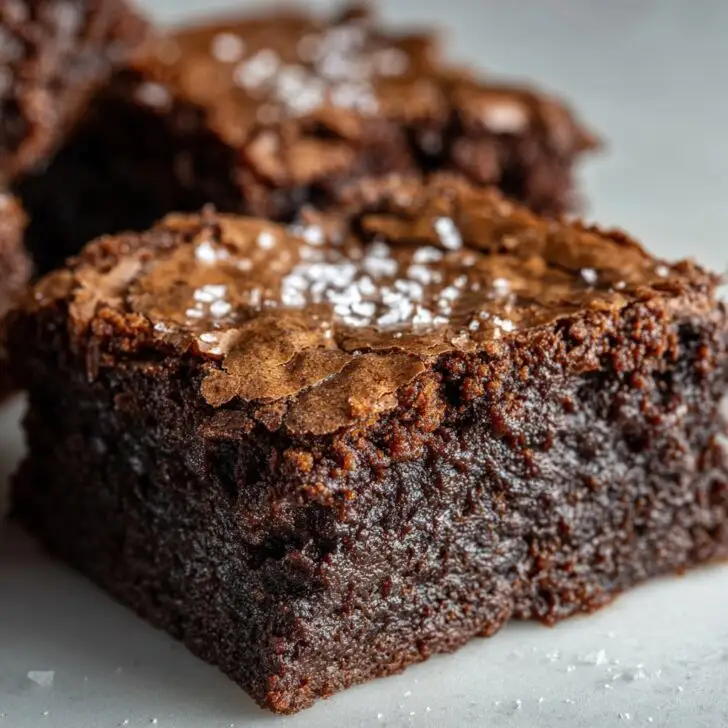
I make these when I really want that gooey, fudgy texture that never happens with store-bought mixes — you know, the kind that sticks to your teeth a little. My family goes nuts for these (especially when I underbake them by a minute or two — shhh). Honestly, I used to struggle with brownies coming out too cakey or just bland. This recipe sorts that. And if you’ve ever cursed at your oven because the brownies looked done but turned out dry? Yep, this will save your mood. Plus, when you’ve run out of chocolate chips, it’s not the end of the world... more on that in a sec.
What You'll Need (and What You Can Swap)
- 170g (about ¾ cup) unsalted butter — salted works fine, just skip the added salt. Or, I’ve even used a half-stick of margarine in a pinch (I know, sacrilege, but it works... kind of).
- 225g (1 ⅛ cups) dark chocolate, chopped — baking chocolate or good ol’ chocolate chips. My grandma swore by Baker’s brand, but I’ll grab whatever’s on sale.
- 250g (1 ¼ cups) granulated sugar. I sometimes sub in half brown sugar if I want them a bit chewier.
- 2 large eggs + 1 yolk — if you’re eggless one day, honestly, a flax egg like this is passable, but not the same.
- 90g (¾ cup) all-purpose flour. I tried oat flour once — wouldn’t recommend, unless you like brownies that double as bricks.
- 30g (⅓ cup) cocoa powder. Dutch-processed is posher, but natural is fine.
- ½ teaspoon sea salt. Table salt works, but go easy.
- 2 teaspoon vanilla extract. I even used maple syrup once; not the same, but nobody noticed.
- Optional: a handful of chopped walnuts, pecans, or a swirl of peanut butter. Up to you.
How I Usually Throw Them Together
- Preheat your oven to 350°F/175°C — unless, like me, you forget until you’re halfway through melting the butter. Grease an 8x8-inch (20x20cm) pan or line it with parchment (I just use whatever baking paper’s left, even if it doesn’t fit perfectly).
- Melt the butter and chocolate together in a saucepan over low heat, stirring constantly so it doesn’t catch. Or zap it in the microwave in 30-second bursts if you’re feeling chaotic. This is where I usually sneak a taste (warning: hot!).
- Take it off the heat, let it cool for a couple minutes — don’t dump the eggs in too soon or you’ll get chocolate scrambled eggs. Learned that one the hard way.
- Whisk in the sugar, then the eggs and yolk, one at a time. Whisk like you mean it. Add vanilla, then stir in flour, cocoa powder, and salt until just combined. (Don’t overmix — it gets weirdly tough.)
- If you’re feeling fancy, fold in nuts or swirls now. Pour the batter into your pan and spread it around. Don’t stress if it’s thick — that’s a good sign.
- Bake for 23–28 minutes, but start checking around 22 mins. I always go for the middle being just set — a toothpick should come out with a few sticky crumbs, not clean. If it’s super gooey in the middle, give it another two minutes and try again. But honestly, underbaked is better than overbaked.
- Let them cool at least 30 minutes if you can stand it. Sometimes I just dig in with a spoon while they’re still warm — no regrets.
Notes That Probably Only Matter to Me
- Once I swapped in coconut oil for butter. Tasted kinda tropical — not my thing, but could be yours?
- The batter always looks too thick before it bakes. Don’t worry — it sorts itself out in the oven.
- If you refrigerate overnight, they get even fudgier. Or at least I think so.
Tried-and-Tested (and One Failed) Variations
- Espresso Brownies — a teaspoon of instant coffee powder in with the cocoa. Makes you feel all grown-up.
- Salted Caramel Swirl — Works great, unless you go overboard and drown the batter. Not that I’ve done that... twice.
- Gluten-Free — Sub gluten-free plain flour, but don’t overbake — they dry fast.
- Don’t Try — White chocolate chunks. They just burn. Not worth it, mate.
What If You Don’t Have All the Gear?
Square metal pans are classic, but I’ve honestly used a round cake tin when nothing else was clean (just take a few mins off baking time). No whisk? A fork and some determination works, though your arm might protest. And if you lack parchment paper, grease the pan really well and cross your fingers.


How I (Try To) Store Them
Keep brownies in an airtight container, if you have any left. Room temp for 2–3 days, or in the fridge for fudgier squares. They freeze fine, but honestly, in my house they never last more than a day! Sometimes I even hide a few in the freezer behind the peas — no shame.
How We Eat 'Em at My Place
My personal fave: warm squares with a scoop of vanilla ice cream and a drizzle of this hot fudge sauce. My cousin claims cold brownies with a glass of milk are best. We’ve even crumbled leftovers onto yogurt for a not-very-healthy breakfast (don’t judge).
Pro Tips (aka, Learn From My Fails)
- Don’t rush cooling — if you cut while hot, they’re a sticky mess. I once tried chilling in the freezer to speed things up, but the top cracked like a jigsaw.
- Seriously, don’t overmix after the flour goes in. I’ve made rubbery brownies and nobody wants that.
- Bake just until set; if you wait for a toothpick to come out clean, you’ll end up with chocolate cake. Not what we’re after here.
Real Questions I Actually Get
- "Can I use milk chocolate instead of dark?" — You can, but the brownies will be sweeter and less rich. Try mixing half and half if you’re not sure.
- "Why did my brownies turn out cakey?" — You probably overbaked them or added too much flour (I’ve done both; it happens). Next time, measure carefully and stop baking when the center’s just set.
- "Can I double the recipe for a bigger pan?" — Yep, but add a few more minutes to baking time. Or, actually, check them a bit early — ovens are fickle, aren’t they?
- "Do I have to use parchment paper?" — No, but it makes life easier. If you don’t have any, just grease the pan and hope for the best (and maybe use a spatula to get the corners out — no shame in a bit of mess).
- "Can I add booze?" — Ha! Sure, a tablespoon of whiskey or Baileys is delish, but don’t go wild or they’ll never set properly.
And if you ever want something totally different, check out my go-to chewy brownie recipe — not quite as fudgy, but a nice change when you want more chew than goo.
Catch you in the kitchen, pal!


Ingredients
- 1 cup (225g) unsalted butter, melted
- 2 cups (400g) granulated sugar
- 4 large eggs
- 1 teaspoon vanilla extract
- 1 cup (120g) all-purpose flour
- 1 cup (85g) unsweetened cocoa powder
- ½ teaspoon salt
- 1 cup (175g) semi-sweet chocolate chips
Instructions
-
1Preheat your oven to 350°F (175°C). Grease and line a 9x13-inch baking pan with parchment paper.
-
2In a large bowl, whisk together the melted butter and granulated sugar until well combined.
-
3Add the eggs one at a time, mixing well after each addition. Stir in the vanilla extract.
-
4Sift in the flour, cocoa powder, and salt. Gently fold the dry ingredients into the wet mixture until just combined.
-
5Fold in the chocolate chips, then pour the batter into the prepared pan and spread evenly.
-
6Bake for 28-32 minutes, or until a toothpick inserted in the center comes out with a few moist crumbs. Cool completely before slicing and serving.
Approximate Information for One Serving
Nutrition Disclaimers
Number of total servings shown is approximate. Actual number of servings will depend on your preferred portion sizes.
Nutritional values shown are general guidelines and reflect information for 1 serving using the ingredients listed, not including any optional ingredients. Actual macros may vary slightly depending on specific brands and types of ingredients used.
To determine the weight of one serving, prepare the recipe as instructed. Weigh the finished recipe, then divide the weight of the finished recipe (not including the weight of the container the food is in) by the desired number of servings. Result will be the weight of one serving.
Did you make this recipe?
Please consider Pinning it!!