
Let Me Tell You About This Cheesecake…
I swear, the first time I made this Witches’ Brew Swirl Cheesecake, I was convinced I'd invented magic—or at least a kitchen mess that tasted magical. Picture me, elbows-deep in cream cheese, trying to swirl spooky colors while my cat watched with that look that says, "Again with the baking?" But honestly, even if my first attempt looked more psychedelic than witchy, it was so good that no one cared. Now, every October, my niece asks for “the one with the purple goo.” If that’s not a win, I don’t know what is. (And yes, I do eat the extra batter with a spoon. No regrets.)
Why You'll Love This (Trust Me, You Will)
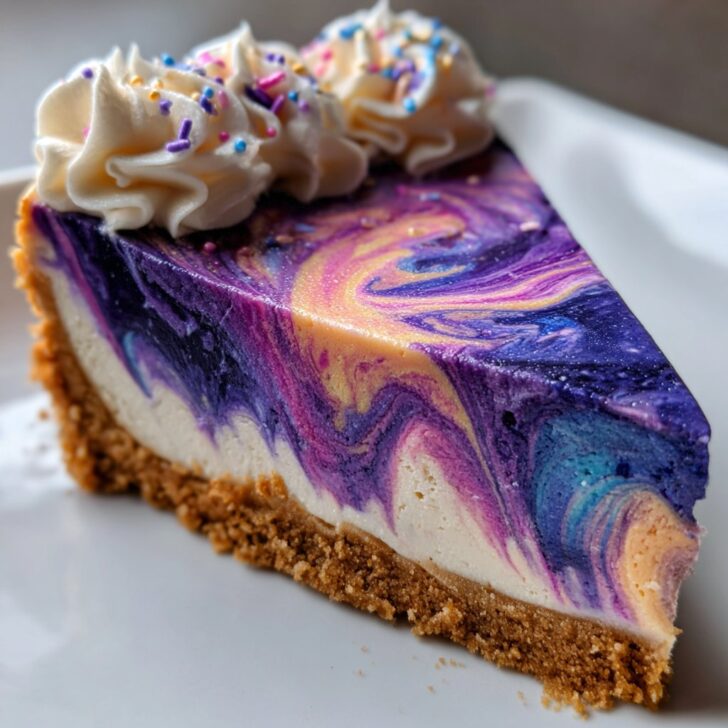
I drag this recipe out every single Halloween—even when I promise myself I’ll do something new. My family goes totally bonkers for it because it’s creamy, a little bit tart, and the swirl looks like something straight out of a storybook. Also, let’s be honest: the colors make it look like you spent hours, but really, it’s less work than trying to frost a cake nicely (which I still can’t do, so there’s that). Sometimes the swirls go haywire, but that just makes it more "witchy," right? Oh, and the crust—if you’re a crust person, you’ll probably double it. I have. Not sorry.
What You’ll Need (With My Usual Substitutions)
- 1 and ½ cups chocolate cookie crumbs (I use Oreos, but my granny always went with chocolate graham crackers—either is grand)
- ¼ cup melted butter (sometimes I just eyeball it, whoops)
- 3 (8 oz) packages cream cheese, softened (full-fat is best, but light works okay if you must)
- 1 cup granulated sugar (sub in coconut sugar if you’re feeling fancy, but it’ll taste a bit different)
- 3 large eggs (room temp, or at least not straight from the fridge—I forget half the time and it still works)
- 1 teaspoon vanilla extract (or a splash more, I won’t judge)
- ½ cup sour cream (Greek yogurt in a pinch, though it’s tangier)
- Food coloring gels: purple, green, and orange (liquid colors work, but gels pop more)
- Optional spooky sprinkles (I buy these here or just raid the grocery store shelf in October)
Let’s Make Some Magic: Directions
- Preheat your oven to 325°F (163°C). I usually forget and have to wait, but hey, faster if you remember. Grease a 9-inch springform pan, or just line it with parchment if you’re out of spray.
- Mix your cookie crumbs and melted butter in a bowl. I use my hands—less mess, somehow. Press it into the bottom of the pan, nice and tight. No need for perfection here.
- Bake crust for about 8 minutes. Take it out and let it cool a bit. This is when I snack on leftover crumbs—don’t skip that step.
- In a big bowl, beat cream cheese until smooth (I use a hand mixer, but a sturdy whisk if you’re feeling strong). Add sugar, beat again. Throw in eggs, one at a time, scraping the bowl as you go. (I always miss a spot—just do your best.)
- Mix in vanilla and sour cream. If it looks a bit lumpy, don’t panic. It’ll smooth out mostly—cheesecake batter always looks slightly suspicious to me.
- Now, scoop out ⅓ of the batter into two small bowls (so you have three bowls total). Add a good blob of purple gel to one, green to the second, orange to the third. Stir until the colors are vivid. Add more color if you like it wild.
- Pour the uncolored batter onto your cooled crust. Then dollop the colored batters all over the top, like blobs on a painter’s palette.
- Take a butter knife and gently swirl the colors. Don’t overdo it or it’ll turn brownish (ask me how I know). Just a few figure-eights.
- Bake for 45 to 55 minutes, or until the center is just set but a bit jiggly. I tap the side of the pan and if it wobbles just a bit in the middle, it’s ready. Don’t freak if it cracks a little—that’s why we have sprinkles. Turn off the oven, crack the door, and let the cheesecake sit for another 30 minutes (I always forget, and it’s fine. But it does help prevent big cracks).
- Cool fully, then chill in the fridge at least 4 hours (overnight is best, but who has that restraint?)
- Decorate with sprinkles, plastic spiders, or whatever else you fancy. Slice and serve, but know it disappears faster than you’d think.
Notes from My (Often Messy) Kitchen
- If the top browns a little, just cover it with more swirls or sprinkles. Problem solved.
- Sometimes I get lazy and skip the water bath—yes, it’ll crack more, but honestly, the taste is the same.
- I once tried swirling with a chopstick instead of a knife. It kinda worked, but the colors ran together more. Not awful, just different.
Variations I’ve Tried (Some Winners, Some...Not)
- Swapping the chocolate crust for crushed pretzels—salty, crunchy, actually pretty good. Not as popular with kids, though.
- Using raspberry puree for a blood-red swirl: looks cool, but makes the batter a bit runnier, so bake a few extra minutes. It tasted great but looked like a crime scene. Fun, though?
- One year I tried adding gummy worms on top. Pro tip: they melt in the fridge. Wouldn’t do it again!
Equipment—But You Can Improvise
- 9-inch springform pan (if not, use a regular cake pan and line it with parchment—just makes removing trickier)
- Hand mixer or sturdy whisk (I’ve done it with a fork in a pinch, just takes ages)
- Mixing bowls—three is ideal, but I’ve rinsed and reused the same one when needed
- Butter knife for swirling. Or a chopstick, I guess (see above!)


How to Store It (If It Lasts That Long)
Store leftovers in the fridge, covered, for up to 4 days—though honestly, in my house it never survives more than a day and a half. If you’re somehow left with slices, I sometimes wrap them up and freeze for a sneaky midnight snack later. Freezes pretty well, but the colors might get a bit blotchy. No big deal if you ask me.
How I Like to Serve It (You Do You)
I usually serve big wedges with a dollop of whipped cream (straight from the can is fine—no shame). Sometimes we add gummy eyeballs for extra drama, but only if the kids are around. My uncle insists on coffee with his slice. Personally, I’ll take a glass of cold milk. If it’s a party, set the cheesecake on a black tray with a few fake spiders nearby. Spooky, but not too spooky—nobody wants to eat plastic bugs. Or do they?
Lessons Learned (AKA: Pro Tips)
- I once tried rushing the chilling step because I was late for a party—disaster. The cheesecake was mushy and fell apart. Don’t do what I did. Just let it cool.
- If you swirl too much, the colors turn a rather unappetizing gray. Less is more. Seriously.
- Bake on a sheet pan if you’re accident-prone. I spilled batter all over my oven once (it smelled like burnt sugar for days).
FAQ (Real Questions I’ve Heard!)
- Can I use low-fat cream cheese? You can, but I think it’s less creamy. Still tasty though! Actually, I find it works better if you add a splash more sour cream.
- Do I have to use food coloring? Nope! It’ll still taste great, just won’t be as much fun. Maybe swirl in some cocoa powder for a marbled look, or skip the swirl.
- Is a springform pan really necessary? It’s helpful, but not a deal-breaker. I’ve used deep pie dishes before (just grease them well and maybe line with parchment). Removing is messier but possible.
- How do I avoid cracks? A water bath helps, but I honestly skip it sometimes. Turning off the oven and letting it cool inside makes a bigger difference for me.
- Where do you get those awesome sprinkles? I usually grab them online at Bakery Depot or just run to the supermarket—depends how late I remember I need them!