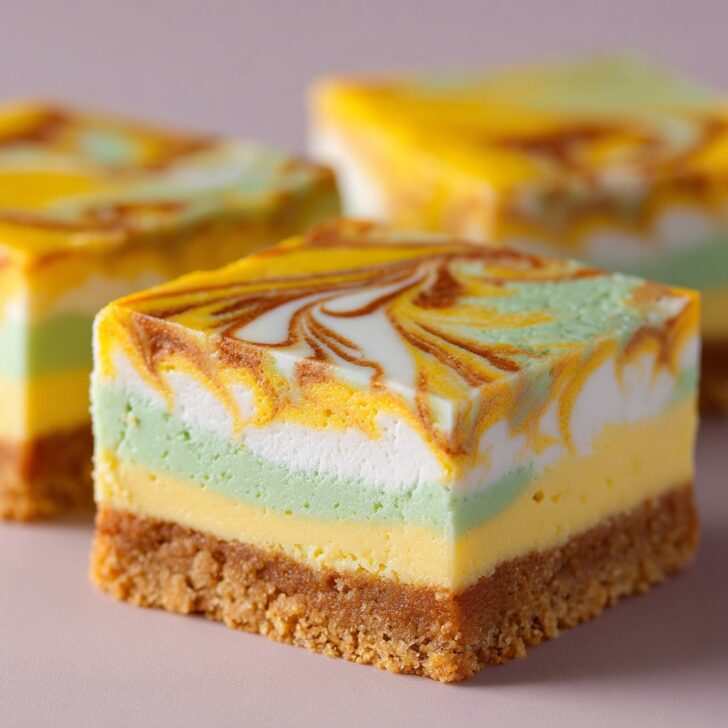
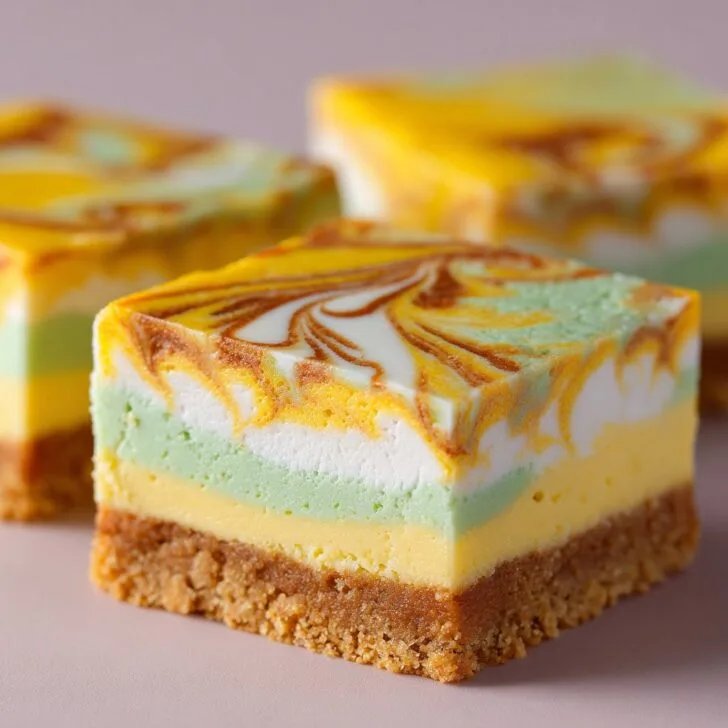
Let's Talk About These Bars (and a Little About Me)
So, I first baked these Velvet Swirl Citrus Symphony Bars on a rainy Sunday when I was meant to declutter the hallway cupboard—safe to say, the cupboard’s still a mess, but these bars have become a bit of a family legend. You know those recipes that send your kitchen into a sort of organized chaos, but then everyone wanders in, noses twitching? Yup, that’s this one. Oh, and once, my cousin tried to eat half the pan before dinner—never again (well, maybe just once more if he's reading this; hi Dan!).
Why You’ll Love This (Or At Least, Why I Do)
I make these whenever I want to fake fancy without hours of effort. My family goes a bit wild for them because they’ve got that creamy citrus zing, but not the kind that smacks you in the face like an old lemonade stand. Plus, if I’m honest, sometimes I just want to swirl stuff and see what patterns I get. (The day I got a shape that looked like a sheep? Peak baking joy.) If you’ve ever tried to make a lemon bar and had it come out, uh, more like scrambled eggs, I feel you. These are much more forgiving.
Gather Up Your Ingredients (And a Backup Plan or Two)
- 1 cup (about 120g) plain flour – I sometimes use whole wheat flour if I run out, makes it a bit nuttier
- ½ cup (115g) unsalted butter, softened – but honestly, I’ve used salted and just skipped the pinch
- ¼ cup powdered sugar – or regular sugar if the grocery run didn’t happen
- 1 cup granulated sugar
- 2 large eggs (room temp is best, but who always remembers?)
- Zest of 1 large orange, plus juice (about ¼ cup) – lemons work too, or even those little mandarins if you’re feeling posh
- Zest of 1 lime, plus juice (about 1 tbsp)
- ¼ cup cream cheese (my gran swears by Philadelphia, but store-brand is just fine)
- 1 teaspoon vanilla extract
- 1 tablespoon cornstarch (I’ve forgotten it before—it still worked, just a tad softer)
- Pinch of salt
How I Actually Make Them (With a Couple Wobbles)
- First, preheat your oven to 175°C/350°F. Grease a small square tin (about 8-inch). I sometimes just line it with parchment, but if you forget, just butter the heck out of it.
- Mix the base. In a bowl, toss together flour, powdered sugar, and salt. Rub in the butter with your fingers (or a pastry blender if you’re fancy—I usually just use my hands) till it looks like crumbly sand. Press it into your tin.
- Bake for 15 minutes. It won’t look golden, more like slightly set. That’s fine. Sometimes I poke the center to check—don’t overthink it.
- Meanwhile, work on the filling. Whisk eggs and granulated sugar till smooth and pale. Add the citrus zests and juices, vanilla, and cornstarch. Here’s where I usually get impatient and beat in the cream cheese, even though it’s meant to be gentle. (It gets a bit lumpy sometimes; doesn’t matter.)
- Swirl it up. Pour the citrusy goodness over the base. Drop little blobs of extra cream cheese on top and swirl with a knife. This is the fun bit. Go wild; it’s only lunch if you’re lucky.
- Bake again for about 18–22 minutes. It should be just set. If you wiggle the pan and it shimmies a bit, that’s perfect. Don’t panic if it cracks a bit—it’s meant to have character.
- Cool completely. I know, I know—but if you cut them too soon, they’ll go a bit wonky (I mean, still tasty, but messy). Slice into bars, dust with extra powdered sugar if you want. Or not. I usually forget.
Notes (Aka, What I’ve Learned the Hard Way)
- If you overbake, they get dry. But even then, still good with tea.
- I once tried using only lime—tasted like a cleaning product. Stick to the orange-lime duo.
- Don’t sweat a bit of lumpy batter. It smooths out in the oven.
- If your cream cheese is cold, just microwave it for a few seconds. (But not too long or it’ll go weird.)
Variations I’ve Attempted (and Sometimes Regretted)
- Swapping in lemon for orange: pretty zippy, but almost too sharp for my lot.
- Tried a ginger snap crust once—tasted oddly like Christmas and summer fighting. Not my best.
- Added a handful of chopped pistachios on top—actually, that one was pretty good. Crunchy!
What You’ll Need (and What to Do If You Don’t Have It)
- 8-inch square baking pan (or any similar-sized dish—just watch the cooking time)
- Mixing bowls (one large, one medium—but I’ve used soup pots when I’m out of clean bowls)
- Whisk (a fork does the job, in a pinch)
- Microplane or grater for zest—it’s fine if you just chop it up tiny with a knife, honestly


How to Store ’Em (If They Even Make It That Long)
Once cooled, these keep in an airtight tin or a Tupperware in the fridge for about 3 days—but honestly, in my house they never last more than a day! The edges dry out a bit after day two, but that’s perfect with coffee, or so my dad says.
How I Like to Serve Velvet Swirl Citrus Symphony Bars
We do this thing where we pile them on a big plate and take them outside if it’s sunny (not often, but when it happens, we’re out there like lizards). Sometimes I top with a dollop of Greek yogurt and a scatter of berries. One time my sister dipped hers in hot chocolate. Odd, but, not bad!
Pro Tips Learned Through (Occasional) Disaster
- Don’t skip cooling time. I tried to rush this once for a party—ended up with citrus mush. Tasty, but not ideal for serving.
- Actually, I find it works better if you zest the fruit directly over the bowl—the oils go in, makes a real difference.
- If you want neat bars, run your knife under hot water between cuts. Or just embrace the rustic look. I usually do.
FAQ (People Really Ask Me These, I Swear)
- Can I use just one citrus fruit? Sure, but I think the mix gives it more zip. Orange alone is a bit sweet; lime alone, a bit too sharp.
- Do I have to use cream cheese? No, but then it’s not really velvet. You could try mascarpone, but I tried it and found it a bit heavy. Actually, on second thought, maybe skip that.
- Can I freeze these bars? You can, but the texture changes. They’re fine for sneaky midnight snacks, but for sharing, fresh is best.
- What if I don’t have cornstarch? Some folks swap in plain flour, but use a little less. It’s a bit softer, though, so don’t blame me if it’s gooey!
- Do they travel well? Surprisingly, yes. Just pop baking paper between the layers. Or eat them all before you leave, like my mate James did on our last picnic. Cheeky!
Just a Quick Side Note, Since I’m on a Roll
I found this lemon square recipe at King Arthur Baking that got me started, but honestly, I tweaked it a lot. And if you want to geek out about citrus zest, Serious Eats has a nerdy guide—super helpful if (like me) you once grated your knuckles by mistake. Been there, mate.
Anyway, if you make these, let me know how your swirl shapes turn out (bonus points for animal shapes). Happy swirling!


Ingredients
- 1 cup all-purpose flour
- ½ cup unsalted butter, softened
- ¼ cup powdered sugar
- 2 large eggs
- ½ cup granulated sugar
- 2 tablespoons fresh lemon juice
- 2 tablespoons fresh orange juice
- 1 teaspoon lemon zest
- 1 teaspoon orange zest
- ¼ cup cream cheese, softened
- ¼ teaspoon salt
Instructions
-
1Preheat the oven to 350°F (175°C). Line an 8x8-inch baking pan with parchment paper.
-
2In a bowl, mix flour, powdered sugar, and softened butter until a crumbly dough forms. Press evenly into the prepared pan to form the crust.
-
3Bake the crust for 15 minutes, or until lightly golden. Remove from oven and set aside.
-
4In another bowl, whisk together eggs, granulated sugar, lemon juice, orange juice, lemon zest, orange zest, cream cheese, and salt until smooth and creamy.
-
5Pour the citrus filling over the baked crust. Use a knife or spatula to swirl the mixture for a marbled effect.
-
6Bake for 20 minutes, or until the filling is set. Cool completely before slicing into bars and serving.
Approximate Information for One Serving
Nutrition Disclaimers
Number of total servings shown is approximate. Actual number of servings will depend on your preferred portion sizes.
Nutritional values shown are general guidelines and reflect information for 1 serving using the ingredients listed, not including any optional ingredients. Actual macros may vary slightly depending on specific brands and types of ingredients used.
To determine the weight of one serving, prepare the recipe as instructed. Weigh the finished recipe, then divide the weight of the finished recipe (not including the weight of the container the food is in) by the desired number of servings. Result will be the weight of one serving.
Did you make this recipe?
Please consider Pinning it!!