Cake Stories Over Coffee—Why I Keep Coming Back to This One
You ever find yourself with a bunch of pears past their prime, sitting next to a jar of ginger you forgot you bought? That’s how my upside down pear gingerbread cake was born (well, sort of). I call it my 'rainy day cake'—a treat I bake when the whole house is craving something warm, spicy, and a bit, you know, sticky. My friend Sarah once tried it and insisted I bring it to every potluck, which is funny because the first time, I actually forgot the egg (oops). It turned out a little dense that time, still tasted amazing though. And don’t get me started on the aroma—honestly, if someone could bottle it, I’d be first in line. I’ll sprinkle in some stories and confessions as we go; hope you don’t mind.
Why You'll Love This Cake (At Least, Why I Do)
I make this when the weather’s gone a bit moody or when I’m not in the mood to fuss (which, let’s be honest, is often). My family loses their marbles for it because: a) it looks fancy, like you know what you’re doing, and b) it’s spicy-sweet with those softened pears on top (or, bottom… you know what I mean). And, sometimes when I’m in a rush, I swap pears for apples (still good, but pears are just… juicier?). The gingerbread part is deeply comforting—sort of like a hug from your favourite uncle except, you also get dessert. Oh, and one time I tried to flip it too soon; learn from my mistakes and let it cool a bit!
Here’s What You’ll Need (With Honest Swaps)
- 3 medium pears (Bartlett or Bosc—any will do, even apples in a pinch. I once used some very firm grocery store pears and they softened up okay!)
- ⅓ cup brown sugar (dark or light; I honestly just use whatever’s not stuck together in the cupboard)
- 2 tablespoons butter (sometimes I use margarine, don’t tell my granny)
- 1 ½ cups all-purpose flour (grandma insists on Gold Medal, but I cheap out and get store brand—no shame)
- ½ cup molasses (the robust stuff. On occasion, I used honey, but it isn’t the same—I tried, let’s move on)
- ½ cup brown sugar (again, either variety)
- 1 large egg (cracked, no shell! Unless you want crunch)
- ½ cup milk (or almond milk, which worked surprisingly well once when I ran out halfway through)
- ¼ cup neutral oil (vegetable, canola… tried olive oil once, not great!)
- 2 teaspoons ground ginger (fresh is lovely but I’m not always that energetic)
- 1 teaspoon cinnamon
- ½ teaspoon ground cloves (optional, but the spice mix just feels right)
- ½ teaspoon baking soda
- ½ teaspoon baking powder
- ¼ teaspoon salt
Let’s Bake (Don’t Overthink It!)
- First, preheat your oven to 350°F/175°C. I know, basic, but worth stating.
- Grease a 9-inch round cake tin. If you’re short on parchment paper, just butter it good and proper. My aunt swears by using the wrapper from a stick of butter as a greasing tool (it actually works).
- Peel, core, and slice those pears—about ¼-inch thick slices. Don’t stress if they’re not perfect. Arrange them pretty-ish on the bottom of the tin. This is where I get all artsy, and then forget you won’t see my pear masterpiece until after baking. Oh well…
- Sprinkle ⅓ cup of brown sugar over the pears, then dot with 2 tablespoons butter. Just chop it up and scatter it like little pebbles—doesn’t have to be exact. Pop the tin in the oven for about 8 minutes (gets the pears sweating, helps later).
- In a bowl, whisk together flour, ginger, cinnamon, cloves, salt, baking powder, and soda. No need for fancy sifting—unless you’re avoiding lumps which, fair game.
- In another bowl, mix the molasses, brown sugar, egg, milk, and oil until smooth. This is the stage where I sneak a taste—molasses is delicious even raw.
- Combine wet and dry mixtures gently, just until mixed; batter’s going to be thick but that’s what you want. Doesn’t need to be perfectly smooth.
- Retrieve the tin from the oven (careful, it’ll be hot!) and pour your batter over those syrupy pears.
- Bake for 35-40 minutes, or until a toothpick comes out nearly clean from the middle. Sometimes it looks a bit wobbly at the centre; it’ll finish setting as it cools. Don’t panic if the top is dark.
- Alright, here’s the slightly weird bit: let it cool for 10-15 minutes in the pan. Not longer, or the topping will glue itself to the tin. Run a knife around the edge, flip carefully onto a plate (I always hold my breath for this part). If a pear sticks, just nudge it back on—no one will know.
Stuff I’ve Learned: Odd Notes Form Experience
- Letting the pears and butter caramelise in the oven before adding batter makes a big difference. I tried skipping this once—cake tasted fine, but pears weren’t gooey enough.
- If the cake seems underbaked, pop it back in for 5 minutes (cover loosely with foil if it’s browning too much).
- On second thought, use a springform pan if you want a fuss-free flip, but regular tins are fine too.
I’ve Messed With Variations (Some Good, One Not So Much)
- Swapped pears for apples—works, but loses that melting texture. Figs? Don’t bother. Too mushy.
- Used half whole-wheat flour once for pretend-health—but honestly, I like all-purpose better (it’s less dense). Up to you!
- Tried spiking the batter with a shot of dark rum; would recommend if you’re into that.
Do You Need Fancy Equipment?
I use a basic 9-inch tin, sometimes a springform (but, confession, I had to patch a leak with foil once). No stand mixer needed—a whisk or just a fork’s fine. If you really don’t have a proper cake tin, I made this in a Pyrex once… just lower the oven a smidge and watch the edges. (Pyrex is forgiving.) Oh, and check out King Arthur’s pan guide if you want details on pan swaps.


How to Store It (But It Probably Won’t Last)
This cake keeps in an airtight container at room temp for 2 days, or in the fridge for 4. But seriously, in my house it never lasts that long—my husband has been known to “sample” half the cake before I even serve it. It tastes somehow even better the next day; flavors deepen up. Freezes okay, just wrap in clingfilm or foil. Here’s a handy guide to freezing cakes if you’re a planner.
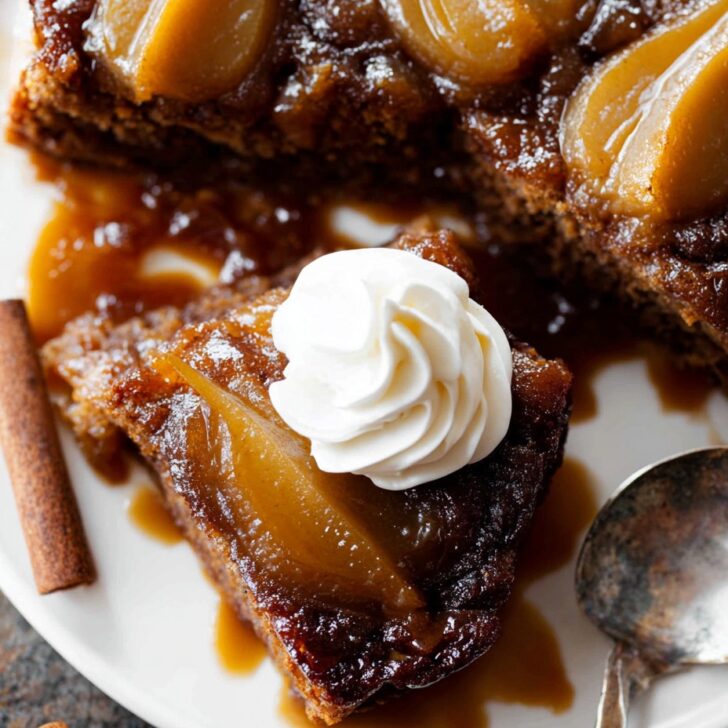
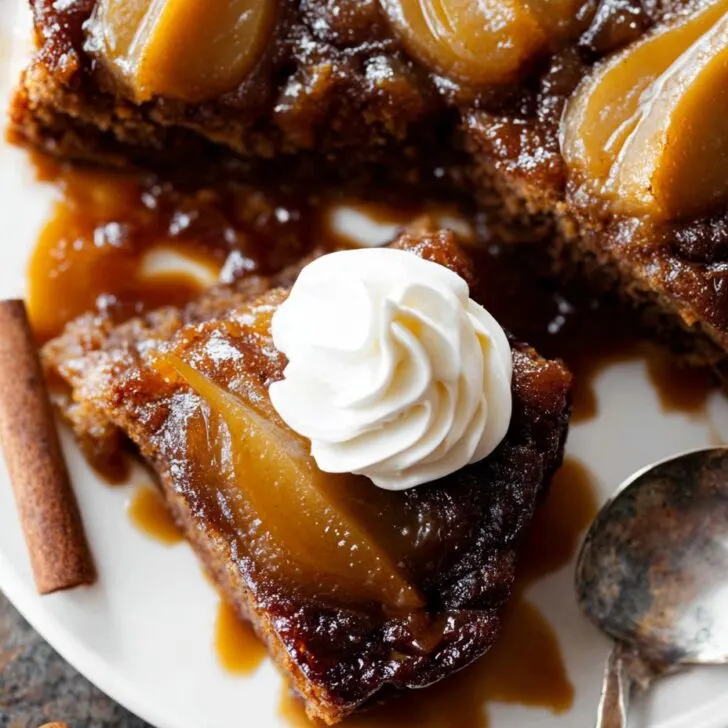
Serving Up—Bring Ice Cream, Trust Me
We usually serve this warm with a scoop of vanilla ice cream, though my uncle swears by a drizzle of double cream (must be a British thing). Occasionally, I dust with powdered sugar if I’m feeling extra. Movie night with a cuppa and a thick slice is tradition at ours. Also, if you’re feeling posh, throw some candied ginger on top.
Pro Tips You Wish You Knew (So You Don’t Repeat My Snafus)
- Don’t rush the cooling before flipping— unless you want a sticky disaster on your hands. It’s tempting, I know, but patience is your friend here.
- I once forgot to tap the tin to release bubbles; ended up with odd holes inside. Not the end of the world, but do give it a gentle tap!
- If your pears are super firm, let them bake a couple extra minutes before pouring the batter. Saves you a crunchy disappointment later.
FAQ— Your Actual Questions (Or Those I’ve Been Asked!)
- Can I use tinned pears?
- Sure can! Drain ’em well, maybe pat dry. The cake might be a bit moister, but it’s fine. Actually, I almost prefer it in a pinch.
- How do I keep the pears form sticking to the pan?
- Loads of butter or parchment paper helps. But honestly, even if one sticks, just patch it on top—no one’s judging!
- I don’t have molasses—what next?
- You could try honey, golden syrup, or treacle, but the gingerbread oomph comes from molasses. Try not to skip it if possible.
- My cake’s a bit dense—did I do something wrong?
- Maybe overmixed, or underbaked (been there). Even if it’s a bit stodgy, a warm slice with ice cream is still a win in my book.
- Can I double the recipe?
- Yep, but bake longer—add 10-15 minutes and keep an eye out.
- Do I REALLY have to peel the pears?
- Nope! Sometimes I’m lazy and leave skins on. It adds a bit of texture; totally up to you.
Phew. If you’ve gotten this far, I owe you cake! (Or, at least, a heartfelt good luck and a thumbs up for trying a new baking adventure.) And if you want to see what this cake almost looks like, check #peargingerbreadcake on Instagram—you’ll see way more photogenic ones than mine, but the taste is what counts, right?


Ingredients
- 3 ripe pears, peeled, cored, and sliced
- ¼ cup unsalted butter (for topping)
- ½ cup packed brown sugar (for topping)
- 1 ½ cups all-purpose flour
- 1 teaspoon ground ginger
- ½ teaspoon ground cinnamon
- ¼ teaspoon ground cloves
- ¼ teaspoon salt
- 1 teaspoon baking soda
- ½ cup unsalted butter, softened
- ½ cup brown sugar
- 2 large eggs
- ⅔ cup unsulphured molasses
- ½ cup buttermilk
Instructions
-
1Preheat the oven to 350°F (175°C). Grease a 9-inch round cake pan.
-
2In a small saucepan, melt ¼ cup butter and ½ cup brown sugar over medium heat. Pour the mixture into the prepared pan and arrange the sliced pears over the caramel.
-
3In a bowl, whisk together flour, ginger, cinnamon, cloves, salt, and baking soda.
-
4In a large bowl, cream ½ cup softened butter and ½ cup brown sugar until light and fluffy. Beat in eggs, one at a time, then mix in molasses.
-
5Add the dry ingredients to the wet mixture alternately with buttermilk, mixing just until combined.
-
6Pour the batter over the pears in the cake pan. Bake for 40-45 minutes, or until a toothpick inserted in the center comes out clean. Cool for 10 minutes, then invert onto a serving plate and let cool before serving.
Approximate Information for One Serving
Nutrition Disclaimers
Number of total servings shown is approximate. Actual number of servings will depend on your preferred portion sizes.
Nutritional values shown are general guidelines and reflect information for 1 serving using the ingredients listed, not including any optional ingredients. Actual macros may vary slightly depending on specific brands and types of ingredients used.
To determine the weight of one serving, prepare the recipe as instructed. Weigh the finished recipe, then divide the weight of the finished recipe (not including the weight of the container the food is in) by the desired number of servings. Result will be the weight of one serving.
Did you make this recipe?
Please consider Pinning it!!