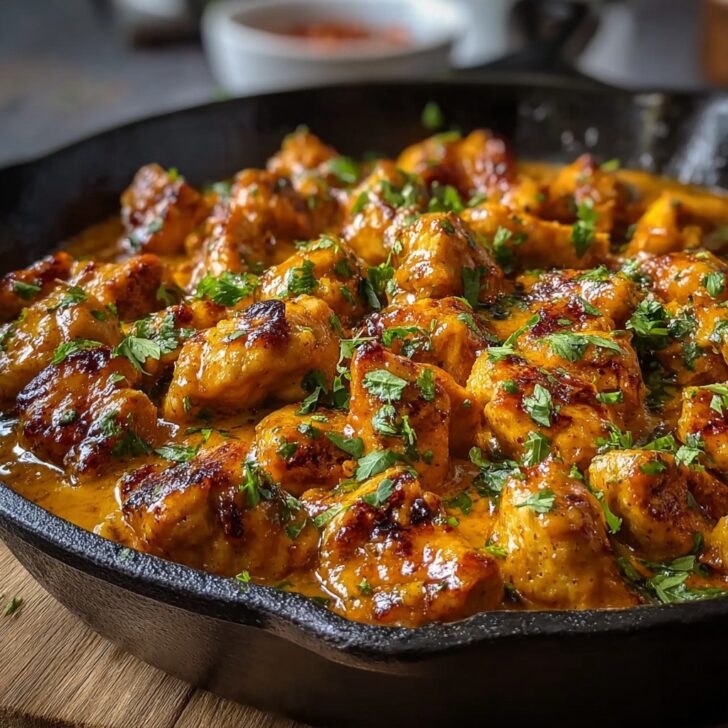

That One Skillet Dinner That Always Delivers
Okay, if I'm being straight with you, there are days (Mondays. Why is it always Mondays?) where I crave something that's just comfort on a plate. Enter my version of Texas Roadhouse Butter Chicken Skillet. The first time I tried making something like this, I accidentally used sweet paprika instead of smoked and, well, let's just say my husband still laughs about "that flavor adventure." But honestly, there's just something about a hot skillet dinner that sort of tells everyone: hey, it's time to eat and feel good, even if the rest of the day felt like being chased by angry ducks.
Why You'll Love This (Or at Least Why My Crew Does!)
I make this skillet chicken anytime I need to win back my family's good graces—especially after a "creative pasta night" that flopped. My kids mop up the buttery sauce with whatever bread is sitting around (I've even seen a tortilla used in a pinch). You know those recipes you grab in a panic when you're kinda exhausted, but still need to, you know, put real food on the table? This is it. And if I'm honest, there's something satisfying about hearing the sizzle and getting that golden crust on the chicken. Oh, and it's so much easier than it sounds. Trust me, I've tried the complicated version—never again. This is the one that sticks.
What You’ll Need (And What I Sometimes Swap)
- 4 boneless, skinless chicken breasts (thighs work if you're after richer flavor; occasionally, I just use whatever's on sale—it'll work)
- Salt and pepper to taste
- 1 teaspoon smoked paprika (sometimes I use sweet if that's all I've got—still tasty)
- 1 teaspoon garlic powder (fresh is fancy, but who has time?)
- 2 tablespoons olive oil (or... whatever cooking oil is close at hand)
- 3 tablespoons salted butter (my grandmother swore by Kerrygold, but I just use the store brand)
- 3 cloves garlic, minced (if you like lots of garlic, double it; I won't judge)
- 1 cup heavy cream (I’ve stretched this with half-and-half, or even whole milk and a bit of cream cheese in a pinch)
- ½ cup chicken broth (bouillon cube and water is totally fine—I've done it often)
- ½ cup grated Parmesan cheese (pre-shredded works if that's what you have)
- Fresh parsley, chopped, for garnish (sometimes I use dried—don’t sweat it)
Alright, Let’s Get Cooking (Even If You’re Distracted)
- Start by seasoning your chicken with salt, pepper, paprika, and garlic powder. Rub it all over—get in there! If you’re using thighs, just adjust cooking time a bit, they're more forgiving.
- Get your big skillet (cast iron is king here, but any old large pan will do). Heat up the oil over medium-high heat. When it shimmers, lay in the chicken—don’t crowd it.
- Sear the chicken for about 5-6 minutes per side, til it's golden and just cooked through. If the house fills with smoke, maybe turn the heat down (speaking from, err, experience!). Remove the chicken and let it rest on a plate, loosely tented with foil. Or, you know, just cover it with another plate if you’re out of foil.
- Add butter to the empty pan—let it melt. Toss in the minced garlic and stir it around til you can smell it, but don’t let it go brown (burnt garlic’s a heartbreaker).
- Pour in the cream and chicken broth, scraping up those tasty browned bits at the bottom. Bring it to a low simmer.
- Slowly add the Parmesan cheese. Whisk like you mean it, or kinda lazily if you’re texting a friend at the same time. Let the sauce thicken up—takes about 3-5 minutes.
- Slide the chicken back in and spoon the sauce all over. Simmer gently for another 2-3 minutes, til it’s all cozy together and the chicken’s heated through.
- Toss chopped parsley on top. (I sometimes skip this step. Looks nice though.)
- This is the moment I always sneak a taste. You probably should too—just to, you know, check flavors.
Personal Notes—Aka Things I Learned the Hard Way
- The sauce thickens more as it cools, so don’t panic if it’s runny at first. It finds its groove.
- If you forget to temper the cream (by mixing with warm broth first), it may separate a little. Still delicious. Swirl it—no one notices.
- I once used all milk instead of cream and...well, it wasn't quite the same level of magic. Still edible, but more 'weekday than wow'.
Variations to Try (Some Winners, Some Meh)
- Once I tossed in mushrooms. Really hearty!
- Squeezing in lemon at the end brightens it up, though my kids aren't fans.
- Swapped the chicken for shrimp one night—tasty, but needed more garlic. Actually, maybe double the garlic if you go the seafood route.
- Tried tossing in spinach...and it turned everything kind of green and made my youngest suspicious. YMMV.
If You Don't Have the 'Right' Equipment
Look, everyone says a cast iron skillet is essential, and it's great if you have it, but honestly I sometimes just use a big nonstick pan. Works just fine. Once, I did this in a Dutch oven—no complaints from anyone except my arm (it’s heavy!).


How to Store (If There Are Leftovers, Which...)
Stick any leftovers in an airtight container in the fridge. Lasts about 2-3 days. Though honestly, in my house, this rarely makes it to the next day—someone always finds it during a midnight snack raid.
Here's How We Serve It (But Do Your Own Thing!)
In my family, we spoon this over mashed potatoes (homey!), but it’s terrific with buttered noodles or even over a hunk of sourdough. My cousin likes it with rice, which I totally get. I tried it with roasted cauliflower—wasn’t a hit with the kids, but I loved it. Family dinner, family rules, right?
Pro Tips from My Many Minor Disasters
- I once tried to rush the simmer stage—ended up with cheese globs. Patience pays off; let the cheese melt slow.
- If you sear the chicken too hot, it'll look picture-perfect but be raw inside. Go medium-high, not full blast.
- Actually, I find it works better if you let the chicken rest for a couple minutes before slicing—stays nice and juicy.
FAQ: Your Questions, Answered (For Real)
- Can I use chicken thighs? Oh for sure, and honestly they can be juicier than breasts. Just cook a little longer (maybe an extra 2 min per side).
- Is there a dairy-free version? I haven’t cracked the code yet, but I’ve seen folks use coconut cream and a vegan parm—a bit different, but worth a try!
- What should I do if my sauce splits? Don’t toss it! Just stir in a splash more cream and whisk it back together—rescues it 8 out of 10 times (oddly specific, I know).
- Can you freeze it? Technically, yes, but the sauce goes a bit funny on thawing—grainy. I’d eat it fresh if you can.
Long story short: this recipe lives at the crossroads of easy and delicious. If you want more ideas for simple skillet dinners, I sometimes browse Budget Bytes (love her cozy meals), and for sides I peek at Sally’s Baking Addiction (her rolls, omg). Life’s too short for dinner stress, friend. Dig in!


Ingredients
- 1.5 lbs boneless skinless chicken breasts, cut into strips
- 4 tablespoons unsalted butter, divided
- 1 tablespoon olive oil
- 1 medium onion, finely diced
- 3 cloves garlic, minced
- ½ cup chicken broth
- ½ cup heavy cream
- 1 teaspoon smoked paprika
- ½ teaspoon dried thyme
- Salt and black pepper to taste
- 2 tablespoons chopped fresh parsley (optional, for garnish)
Instructions
-
1Season the chicken breast strips with salt, black pepper, smoked paprika, and dried thyme.
-
2Heat 2 tablespoons of butter and the olive oil in a large skillet over medium-high heat. Add the chicken strips and cook for 4-5 minutes per side until browned and cooked through. Remove chicken from skillet and set aside.
-
3In the same skillet, add the remaining 2 tablespoons of butter. Add diced onion and sauté for 2-3 minutes until softened. Add garlic and cook for 1 minute more.
-
4Pour in the chicken broth, scraping any browned bits from the skillet. Stir in heavy cream and bring to a gentle simmer.
-
5Return the cooked chicken to the skillet and spoon sauce over the pieces. Simmer for 3-4 minutes until the sauce thickens slightly and the chicken is heated through.
-
6Garnish with chopped fresh parsley if desired. Serve hot with your choice of side.
Approximate Information for One Serving
Nutrition Disclaimers
Number of total servings shown is approximate. Actual number of servings will depend on your preferred portion sizes.
Nutritional values shown are general guidelines and reflect information for 1 serving using the ingredients listed, not including any optional ingredients. Actual macros may vary slightly depending on specific brands and types of ingredients used.
To determine the weight of one serving, prepare the recipe as instructed. Weigh the finished recipe, then divide the weight of the finished recipe (not including the weight of the container the food is in) by the desired number of servings. Result will be the weight of one serving.
Did you make this recipe?
Please consider Pinning it!!