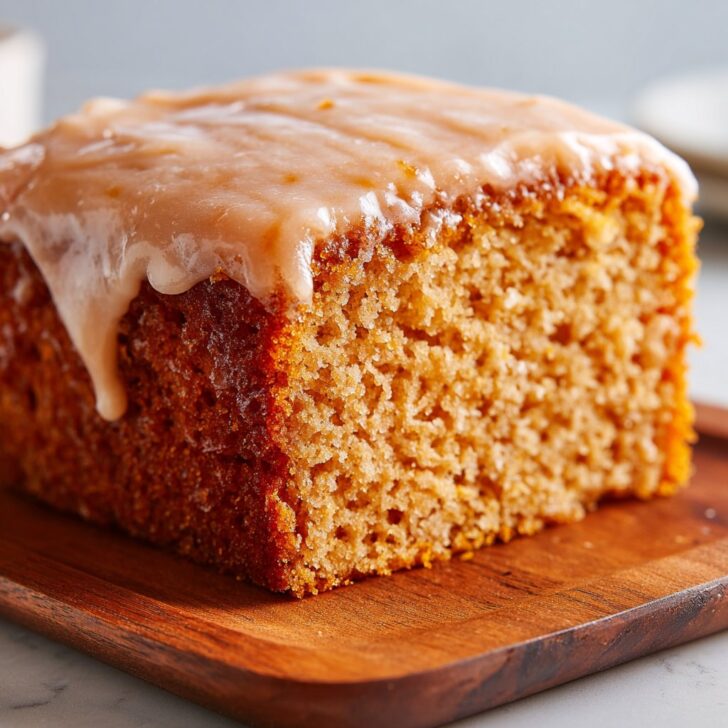
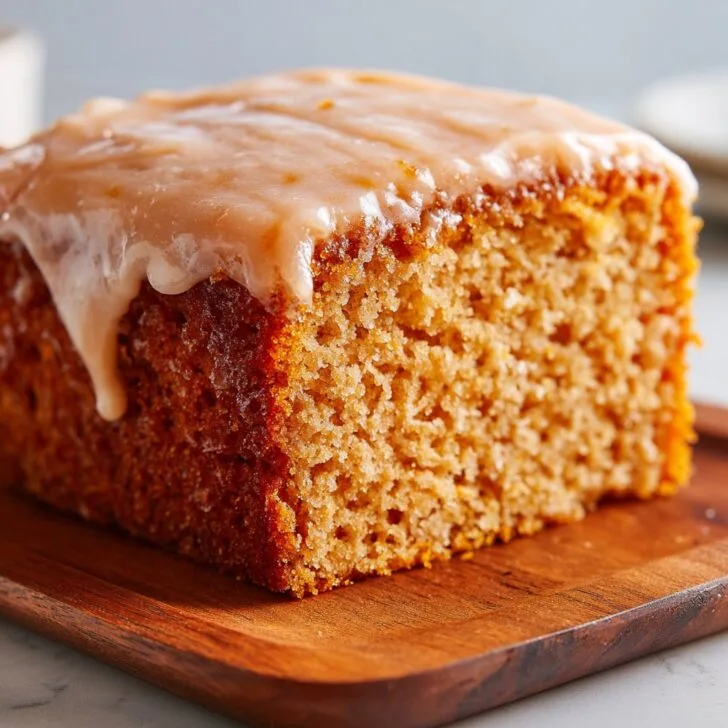
So, Here’s the Story Behind This Cake
Alright, I have to let you in on a little secret—this Sweet Potato Butter Cake recipe is my not-so-hidden weapon for rainy days or just any Sunday when I want the house to smell amazing (which is always, let’s be honest). The first time I baked it, I accidentally used too much butter (how does one even measure 'a stick and a bit'?), and it turned out so rich my brother demanded I make it every fall. He calls it "the cake that could end wars"—I mean, he exaggerates, but still. Actually, my neighbor once dropped by "just to return a bowl" and left with half the cake, so you’ve been warned.
Why You’ll Love This (Trust Me, You Will)
I make this when I want something both homey and just a smidge fancy. My family goes absolutely bonkers for it—maybe it’s the buttery crust or the fact that sweet potatoes make it feel almost healthy (lies we tell ourselves, am I right?). And, you know, I get a kick out of sneaking in veggies where nobody expects them. Sometimes the batter looks like an orange mess, and every time, my husband peeks into the kitchen asking what the heck I’m doing. But the cake always vanishes before it cools. If you’re impatient, like me, you’ll appreciate how forgiving it is – I’ve forgotten to sift the flour, used cold butter, swapped spices, and it still tastes like autumn in cake form.
What You’ll Need (And What I’ve Swapped In)
- 2 medium sweet potatoes (about 2 cups, mashed) – I’ve used canned puree in a pinch. Doesn’t make a big difference, I promise.
- 1 cup (225g) unsalted butter, room temp – Salted works too, just skip added salt later.
- 1 and ½ cups sugar – Brown sugar is nice for a slightly caramel vibe.
- 3 large eggs – My grandma always said farm eggs are best, but hey, supermarket ones work just fine.
- 2 cups all-purpose flour – Have tried half oat flour; it’s denser but not bad!
- 1 teaspoon baking powder
- ½ teaspoon salt
- ½ cup whole milk – I’ve made it with oat milk, actually, and didn’t hate it.
- 1 teaspoon vanilla extract (real is best, but I’ve totally used the fake stuff)
- 1 teaspoon cinnamon (sometimes I throw in a pinch of nutmeg, too)
Let’s Make This Sweet Potato Butter Cake!
- Roast (or cheat) the sweet potatoes: If you’re feeling fancy, roast them at 400°F (200°C) for about 45 mins, then scoop out the flesh. Or microwave them—poke a few holes, toss in, cook 8-10 mins until squishy. Let cool, then mash. Don’t worry if it’s a little lumpy; honestly, the bits are sort of great.
- Prep the pan: Butter (generously!) and flour a loaf pan or a cake tin. I sometimes just line it with parchment because scrubbing pans is not my idea of fun.
- Mix butter and sugar: Beat butter and sugar together until fluffy. This step always takes longer than I think, like 4-5 minutes. Sometimes I wander off and overmix—still turns out fine, so no stress.
- Add the eggs: Crack in eggs one at a time, mixing in between. It might look a little separated; that’s normal. Don’t panic.
- Dry stuff, meet wet stuff: Whisk flour, baking powder, salt, cinnamon (and nutmeg if you like) together. Add a bit of this to the wet mixture, alternate with milk, until everything’s in. Start and end with dry. (This is where I sneak a taste. If you say you don’t, I don’t believe you.)
- Now, the spud star: Fold in mashed sweet potatoes and vanilla. If it looks thick, that’s right. If it looks weirdly orange and lumpy, even better.
- Bake: Pour into the pan. Bake at 350°F (175°C) for 50-60 minutes. Stick a skewer in; if it comes out mostly clean, you’re golden.
- Cool-ish: Let it cool in the pan for 15-20 minutes, then turn out. Or, just slice warm and deal with crumbs everywhere. That’s what I usually do.
Some Notes I Wish I’d Known Sooner
- If you over-whip the eggs and butter, it’ll still work, just maybe a little crumbly. Not the end of the world.
- Actually, I find it works better if you use slightly undercooked sweet potatoes—they mash chunkier and taste sweeter. Or maybe it’s just me?
- I once tried skipping parchment paper and spent 20 minutes chiseling out cake. Parchment is your pal.
Wild Variations I’ve Tried (And One I Regret)
- Added a handful of chocolate chips. Good? Yes. Necessary? Not really, but my niece loved it.
- Swapped half the flour for almond meal. Nutty and nice, but a bit crumbly. Maybe not company cake, but snack cake.
- Once tried coconut oil instead of butter. Nope, didn’t love it, tasted odd—stick with the butter, trust me.
- Stirred in a sprinkle of dried cranberries once—festive and tasty, especially at Christmas.
What You Need (And What You Can Use If You Don’t Have It)
- Electric mixer (but I’ve totally mixed by hand with a sturdy spoon when my mixer was on strike)
- Loaf pan or cake tin (round, square, whatever—just not too shallow)
- Parchment paper (or butter and flour if you’re feeling patient)
- Mixing bowls (more than one is nice, but if not, just rinse between uses—no biggie)


Storing Your Cake (If You Have Any Left, Which I Never Do)
Keep it in an airtight container at room temp for up to 3 days. But honestly, in my house it never lasts more than a day! Actually, I think it tastes even better the next morning, especially with a bit of butter slathered on top (try it, you’ll see what I mean).
How I Like to Serve It (And You Might Too)
This cake absolutely rules with a cup of strong coffee. Sometimes I toast a slice the next day and add a smear of salted butter. At Thanksgiving, I serve it with a dollop of whipped cream and call it breakfast (don’t tell my kids). You could even make it fancy with a drizzle of this homemade caramel sauce I love (not sponsored, just obsessed).
Pro Tips (Learned the Hard Way)
- I once tried rushing the cooling step and ended up with a pile of cake rubble. Let it cool, at least a little.
- If you forget to line the pan, run a knife around the sides before turning out. Or just accept the rustic look, honestly.
- Don’t skimp on the butter. I tried once (health kick—bad idea), and it was… meh. Go all in.
FAQ (Stuff People Actually Ask Me)
- Can I make this gluten-free? Yep, I’ve had luck with a 1:1 GF flour blend. It’s a bit crumblier, but nothing tragic.
- Do I have to peel the sweet potatoes? I do, but my cousin once left the skins in and nobody really noticed. Up to you.
- Can I freeze it? Totally. Just wrap slices tight in foil, freeze ‘em. Thaw in the toaster oven for best vibes.
- What if I don’t have an electric mixer? Roll up your sleeves and use a wooden spoon, like my nan did. Actually, it’s a good arm workout.
If you want more cozy cake recipes, I’m a fan of King Arthur’s pumpkin bread—it’s got that same autumn glow, different flavor. And for all things sweet potato, check out Southern Living’s sweet potato desserts. If you try my cake, let me know how it goes—or if you make a wild substitution that works!
P.S. If you find yourself scraping the last crumbs out of the pan with your finger, don’t worry, you’re not alone. Happens every time in my kitchen. Enjoy!


Ingredients
- 1 cup mashed sweet potatoes (about 2 medium sweet potatoes, cooked and peeled)
- 1 ½ cups all-purpose flour
- 1 cup unsalted butter, softened
- 1 cup granulated sugar
- 3 large eggs
- ½ cup whole milk
- 1 ½ teaspoons baking powder
- ½ teaspoon ground cinnamon
- ¼ teaspoon salt
- 1 teaspoon vanilla extract
Instructions
-
1Preheat the oven to 350°F (175°C). Grease and flour a 9-inch round cake pan.
-
2In a medium bowl, whisk together the flour, baking powder, cinnamon, and salt.
-
3In a large bowl, cream the butter and sugar together until light and fluffy. Beat in the eggs one at a time, then mix in the mashed sweet potatoes and vanilla extract.
-
4Gradually add the dry ingredients to the wet mixture, alternating with the milk. Mix until just combined.
-
5Pour the batter into the prepared cake pan and smooth the top. Bake for 45-50 minutes, or until a toothpick inserted into the center comes out clean.
-
6Allow the cake to cool in the pan for 10 minutes, then transfer to a wire rack to cool completely before serving.
Approximate Information for One Serving
Nutrition Disclaimers
Number of total servings shown is approximate. Actual number of servings will depend on your preferred portion sizes.
Nutritional values shown are general guidelines and reflect information for 1 serving using the ingredients listed, not including any optional ingredients. Actual macros may vary slightly depending on specific brands and types of ingredients used.
To determine the weight of one serving, prepare the recipe as instructed. Weigh the finished recipe, then divide the weight of the finished recipe (not including the weight of the container the food is in) by the desired number of servings. Result will be the weight of one serving.
Did you make this recipe?
Please consider Pinning it!!