
How This Sweet Hawaiian Crockpot Chicken Ended Up in My Life (and Stuck Around)
Okay, friend—so here’s the deal. The first time I made this Sweet Hawaiian Crockpot Chicken, it was one of those Tuesdays (you know the ones) where the fridge offered me exactly two sad chicken breasts, three bottles of not-quite-empty sauces, and a pineapple hanging on for dear life. Honestly, I only tried it ‘cause the grocery store rotisserie chicken was all out. Now, my family practically threatens mutiny if I don’t make it once a month. And yes, I’ve even made it in the summer when the kitchen was a hotbox—crockpot to the rescue!
Sidebar: I once spilled half the pineapple juice into my sock. This is a no-judge kitchen.
Why You'll Love This One
I make this when I want people to think I fussed all day (but secretly I didn’t, shh). My kids—well, one of them, anyway—loves the sweet and sticky vibe, and my spouse picks out the pineapple pieces before I even sit down. It’s one of those meals that sort of tricks you into thinking you’re on vacation somewhere with palm trees (though, I’m just staring at the neighbor’s rickety swing set). Also, my freezer sometimes coughs up random chicken cuts, and this recipe just doesn’t mind.
Once, I dumped everything in and realized, halfway through, I’d forgotten to plug in the crockpot. Do with that what you will.
Here’s What You’ll Need (Substitutions Welcome)
- 2 to 3 pounds chicken thighs or breasts (sometimes I go half and half; thighs are juicier, but breasts work if that’s what’s left!)
- 1 cup pineapple juice (canned is fine; one time I just poured in all the juice from the pineapple can and it was perfect)
- 1 cup brown sugar (I’ve swapped white sugar with a splash of molasses in desperate times)
- ⅔ cup soy sauce (my grandma insisted on low-sodium, but if all you have is the regular stuff, just use a bit less salt later)
- 1 can of pineapple chunks, undrained (Sometimes I use fresh pineapple and toss in a splash more juice)
- 1 bell pepper, chopped (any color, or skip if you hate them, totally up to you)
- 2 cloves garlic, minced (okay, I use jarred about half the time, it’s fine)
- A small handful of sliced green onions for topping (optional, though my husband says it looks fancier)
Let's Get Cooking (Follow, Or Don’t, Every Step!)
1. Pop your chicken in the bottom of the crockpot. Thighs or breasts—honestly, I usually grab whatever’s on sale.
2. Splash in the pineapple juice, soy sauce, and dump in the brown sugar. I tend to stir these together in a big measuring cup first so I can peek at the color—it should look like golden maple syrup—but you can just dump everything straight in if you’re short on time.
3. Add your garlic, bell pepper, and the pineapple chunks (juice and all). At this point, it looks kinda unappetizing, honestly, but trust me—it sorts itself out.
4. Lid on! Cook on low for 5–6 hours or high for about 3. I’ve even stretched it a little longer on low if I got stuck on a work call. Don’t worry, it’s forgiving.
5. At hour four-ish (or when you remember), give it all a gentle stir. If you like your sauce a little thicker, take the lid off for the last 30 mins, or whisk in a tablespoon of cornstarch with a little water and add that in.
6. Chicken should shred easily with two forks when it’s ready. Sometimes, I just do rough chunks if I’m feeling lazy—tastes the same!
7. Serve hot, scatter with green onions if you’re feeling bonus-fancy. This is when I usually sneak a bite ‘for quality control’ (my excuse every time).
A Few Notes I Learned the Hard Way
- Sometimes the sauce decides to get watery if you use fresh pineapple (weird, right?). Just thicken it up, or serve with rice to soak it all in.
- Actually, I find it works better if you don’t overcrowd the crockpot—the chicken gets kind of... steamy otherwise?
- Don’t worry about perfect measurements; a little less (or more) juice won’t tank the flavor.
Variations (Yes, Some Went Awry)
- Once, on a dare, I tried adding sriracha for ‘sweet heat’—pretty tasty, actually.
- Swapped in tofu instead of chicken for a meatless day, and it *mostly* worked, though the tofu got a little squishy (maybe freeze it first?).
- Tried it with teriyaki sauce instead of soy after a late night shopping trip—tasted decent, but definitely sweeter!
- I once thought adding coconut milk would be genius, but honestly, it kinda muddled things. Not my fave.
Equipment (and How You Can Totally Wing It)
You’ll need a trusty crockpot (mine is ancient and sometimes squeaks, but it works). No crockpot? I once used a big covered Dutch oven in the oven at about 275°F for three-ish hours. Not exactly the same, but not bad at all. Metal tongs for serving? Sure, or just a big fork like I sometimes do.


How I Store Leftovers (If There Are Any)
Into an airtight container, then in the fridge. It’ll last 2–3 days, though honestly, in my house it disappears before lunch the next day. If you do freeze it, it comes out a little saucier, which actually I kinda love on day two. If you’re curious about food safety, check sites like FoodSafety.gov.
Serving: My Favorite Traditions
Most nights, I serve this over steamed jasmine rice—sometimes straight outta the microwave bag (no shame in shortcuts). When we’re feeling wild, I’ll toast up some Hawaiian rolls and pile the chicken on for messy little sliders. And when my sister comes over, she insists on a sprinkle of toasted sesame seeds, which does make it look nice. A simple fresh salad on the side is solid, too.
Here’s What I Wish I Knew—Pro Tips the Hard Way
- I once tried rushing and cooked it all on high for just two hours; the chicken was rubbery. Don’t do it, mate.
- If the sauce tastes a bit too sharp, splash in another spoon of sugar (or a drizzle of honey, which is what I did last time)
- On second thought, letting it sit (even for 10 mins) before serving gives the flavors time to settle down.
FAQ: Real Questions I’ve Gotten (and My Honest Answers)
Q: Can I make this ahead for meal prep?
A: Oh, totally. Actually, I think it tastes better the next day (flavors get all happy together in the fridge). But stir it before microwaving, or it’s weirdly lumpy.
Q: Is this actually kid-friendly?
A: Absolutely—for my kids, anyway—though my neighbor’s kid picked out every pineapple chunk and made a face. So, maybe test with a small batch first?
Q: What’s the best rice to serve with this?
A: Jasmine rice is the go-to, but honestly, I’ve used brown rice, quinoa, even those pre-cooked microwave packets when I forgot to make rice entirely. Not picky!
Q: Does it work with frozen chicken?
A: In a pinch, yeah. Just add another hour or so and don’t forget food safety (not a doctor, just experienced at kitchen shortcuts). Here’s a handy article on that (not mine, but it helped me once!).
Need more slow cooker ideas? I sometimes check Simply Recipes' crockpot section if I’m stuck for inspiration.
And hey, if you ever figure out how not to spill sauce when you’re transferring leftovers, let me know. I’m still working on that trick!


Ingredients
- 6 boneless, skinless chicken breasts
- 1 cup pineapple juice
- ½ cup brown sugar
- ⅓ cup soy sauce
- 1 can (20 oz) pineapple chunks, drained
- 1 red bell pepper, sliced
- 2 cloves garlic, minced
- 1 tablespoon cornstarch (optional, for thickening)
- Salt and pepper to taste
Instructions
-
1Place the chicken breasts in the bottom of the crockpot and season with salt and pepper.
-
2In a bowl, mix together the pineapple juice, brown sugar, and soy sauce until well combined.
-
3Pour the sauce over the chicken, then add the pineapple chunks, bell pepper, and minced garlic.
-
4Cover and cook on low for 4 hours or until the chicken is tender and fully cooked.
-
5For a thicker sauce, remove about half a cup of the cooking liquid, whisk in the cornstarch, then return the mixture to the crockpot and stir. Cook uncovered for an additional 10-15 minutes.
-
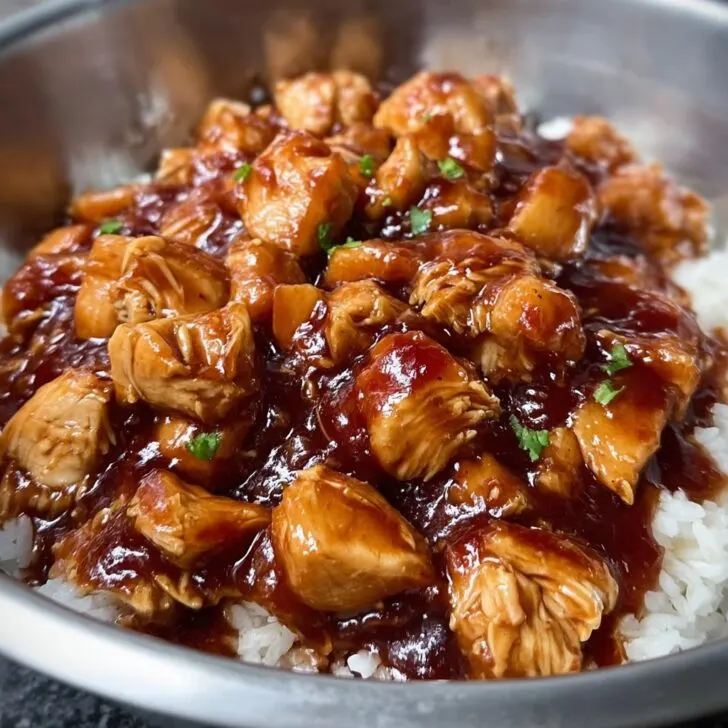
6Serve the sweet Hawaiian chicken over rice, garnished with extra pineapple or fresh herbs if desired.
Approximate Information for One Serving
Nutrition Disclaimers
Number of total servings shown is approximate. Actual number of servings will depend on your preferred portion sizes.
Nutritional values shown are general guidelines and reflect information for 1 serving using the ingredients listed, not including any optional ingredients. Actual macros may vary slightly depending on specific brands and types of ingredients used.
To determine the weight of one serving, prepare the recipe as instructed. Weigh the finished recipe, then divide the weight of the finished recipe (not including the weight of the container the food is in) by the desired number of servings. Result will be the weight of one serving.
Did you make this recipe?
Please consider Pinning it!!