
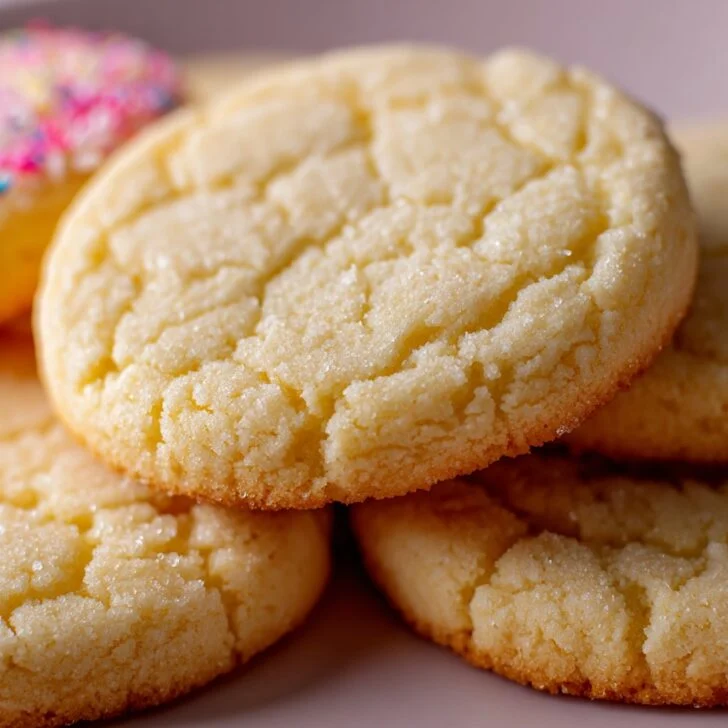
Hey, Ready for the Softest Sugar Cookies Ever?
Okay, so here's the deal: this Sugar Cookie Recipe with Soft Centers is basically my secret weapon when I want to make friends at bake sales. I mean, my aunt has been making these for holidays since I was a kid, and now it's kind of become a thing—people expect them (no pressure, right?). There's this one time I totally forgot the baking powder, and the cookies came out like sweet hockey pucks. We still ate them. Point is, these cookies are forgiving, cozy, and just the right amount of chewy in the middle. Plus, my dog once stole one straight off the cooling rack, so I guess they're pet-approved, too (don’t actually feed them to your dog though!).
Why I Make These Over and Over (and Over)
I whip these up when I want something that tastes like childhood, or honestly, when I need an edible bribe—my family goes nuts for them, especially if I remember to sprinkle a little extra sugar on top (which is almost always). Sometimes, the dough sticks to my hands and I get all flustered, but then I remember to just toss on a bit more flour and carry on. Oh, and when friends come over unexpectedly—these are what I make because the dough freezes like a dream. (Confession: I tried making them with brown sugar once, and it was... interesting. Let’s just say I don’t recommend it unless you like cookies that taste like caramel fudge. Some folks might!)
Stuff You'll Need (And What You Can Swap)
- 2 and ¾ cups (about 350g) all-purpose flour (I've used bread flour in a pinch—makes them chewier, but not bad at all)
- 1 teaspoon baking soda (don’t forget this or you’ll get cookie crackers!)
- ½ teaspoon baking powder
- ½ teaspoon salt (I sometimes use salted butter and skip this, but I think unsalted is best)
- 1 cup (225g) unsalted butter, room temp (Honestly, margarine works but it’s never quite as rich. My gran swore by Kerrygold but any decent butter is fine)
- 1 and ½ cups (300g) granulated sugar (I’ve tried a mix of white and superfine—meh, doesn’t make much difference, but do what you want)
- 1 large egg (room temp if you can remember, but straight from the fridge is fine—no one’s perfect)
- 2 teaspoons vanilla extract (Real vanilla is great, but I’ve used imitation and nobody noticed. Try almond extract for a twist!)
- Extra sugar for rolling (sometimes I use colored sanding sugar if I’m feeling fancy)
How I Actually Make Them (Maybe You Will Too)
- Preheat your oven to 350°F (180°C). Line two baking sheets with parchment—unless, like me, you ran out and just buttered the trays. Works fine.
- Whisk flour, baking soda, baking powder, and salt in a big bowl. It looks a bit lumpy? No worries, just break up the clumps with a fork.
- Grab another bowl, beat the butter and sugar together until fluffy—this is where I usually sneak a taste. If you’ve only got a wooden spoon, your arm gets a workout, but hey, cardio. Electric mixer makes short work of it though.
- Mix in the egg and vanilla. It might look a little separated, but it all comes together in a sec.
- Slowly add the dry ingredients to the wet. Don’t dump it all at once (unless you want a flour snowstorm). Just mix until it all looks like cookie dough—don’t overthink it.
- Scoop out about a tablespoon of dough, roll it into a ball, then roll each ball in extra sugar. Place on baking sheet, a couple inches apart (they spread a bit).
- Bake 8 to 10 minutes. Now, here’s where you gotta pay attention: they should look just barely set in the middle—almost underbaked. That’s the magic. Take them out, let them cool on the tray for 3 minutes (I’ve skipped this and regretted it; they fall apart), then move to a wire rack.
Notes (Aka Stuff I Learned the Hard Way)
- If the dough’s too sticky, stick it in the fridge for 20 minutes. Or just flour your hands—works just as well and faster.
- These taste pretty amazing the next day, actually. The centers get even softer (if they last that long!).
- Once, I forgot to roll them in sugar. Still good, just a little less sparkly.
- Don’t use dark baking sheets unless you like crispy bottoms. Learned that from a burnt batch, oops.
Variations I've Messed With (and One Flop)
- Add a smidge of lemon zest—makes them taste like sunshine, seriously.
- Swap half the vanilla for almond extract for a nutty twist (my cousin loves this version).
- Tried mixing in rainbow sprinkles. Fun for kids, but once they melted into weird blobs. Maybe stick to rolling in sprinkles instead.
- I tried adding cocoa powder once. Uhhh, they got dry. Maybe just stick with chocolate chips if you want chocolate flavor.
Don't Have Every Gadget? No Problem
I usually use a hand mixer, but I've made this dough with a fork and some stubbornness. No cookie scoop? Just use a tablespoon (or honestly, your hands—rustic is in!). If you don’t have wire racks, just cool the cookies on a clean towel. Works a treat.


How I Store Them (But They Never Last Long)
Just pop them in an airtight tin or container at room temp. They stay soft for up to four days, at least that's what I hear. In my house, they vanish within 24 hours (teenagers, I swear). You can freeze the baked cookies or even the dough balls—just bake straight from the freezer, add a minute or two.
How We Serve These at My Place
Honestly, just with a big mug of tea or coffee. My kids like dunking them in milk, though. At Christmas, we pile them on a plate with some fudge and call it a dessert board—fancy, right?
Pro Tips (a.k.a. Learn From My Oopsies)
- Don’t rush the creaming step. I once did and the cookies came out flat as pancakes. Take the extra minute.
- Let them cool on the baking sheet, even if you’re impatient. They finish setting up, and if you skip it, they fall apart. Trust me, I learned the crumbly way.
- If you want perfectly round cookies, roll the dough balls between your palms—though lumpy ones taste just as good.
Questions I Actually Get (And My Honest Answers)
- Can I double the recipe? Oh, for sure! Just use a big bowl—trust me, dough goes everywhere otherwise.
- Can I make these gluten-free? I haven’t tried it myself, but my friend swears by this flour from King Arthur Baking. She says you can’t tell the difference.
- What if I want them crispier? Just bake an extra 2-3 minutes, but keep an eye out so they don’t go too hard. Actually, I think the softness is the best part.
- Can I frost these? You bet! I like a simple powdered sugar glaze. If you want inspo, Sally's Baking Addiction has a killer icing recipe.
- Do I really need parchment? Meh, not really. Greased trays work fine, just maybe don’t use tinfoil—it sticks.
- Why are my cookies spreading too much? Too-warm butter, probably. Next time chill the dough for 10–15 minutes before baking, even if you’re in a rush.
So that’s it—my tried and (occasionally) failed Sugar Cookie Recipe with Soft Centers. Give it a whirl, and let me know if you come up with any wild variations that actually work! For more ideas, I sometimes browse Allrecipes Easy Sugar Cookies when I want to mix things up.


Ingredients
- 2 ¾ cups all-purpose flour
- 1 teaspoon baking soda
- ½ teaspoon baking powder
- ½ teaspoon salt
- 1 cup unsalted butter, softened
- 1 ½ cups granulated sugar
- 1 large egg
- 2 teaspoons pure vanilla extract
- 3 tablespoons milk
Instructions
-
1Preheat the oven to 350°F (175°C) and line baking sheets with parchment paper.
-
2In a medium bowl, whisk together the flour, baking soda, baking powder, and salt.
-
3In a large bowl, cream the softened butter and granulated sugar together until light and fluffy.
-
4Beat in the egg, vanilla extract, and milk until well combined.
-
5Gradually add the dry ingredients to the wet ingredients, mixing until just combined.
-
6Scoop tablespoon-sized balls of dough onto the prepared baking sheets, spacing them about 2 inches apart. Bake for 8-10 minutes, until the edges are set but the centers are still soft. Cool on the baking sheet for 5 minutes before transferring to a wire rack.
Approximate Information for One Serving
Nutrition Disclaimers
Number of total servings shown is approximate. Actual number of servings will depend on your preferred portion sizes.
Nutritional values shown are general guidelines and reflect information for 1 serving using the ingredients listed, not including any optional ingredients. Actual macros may vary slightly depending on specific brands and types of ingredients used.
To determine the weight of one serving, prepare the recipe as instructed. Weigh the finished recipe, then divide the weight of the finished recipe (not including the weight of the container the food is in) by the desired number of servings. Result will be the weight of one serving.
Did you make this recipe?
Please consider Pinning it!!