
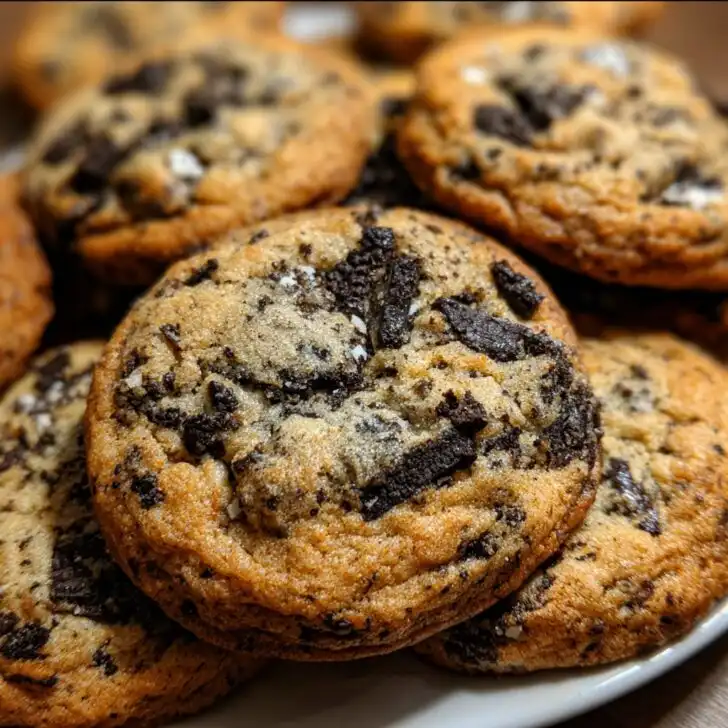
Let's Talk About Cookies (And Why I Make These Way Too Often)
You know those recipes you promise yourself you'll only make for special occasions, but then, three Tuesdays later, your oven's preheating again? Yeah, that's me with these Soft Oreo Chocolate Chunk Cookies from scratch. I think it started when my niece kept begging for “cookies with the black bits and big chocolate,” and now it’s a full-blown tradition—plus, these are dangerously easy. Honestly, I once made them at 10pm because I couldn’t sleep, and by midnight, they were mysteriously… gone. Anyway, the point is, sometimes you just need a good cookie; calories be damned.
Why You'll Love This (Trust Me, I Know)
I make this when my siblings drop by “unexpectedly” (they always hope I’ve got a batch in the tin). My family goes absolutely bonkers for these, mostly because they’re chewy and soft, but they’ve also got big, chunky hits of chocolate and the crunch of Oreos. Side note: I used to get so annoyed smashing up Oreos with a spoon, until I realized using a ziplock and a rolling pin is just... smarter. Also, if you’re like me and can’t stand dry cookies, you’ll love that these stay soft for ages (well, as long as they last, anyway).
Here’s What You’ll Need (And Some Swaps I’ve Tried)
- 2 cups all-purpose flour (sometimes, I’ll do 1 cup white and 1 cup whole wheat, but honestly, nobody notices)
- ½ teaspoon baking soda
- ½ teaspoon salt (sea salt is my go-to, but regular ol’ table salt works if you forgot to buy more)
- ¾ cup unsalted butter, melted and slightly cooled
- 1 cup packed light brown sugar (granulated works in a pinch; I just think brown makes 'em chewier)
- ¼ cup white sugar
- 1 large egg plus 1 egg yolk (don’t skip the yolk—super important)
- 2 teaspoons vanilla extract (my grandmother swears by Nielsen-Massey but, let’s be real, store brand is fine)
- 1 cup chopped chocolate chunks (I use a dark chocolate bar, but chips are fine if you’re in a rush)
- 1 heaping cup Oreo cookies, roughly chopped (sometimes I use the double stuff, sometimes not; no one’s complained yet)
How I Actually Pull This Together (With The Occasional Mess-Up)
- Preheat your oven to 350°F (175°C). Line two baking trays with parchment. Or just butter the tray. Honestly, I’ve done both and they both work, unless you hate washing up as much as I do.
- Whisk flour, baking soda, and salt together in a bowl. Set aside. (This is where I always forget if I added the salt—just dump it in if you’re really unsure, but don’t go wild.)
- In a bigger bowl, whisk your melted butter, brown sugar, and white sugar.
Caution: If your butter’s too hot, you might get weird scrambled bits. Ask me how I know. - Crack in your egg and extra yolk. Then pour in the vanilla. Mix until it looks glossy and smooth—it’ll smell amazing, try not to eat it yet.
- Tip in the dry stuff and mix until just combined. Don’t overmix! (Or do, but your cookies will be more like cake. Maybe that’s your style?)
- Fold in the chocolate chunks and Oreo pieces. This is where I sneak a little taste, “just to check for poison.”
- Scoop dough balls (a heaping tablespoon works; I just use my hands). Place them on the tray a couple inches apart. If you’re feeling fancy, press a few extra bits of Oreo or chocolate on top so they look bakery-perfect.
- Bake 9–11 minutes, until edges are set but middles look a bit underdone. Seriously, don’t overbake! They’ll finish off as they cool.
- Leave them on the tray about 5 minutes before transferring. Or, if you’re me, burn your mouth on the first one out because patience is not my strong suit.
Notes I’ve Learned From Messing It Up (Many Times)
- I once tried chilling the dough for 24 hours—honestly, I think 30 minutes is enough. Too long and the Oreos get a bit weird.
- If you only have salted butter, skip the extra salt. Learned that the hard way.
- Don’t crush the Oreos to dust. You want chunks, not sand (unless you’re into that, but… why?)
How I’ve Played Around With It (Some Hits, Some Not)
- Once swapped in peanut butter Oreos. Result: strange, but edible. Kids liked it, I wasn’t sold.
- White chocolate chunks instead of dark: surprisingly good if you like it sweeter
- Tried stuffing marshmallows inside… but they oozed out and made a mess. Wouldn’t recommend unless you love cleaning baking trays.
Don’t Have Fancy Gear? No Worries
I use a basic mixing bowl and a wooden spoon. No stand mixer needed (though I sometimes wish for one). If you don’t have a cookie scoop, just grab a spoon or roll the dough with your hands—gets a bit messy, but that’s half the fun, right?


Keeping Them Soft (Not That It Matters…)
Tuck cookies into an airtight container. They’ll stay soft for about three days, but—real talk—they never last more than a day here. You can freeze them, but I never do. No self control, I guess.
Serving Them Up (Our Family’s Weird Habits)
We eat these warm, with a glass of cold milk. My cousin dips one in coffee, which I thought was odd until I tried it. Also, stacking two with a scoop of ice cream in the middle? Ridiculous but fabulous.
Lessons From My (Many, Many) Cookie Bakes
- Once I tried to rush the creaming step, and the cookies came out flat as pancakes. Take 2 extra minutes, trust me.
- If your dough looks too dry, add a splash of milk. If it’s too sticky, more flour. I know, not very precise, but it works every time.
The FAQ Bit (Because Folks Always Ask Me These)
- Can I use margarine instead of butter? Sure, but the flavor’s not quite as rich. I wouldn’t, but if it’s all you’ve got, go for it!
- Why are my cookies spreading too much? Probably your butter was too warm, or you didn’t chill the dough a bit. Happens to the best of us.
- Are these better the next day? Actually, yes! The flavors kind of meld, and they get even softer (if you can resist eating them all first).
- Can I make them gluten-free? I haven’t tried, but here’s a gluten-free base recipe I trust. Just swap in GF Oreos.
- What’s the best chocolate to use? I love chopping up a bar of Lindt 70%, but, honestly, chocolate chips from the supermarket are fine. I read this great cookie guide if you’re a chocolate nerd.
Oh, and one last thing—if you’re looking for more home-baked goodness, I always check Serious Eats for inspiration. Sometimes I get distracted reading, but isn’t that what kitchen breaks are for?


Ingredients
- 1 cup (226g) unsalted butter, softened
- ¾ cup (150g) granulated sugar
- ¾ cup (150g) packed brown sugar
- 2 large eggs
- 2 teaspoons vanilla extract
- 2 ¼ cups (280g) all-purpose flour
- 1 teaspoon baking soda
- ½ teaspoon salt
- 1 cup (170g) semi-sweet chocolate chunks
- 12 Oreo cookies, coarsely chopped
Instructions
-
1Preheat the oven to 350°F (175°C) and line two baking sheets with parchment paper.
-
2In a large bowl, cream together the softened butter, granulated sugar, and brown sugar until light and fluffy.
-
3Beat in the eggs one at a time, then add the vanilla extract and mix until combined.
-
4In a separate bowl, whisk together the flour, baking soda, and salt. Gradually add the dry ingredients to the wet ingredients, mixing just until combined.
-
5Fold in the chocolate chunks and chopped Oreo cookies until evenly distributed throughout the dough.
-
6Scoop tablespoon-sized portions of dough onto the prepared baking sheets, spacing them about 2 inches apart. Bake for 10-12 minutes or until the edges are lightly golden. Allow cookies to cool on the baking sheet for 5 minutes before transferring to a wire rack to cool completely.
Approximate Information for One Serving
Nutrition Disclaimers
Number of total servings shown is approximate. Actual number of servings will depend on your preferred portion sizes.
Nutritional values shown are general guidelines and reflect information for 1 serving using the ingredients listed, not including any optional ingredients. Actual macros may vary slightly depending on specific brands and types of ingredients used.
To determine the weight of one serving, prepare the recipe as instructed. Weigh the finished recipe, then divide the weight of the finished recipe (not including the weight of the container the food is in) by the desired number of servings. Result will be the weight of one serving.
Did you make this recipe?
Please consider Pinning it!!