
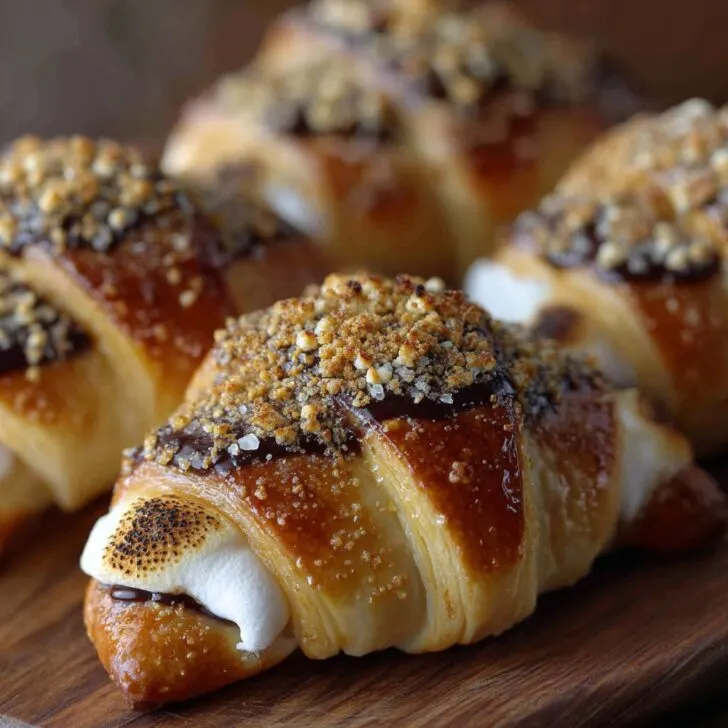
Okay, so you know how some recipes just instantly take you back to summer nights and sticky fingers? That's totally what these S'mores Crescent Rolls do for me. I first cobbled this together after a camping trip where, believe it or not, we ran out of marshmallows (I know, tragic). When I got home, I wanted that gooey s'more taste but, honestly, I was too lazy for a bonfire. Enter: the humble can of crescent rolls. My kids were skeptical—until the whole tray disappeared before I even had a chance to sneak a second one. (I might still hold a grudge about that.)
Why I Keep Making These (Besides the Obvious Chocolate)
I make these S'mores Crescent Rolls when I want that campfire nostalgia without, you know, actually buying firewood or dealing with mosquito bites. My family goes nuts for them, especially on rainy weekends or when we're pretending it's still summer in the middle of February. Plus, they're so simple—no fancy stuff, and if the marshmallow oozes out, it just gets crispy and delicious (even if it makes a bit of a mess in the pan, but that's half the fun, right?). Oh, and when I'm short on patience (which is often), these are basically foolproof. Well, except for that time I forgot to preheat the oven—let's not talk about that morning.
What You’ll Need (and What I Sometimes Swap In)
- 1 can crescent roll dough (Honestly, any brand works. My grandmother swore by Pillsbury, but I’ve used the cheap stuff and no one noticed.)
- 1 cup chocolate chips (semi-sweet is classic, but sometimes I use dark chocolate, or even chop up a leftover Easter bunny—don't judge)
- 1 cup mini marshmallows (the big ones work if you rip 'em up; or, I've even tried marshmallow creme, but it's a bit sticky)
- 2 sheets graham crackers, crumbled (or digestive biscuits if you’re fancy or, like me, just out of graham crackers)
- Optional: a sprinkle of flaky sea salt (I like Maldon, but regular salt works fine too, or skip it entirely if you’re not a salty-sweet person)
How I Pull These Together (with a Few Tangents)
- Preheat your oven to 375°F (190°C). Or don’t—once, I forgot and just added five extra minutes. Came out fine, honestly.
- Pop open the crescent roll can (the best/worst part, really) and unroll the dough. Separate into triangles. If any look weirdly shaped, just stretch it out—no one’s grading you.
- Sprinkle a handful of chocolate chips, a spoonful of marshmallows, and a good pinch of graham cracker crumbs on each triangle. (Here’s where I sneak a few chocolate chips for myself.)
- Roll 'em up, starting at the wide end. If the filling falls out, just shove it back in—no stress. Place them on a lined baking sheet with a little space in-between—it’s okay if they get cozy.
- Optional but fun: brush the tops with a bit of milk or melted butter so they get golden. Sometimes I forget this step and, you know what, they still get eaten.
- Bake for 10-12 minutes, or until puffy and golden. (Don’t be alarmed if some marshmallow escapes—those crispy bits on the pan are the best part for snacking while you wait.)
- Let them cool for a few minutes so you don’t burn your mouth (I speak from experience), then sprinkle with extra crumbs and salt if you like.
Things I Wish I'd Known Earlier (AKA Notes)
- If you overfill them, they’ll ooze everywhere. It’s not the end of the world, but maybe stick to a light hand.
- Actually, I find it works better if you tuck in the edges a little before rolling, but I forget half the time and it’s still fine.
- The dough is stickier than you'd think, so use parchment paper if you have it—otherwise, a greased pan works in a pinch (cleanup will just take a bit longer).
Some Versions I’ve Tried—Not All Winners!
- Peanut butter: A thin swipe inside is amazing, but don’t overdo it or it leaks everywhere. Trust me, peanut butter burns fast.
- Banana: Okay, I really wanted this to work, but it just made the rolls soggy. Maybe someone else can crack that nut.
- White chocolate: Not my thing, but my neighbor swears by it—try it if you like.
Tools You Need (or Don’t, Honestly)
- Baking sheet (but I’ve used a pizza pan in a pinch—just don’t overload it)
- Parchment paper or foil (if you’re out, just oil the pan and call it a day)
- A small bowl for mixing the filling, but sometimes I just sprinkle everything straight on the dough. Less washing up, right?


If By Some Miracle You Have Leftovers (Storage)
Keep them in an airtight container at room temp for a day or two. I think they taste even better the next day, but my crew usually polishes them off by nightfall. In the fridge, they get a little chewy, but a quick zap in the microwave sorts that out.
How We Eat These (Serving Ideas from My Table)
I serve these warm, usually with a mug of hot chocolate or, if it’s summer, a glass of cold milk (dunking is highly encouraged). My cousins have been known to pile on a scoop of vanilla ice cream, which is probably overkill but also pretty fantastic. Sometimes, I just eat one standing at the counter before anyone else is home. No regrets.
What I’ve Learned the Hard Way (Pro Tips)
- I once tried to rush the rolling and ended up with most of the filling on the pan. Take your time, even if it feels fiddly.
- Don’t skip the cooling time—molten marshmallow is a menace. (Still have the tongue burn to prove it.)
- Actually, letting them cool on a wire rack keeps the bottoms from getting soggy. I didn’t do this at first—now I’m a convert.
Questions Friends Really Ask Me (FAQ)
- Can I make these ahead? Yeah—sort of. They’re best fresh, but you can roll them up and pop in the fridge for a few hours before baking. I wouldn’t leave them overnight though, dough gets kind of weird.
- Can I use regular marshmallows? Definitely. Just tear them up a bit so they fit. The big ones are wild, but it works.
- What if I don’t have crescent dough? Puff pastry works in a pinch, or even biscuit dough—just takes a bit longer to bake. Not quite the same, but close. Or you could try making your own dough, but who has the time? (If you do, Sally’s Baking Addiction has a good recipe!)
- Can I freeze them? I guess? I’ve never had any left to test this, but in theory, sure. Let me know if you try it!
- Are they messy? Oh, for sure. That’s half the charm. Have napkins handy.
- Can I air fry these? Haven’t tried, but I’ve seen people do it on TikTok. If you’re braver than me, here’s a guide I’d probably follow.
And just to digress for a sec—once, while making these, I realized halfway through I was out of graham crackers and ended up crumbling up some vanilla wafers instead. Not quite the same, but pretty tasty in a pinch. Shows you, sometimes making do leads to happy accidents (or just a good snack).
If you’re after more easy, crowd-pleasing desserts, I usually get good ideas browsing Allrecipes—they've got a million variations and honestly, I steal inspiration all the time. Happy baking, and let me know if your family polishes these off as quickly as mine does!


Ingredients
- 1 can (8 oz) refrigerated crescent roll dough
- ½ cup milk chocolate chips
- ½ cup mini marshmallows
- ¼ cup graham cracker crumbs
- 2 tablespoons unsalted butter, melted
- 1 tablespoon granulated sugar
- ½ teaspoon ground cinnamon
- Pinch of salt
Instructions
-
1Preheat your oven to 375°F (190°C) and line a baking sheet with parchment paper.
-
2Unroll the crescent dough and separate into 8 triangles.
-
3Sprinkle each triangle with graham cracker crumbs, then add a few chocolate chips and mini marshmallows to the wide end of each triangle.
-
4Roll up each triangle, starting from the wide end, and place on the prepared baking sheet.
-
5Brush the tops with melted butter, then mix together the sugar, cinnamon, and salt and sprinkle over the rolls.
-
6Bake for 10-12 minutes, or until golden brown. Let cool slightly before serving.
Approximate Information for One Serving
Nutrition Disclaimers
Number of total servings shown is approximate. Actual number of servings will depend on your preferred portion sizes.
Nutritional values shown are general guidelines and reflect information for 1 serving using the ingredients listed, not including any optional ingredients. Actual macros may vary slightly depending on specific brands and types of ingredients used.
To determine the weight of one serving, prepare the recipe as instructed. Weigh the finished recipe, then divide the weight of the finished recipe (not including the weight of the container the food is in) by the desired number of servings. Result will be the weight of one serving.
Did you make this recipe?
Please consider Pinning it!!