
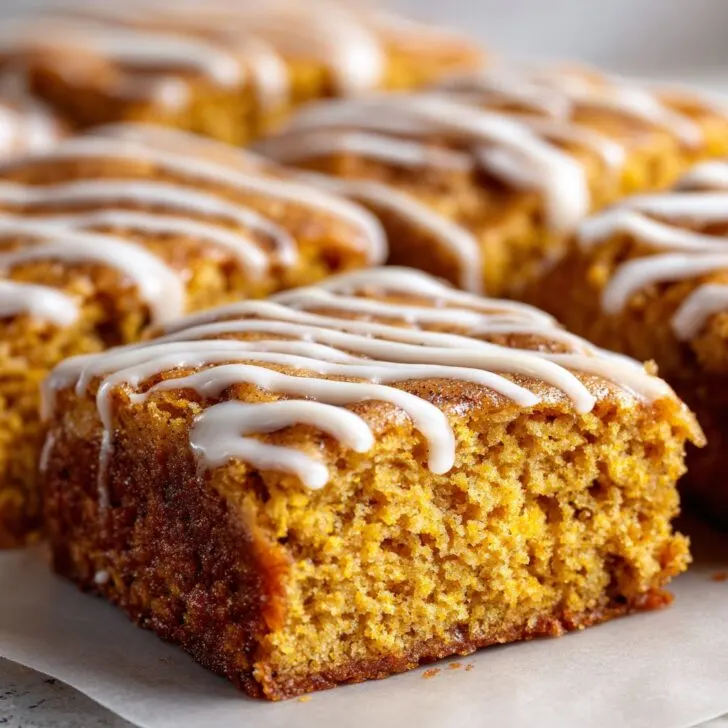
Let Me Tell You About These Pumpkin Snickerdoodle Bars…
Honestly, if autumn had an official scent, it’d be the smell wafting out of my oven every time I bake these Pumpkin Snickerdoodle Bars with Glaze. The first time I made them was actually because I’d totally botched a batch of cookies (don’t ask), and I needed to salvage my pride for our Sunday game night. These bars turned out so well my neighbor tried to barter her tomato soup recipe for them, which is saying something because she’s not known for sharing. Sometimes, I make them just to get that sweet-spicy cinnamon aroma going—it’s like a warm hug, or wearing fluffy socks on a chilly morning.
Side note, I once tried to eat the glaze straight out of the bowl with a spoon. Wouldn’t recommend it unless you like your teeth singing, but hey, you do you.
Why You'll Love Making These (And Eating Them!)
I make these bars whenever I want something fuss-free but still a little bit special. My family goes nuts for them, and if you think pumpkin is just for pies, you’re in for a treat. For whatever reason, my brother claims they taste like fall and childhood at the same time. Sometimes, getting the dough to spread is mildly annoying (it’s sticky!), but honestly, once you taste the finished bars, all is forgiven. I like that it’s one bowl, mostly (well, plus the glaze bowl). Oh, and if you’re a dunker, these bars and coffee are a match made in heaven. Or if you’re like me and occasionally impatient, you can nibble the edges before the glaze sets. No judgment here.
What You’ll Need (A Few Swaps You Can Make)
- 1 cup unsalted butter, softened (I’ve melted it in the microwave in a pinch—works fine!)
- 1 cup light brown sugar (dark brown works if you like a deeper flavor—my grandma swore by it)
- ½ cup granulated sugar
- 1 cup pumpkin puree (not pumpkin pie filling—though I accidentally used it once. Still tasted good, but a bit spicy)
- 1 large egg
- 2 teaspoons vanilla extract (I’ve used the cheap stuff, but when I feel fancy I break out the pure vanilla)
- 2 ½ cups all-purpose flour
- 1 teaspoon cream of tartar (I’ve skipped this when I couldn’t find it and honestly, it’s still tasty)
- 1 teaspoon baking soda
- ½ teaspoon salt
- 2 teaspoons ground cinnamon (sometimes I add a pinch more—can you have too much?)
- ½ teaspoon nutmeg (totally optional, but I like the extra warmth)
For the Cinnamon Sugar Topping:
- ¼ cup granulated sugar
- 2 teaspoons cinnamon
For the Glaze:
- 1 cup powdered sugar (sometimes called icing sugar, depending where you’re from)
- 1-2 tablespoons milk (or water, if you’ve run out—been there)
- ½ teaspoon vanilla extract
How to Make Pumpkin Snickerdoodle Bars with Glaze (Let’s Do This!)
- Preheat your oven to 350°F (about 180°C if you’re on my side of the pond). Line a 9x13-inch pan with parchment or just grease it well—I always forget the parchment and regret it slightly, but the bars come out okay with a good spatula.
- Cream the butter and sugars together till it’s light and fluffy. You can use a mixer or a wooden spoon if you’re feeling strong. This is where I usually sneak a taste (shh!).
- Add in the pumpkin, egg, and vanilla. Mix till it looks sort of like a slightly weird, orange batter—that’s totally normal.
- Stir in the dry ingredients: flour, cream of tartar, baking soda, salt, cinnamon, and nutmeg. Don’t overmix; just until you don’t see any flour streaks. It’ll be thick and sticky and kind of stubborn—don’t panic.
- Spread the batter into your prepared pan. I use an offset spatula but my cousin swears by wetting her hands and patting it down (actually, that works better if you ask me!).
- Mix the cinnamon sugar topping and sprinkle it generously over the batter. I usually add a bit extra because... why not?
- Bake for 23-28 minutes. Check at 24 minutes; a tester should come out with just a few moist crumbs. Don’t overbake or they’ll lose that fudgy, soft vibe.
- Let cool completely in the pan. (Or at least until just warm, if you can’t wait. I rarely do.)
- Make the glaze by whisking the powdered sugar, milk, and vanilla together. Drizzle over the cooled bars. If your glaze gets too thick, splash in more milk. Too thin? Add a bit more sugar—easy fix.
- Slice and devour. Or sneak a corner piece while “testing” for doneness. Purely for quality control, of course.
Some Notes, Because I’ve Fumbled Through Plenty
- If your bars seem a little too cakey, you probably overbaked—set a timer! I always think “just one more minute” and then, oops.
- Don’t stress about perfectly spreading the batter; it evens out more than you’d expect in the oven.
- Actually, I find they taste even better the next day. If you can wait that long. I usually can’t.
Variations I’ve Tried (And One Fail!)
- Chocolate chips: Toss in a handful for a totally different vibe. My sister says it’s the best version.
- Swap spices: I added ginger once; good, but not amazing. Clove is a bit too strong, so go easy.
- Gluten-free: Tried with a 1:1 GF flour blend—worked, but slightly crumblier. Worth it if you need it, though.
- Don’t try doubling the glaze and pouring it all on at once. It soaks in and gets weirdly soggy. Lesson learned!
What You’ll Need (And What You Probably Have)
- 9x13-inch baking pan (if you only have an 8x8, just bake it longer and expect thicker bars—yum!)
- Mixing bowls
- Whisk or fork (I’ve used a fork in a pinch, works fine)
- Spatula or big spoon
- Measuring cups and spoons—but honestly, I’ve eyeballed the cinnamon once or twice
If you’re after precise measurements and metric conversions, King Arthur Baking has a handy chart I use when I’m feeling like a scientist in the kitchen.


How to Store (If They Last That Long)
They’ll keep in an airtight container at room temp for 3 days, or you can pop them in the fridge if you want them to last a week—though honestly, in my house, they never last more than a day! Sometimes, I wrap a couple bars in parchment and tuck them in my bag for work. They’re still soft by afternoon tea.
Serving (The Fun Part)
I love serving these cut into big, generous squares with a mug of strong coffee. My niece likes hers with a scoop of vanilla ice cream—can’t argue with that logic. If you’re feeling festive, you could dust with extra cinnamon or even, dare I say, a tiny bit of flaky sea salt for contrast. On Thanksgiving, I bring these out instead of pie (controversial, I know, but they disappear faster!).
The "Please Don’t Skip This Step" Tips
- Don’t rush the cooling before glazing—once, I tried to hurry and the glaze ran right off. Just, no.
- Mix the batter until just combined; overmixing = tough bars (learned that one the hard way after getting distracted by a phone call)
- If you melt the butter, let it cool a bit so you don’t accidentally scramble the egg. Ask me how I know…
FAQ (Real Questions From Actual, Hungry People)
- Can I use fresh pumpkin? Yup, as long as it’s mashed really smooth. Canned is easier, but hey, if you’ve got a pumpkin to use up, go for it!
- Can I make these ahead? Definitely, and honestly, I think they taste better the next day. But good luck hiding them.
- No cream of tartar—what now? Just leave it out. The bars still work; maybe a little less tangy, but still tasty.
- What if I don’t have a 9x13 pan? Use whatever you’ve got, just adjust the baking time. I’ve made a half batch in a loaf pan before, came out more like a thick blondie, but still good!
- Can I freeze these? You can, but the glaze gets a bit weird when thawed. If you must, freeze them unglazed, then add the glaze after defrosting. Or just eat them all before freezing; that’s what usually happens around here.
For more cozy baking inspiration, check out Sally’s Baking Addiction (her tips have saved my skin so many times), or visit Allrecipes if you want to see what other home bakers are saying about similar treats.
And if you’ve read this far—go on, bake these Pumpkin Snickerdoodle Bars with Glaze. Light a candle, make a pot of coffee, and share with your favorite people. Or, you know, keep them all for yourself. I won’t tell.


Ingredients
- 1 cup pumpkin puree
- 1 cup granulated sugar
- ½ cup unsalted butter, melted
- 1 large egg
- 2 cups all-purpose flour
- 1 teaspoon baking powder
- 1 ½ teaspoons ground cinnamon
- ½ teaspoon salt
- ½ cup powdered sugar (for glaze)
- 2 tablespoons milk (for glaze)
- ½ teaspoon vanilla extract (for glaze)
Instructions
-
1Preheat oven to 350°F (175°C). Line an 8x8-inch baking pan with parchment paper.
-
2In a large bowl, whisk together pumpkin puree, granulated sugar, melted butter, and egg until smooth.
-
3In a separate bowl, combine flour, baking powder, ground cinnamon, and salt. Gradually add dry ingredients to the wet mixture and stir until just combined.
-
4Spread the batter evenly into the prepared pan. Bake for 25 minutes or until a toothpick inserted in the center comes out clean. Allow to cool completely.
-
5For the glaze, whisk together powdered sugar, milk, and vanilla extract until smooth. Drizzle glaze over cooled bars, then cut into squares and serve.
Approximate Information for One Serving
Nutrition Disclaimers
Number of total servings shown is approximate. Actual number of servings will depend on your preferred portion sizes.
Nutritional values shown are general guidelines and reflect information for 1 serving using the ingredients listed, not including any optional ingredients. Actual macros may vary slightly depending on specific brands and types of ingredients used.
To determine the weight of one serving, prepare the recipe as instructed. Weigh the finished recipe, then divide the weight of the finished recipe (not including the weight of the container the food is in) by the desired number of servings. Result will be the weight of one serving.
Did you make this recipe?
Please consider Pinning it!!