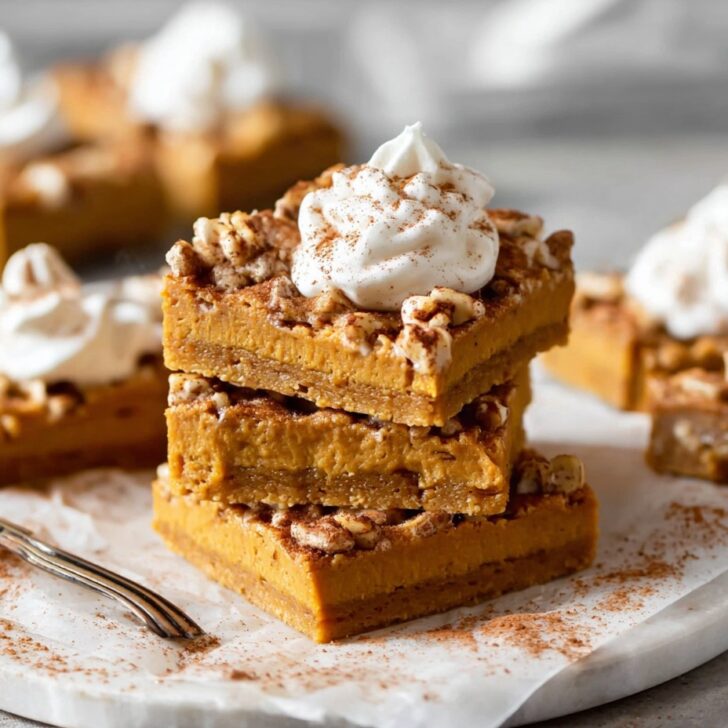
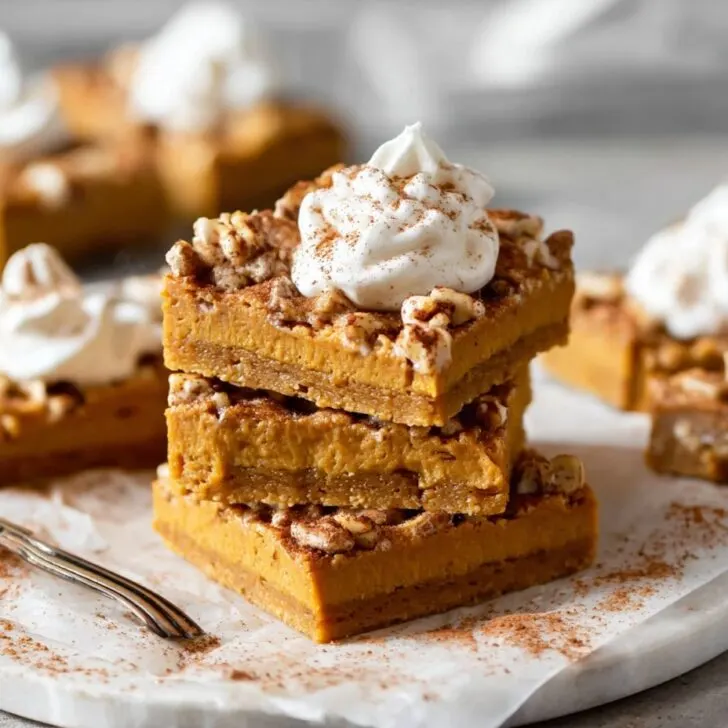
Let Me Tell You About The Pumpkin Pie Spice Squares
Okay, so picture this—it's a crummy November afternoon, rain pattering on the kitchen window, and my kids have lost all interest in their homework (as usual). I'm tempted to just make that boxed brownie mix I stashed in the back of the cupboard, but the Pumpkin on my counter practically begs me for attention. So I dig out my well-worn (maybe too well-worn) recipe notebook and my trusty can of pumpkin, and decide it’s a Pumpkin Pie Spice Squares kind of day. Honestly, these are the sort of squares that make you feel like you’ve won baking bingo—they’re soft, spicy, and just toeing the line between a cake and a blondie. Best of all? They're pretty forgiving. Mine have been rescued from near disaster multiple times, and they’re still the first thing gone from any snack table (I once left them unattended at a party, and—poof!—someone’s uncle ate half the tray).
Why I Actually Make These (And Maybe You Will, Too?)
I make this Pumpkin Pie Spice Squares Recipe literally whenever I want to make the house smell like I know what I'm doing. My family goes nuts for them, even though my oldest complains that I sometimes go heavy on the cloves (it’s called “depth,” kid). Plus, they’re the world’s best excuse to sneak in breakfast dessert—try not to judge! And if you’ve ever had a pumpkin pie split in the oven on you, these squares are like a cheat code (seriously, no fiddly crust). Oh, also, they freeze pretty well, but to be honest my squares rarely make it past the first 24 hours, so that’s mostly theoretical.
Home Cooks’ Ingredient List (with Swaps!)
- 1 cup canned pumpkin puree (sometimes I use homemade, but honestly Libby's is just fine if you’re in a rush)
- 2 large eggs (farm-fresh if I can nab them from the neighbor, store-bought for the rest of us)
- ½ cup vegetable oil (or melted butter—my sister-in-law always subs applesauce and swears by it, but it’s a bit too virtuous for me most days)
- 1 cup packed light brown sugar (the cheap stuff works, but dark brown gives it a caramel-y kick)
- 1 teaspoon vanilla extract (the real stuff, but fake vanilla gets a pass if you’re out)
- 1 ½ cups all-purpose flour
- 1 tablespoon pumpkin pie spice (or: 2 teaspoon cinnamon + ½ teaspoon ginger + ¼ teaspoon nutmeg + ¼ teaspoon cloves—but no stress, whatever’s handy)
- ½ teaspoon baking soda
- ¼ teaspoon salt (sometimes a big ‘pinch’ if I miss the measuring spoons)
- Optional: ½ cup chopped walnuts, pecans, or dark chocolate chips (my mom always added walnuts—but I just chuck in whatever’s left in my ‘baking bits’ jar)
So, How Do We Actually Make These?
- Preheat your oven to 350°F (about 175°C). Grease an 8x8-inch square baking pan—though honestly if all you’ve got is a round cake tin, it’ll still work, just call them wedges instead of squares.
- In a big bowl (less washing up later), whisk together the pumpkin, eggs, oil, sugar, and vanilla until it’s looking smooth-ish. This is where I sneak a taste, mostly out of habit (and yes, I know—raw egg danger, rebel over here).
- In another bowl, stir together the flour, pumpkin pie spice, baking soda, and salt. Or just dump them in on top and give it a little swirl if you hate dirtying more bowls (been there, done that, lived to tell).
- Add the dry mix to the wet stuff. Gently fold together until just combined—don’t overmix! (Trust me, I turned these into a rubbery mess once by getting too diligent. Less is more here.)
- Fold in any extras—nuts, chocolate, whatever jazzes you up. If I’m feeling fancy, I sprinkle a few chips right on top too.
- Pour (well, plop might be more accurate) the batter into your pan. Smooth it out with a spatula or the back of a spoon.
Don’t panic if it seems thick; it all comes together in the oven magic. - Bake for 26-30 minutes—start checking at 25. A toothpick poked in the middle should come out mostly clean; a crumb or two clinging is perfect. Under-baked = gooey, so you do you.
- Let cool in the pan (or if you’re impatient like me, at least 10 minutes so you don’t scorch your fingers taking that first bite).
Random Notes You Probably Want to Know
- This is kind of a forgiving recipe—forgot the vanilla once, found out it wasn’t actually a disaster.
- If your squares look a bit sunken in the middle, honestly, nobody’s noticing under the icing sugar dusting (if you do that—I sometimes go wild with a glaze, see below).
- I sometimes make them the night before, and, strangely, the spices taste even bolder next day. Maybe this is just my fridge doing magic or something.
How I Messed Around with Variations
- I tried swapping all the sugar for coconut sugar once; not my best move, came out dry (but hey, edible with enough whipped cream).
- Chopped apples instead of nuts—turns out their extra juiciness made the mix a tad soggier, so maybe press out some apple juice first if you try it.
- Sometimes I add a swirl of cream cheese through the top before baking. Stunning if you don’t mind a bit of messiness.
What Gear Do You Need? (And What If You Don't Have It?)
An 8x8 or 9x9-inch pan is ideal, but, y’know, I’ve once split the batter between two loaf pans in a pinch. No electric mixer necessary, just grab a whisk and pretend it’s an arm workout. If you don’t have a spatula, honestly, a spoon is enough. Sometimes I use one of those flexible pastry scrapers from Sally’s Baking Addiction (she has great gear recs, by the way), but it’s not make or break.


How Long Do These Actually Keep?
If you somehow have leftovers, store them in an airtight container at room temp for up to 3 days, or pop in the fridge for 5 (though they’ll get a bit firmer). I say 3 days, but honestly, in my house they rarely stick around overnight—you could probably press them into service as a last-minute breakfast bar the next morning, just sayin’.
How I Like to Serve Pumpkin Pie Spice Squares
Often, I just dust them with icing sugar and call it a day—low effort, high impact. But if I’m feeling snazzy, a drizzle of vanilla glaze works wonders. Oh! And at Thanksgiving, my cousin insists we serve them a little warm with a blob of whipped cream (which, okay, admittedly is pretty great). And once, I tucked a square into my kid’s lunchbox… only to find a sticky napkin and crumbs at pickup, so I’ll count that as a win?
My Top ‘Don’t Do As I Did’ Tips
- Don’t try to pop them out of the pan too soon—unless you like your squares with a side of “oops, oops, help!”
- I skipped parchment lining once and deep-regretted the stuck-corner carnage. Actually, a quick lining saves a lot of grief.
- Test with a toothpick—looks can deceive. I set a timer on my phone now because I once binged a show and lost all sense of time (burned the corners, but middle was salvageable).
For The Curious (Or Just When You’ve Got Questions)
Q: Can I use fresh pumpkin instead of canned?
A: Definitely. Roast and mash it, but make sure it's not watery—canned is just easy. (I once got overzealous with fresh pumpkin and, let's just say, it was a bit mushy.)
Q: No pumpkin pie spice—what now?
A: Mix cinnamon, ginger, nutmeg, and a dash of cloves. Improv is your friend! King Arthur Baking (their DIY mix) has handy measurements if you’re that way inclined.
Q: Can I double the recipe?
A: Yep, just use a 9x13 pan and add another 5ish minutes to the baking time. Maybe check mid-bake though—ovens can be dodgy.
Q: Do you really have to let them cool?
A: Hah! Good one. Technically, yes, but I almost never do. Just don’t sue me if you scorch your fingertips—life's short, eat the warm square.
If you’ve made it this far, I appreciate your attention span—a rare trait these days. I suppose you didn’t need my little tangent about my cat knocking over my first pan of these last fall, but suffice it to say, these squares are now both kid- and cat-approved (sort of). Happy baking!


Ingredients
- 1 cup canned pumpkin puree
- 2 large eggs
- ½ cup vegetable oil
- 1 cup granulated sugar
- 1 cup all-purpose flour
- 1 teaspoon baking powder
- ½ teaspoon baking soda
- 1 ½ teaspoon pumpkin pie spice
- ¼ teaspoon salt
- 1 teaspoon vanilla extract
Instructions
-
1Preheat oven to 350°F (175°C). Grease an 8x8-inch baking dish and set aside.
-
2In a large bowl, whisk together the pumpkin puree, eggs, vegetable oil, sugar, and vanilla extract until smooth.
-
3In a separate bowl, combine the flour, baking powder, baking soda, pumpkin pie spice, and salt.
-
4Gradually add the dry ingredients to the wet mixture, stirring until just combined.
-
5Pour the batter into the prepared baking dish and spread evenly. Bake for 30–35 minutes, or until a toothpick inserted in the center comes out clean.
-
6Allow to cool completely before cutting into squares. Serve plain or with a dusting of powdered sugar.
Approximate Information for One Serving
Nutrition Disclaimers
Number of total servings shown is approximate. Actual number of servings will depend on your preferred portion sizes.
Nutritional values shown are general guidelines and reflect information for 1 serving using the ingredients listed, not including any optional ingredients. Actual macros may vary slightly depending on specific brands and types of ingredients used.
To determine the weight of one serving, prepare the recipe as instructed. Weigh the finished recipe, then divide the weight of the finished recipe (not including the weight of the container the food is in) by the desired number of servings. Result will be the weight of one serving.
Did you make this recipe?
Please consider Pinning it!!