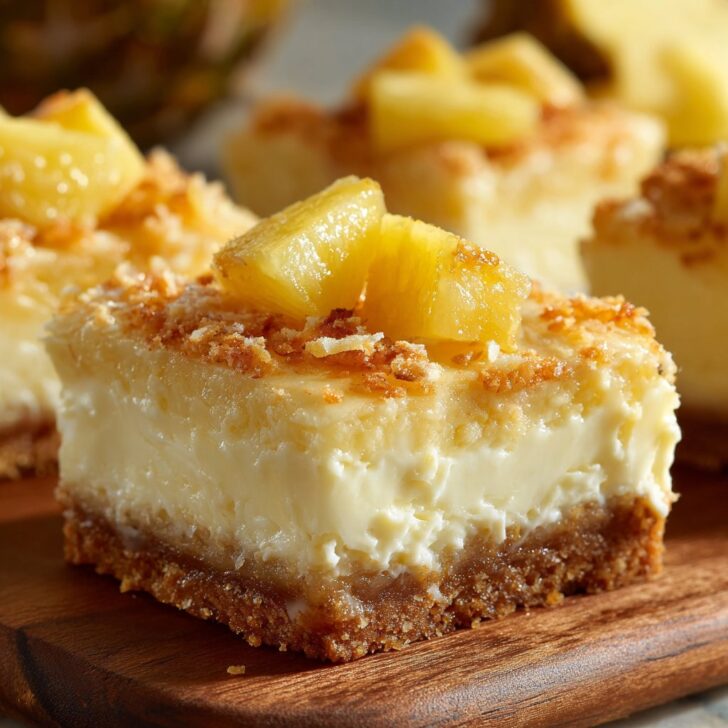
When Pineapple Cheesecake Bars Became My Go-To
Alright, so let me get this out there—I'm absolutely not a trained chef, but I do know my way around a block of cream cheese and a can (or, on a good day, a fresh one) of pineapple. The first time I tried making Pineapple Cheesecake Bars, my kitchen looked like a tropical storm hit. There was cream cheese in my hair and, oddly, pineapple chunks on the cat. But—oh boy—when those bars came out of the oven, I swear I did a little happy dance. Now, they're sort of my secret weapon for potlucks or family get-togethers (and, let's be honest, snack emergencies).
Funny thing: my friend Amy insists these should be called "sunshine bars" because they just make people smile. Or maybe that's the sugar rush talking? Either way, they're bright, tangy, and just a bit quirky. Kinda like me on a good day, I suppose.
Why You'll Love Making These (And Maybe Hate That They Disappear So Fast)
I make these Pineapple Cheesecake Bars when I want something that's not fussy but still feels, I don't know, a little special? My family basically hovers around the oven waiting for them to cool (they never do, by the way, so we eat 'em warm). Sometimes the bars crack on top—big whoop, they taste the same! Also, if you have a sweet tooth but don't want to break out the stand mixer, these are a lifesaver. (I once forgot to chill the cream cheese—still worked, though maybe a bit lumpy. No one complained.)
What You’ll Need (With a Few Cheat Options)
- 1 ½ cups graham cracker crumbs (sometimes I use digestive biscuits if they're all I have—my gran swore by McVitie’s, but honestly, any will do)
- ⅓ cup melted butter (if I’m feeling wild, I’ll use coconut oil instead, but only if I have some lying around)
- ¼ cup sugar (brown or white, I switch it up—never noticed much difference, to be real)
- 2 packages (8 oz each) cream cheese, softened (full-fat is best, but I’ve used Neufchâtel in a pinch—it’s slightly less creamy but still yum)
- ½ cup granulated sugar
- 2 large eggs (I once used 3 small ones and it was fine)
- 1 teaspoon vanilla extract (okay, I sometimes add a splash more; who’s counting?)
- 1 cup crushed pineapple, well-drained (fresh or canned—I’m lazy, so usually canned; just squeeze out the juice!)
- Pinch of salt (totally optional, but I think it does something...)
How I Throw It All Together
- First, preheat your oven to 325°F (or about 160°C for those of us on the metric system). Grease an 8-inch square pan—sometimes I just use baking spray, sometimes butter, depends on my mood.
- Mix the graham cracker crumbs, melted butter, and ¼ cup sugar together until everything looks like damp sand. Dump that into your prepared pan and pat it down—use your hands, or a glass bottom. (I always have crumbs under my nails after, but oh well.)
- Bake the crust for about 8 minutes. It won't look much different, but that's totally fine.
- While that’s happening, grab a bowl (I just use the one from my stand mixer, but elbow grease works too). Beat the cream cheese till it’s smooth—if yours is still a bit cold, go slow or you’ll fling blobs everywhere. Ask me how I know.
- Add ½ cup sugar, eggs, vanilla, and salt. Mix again till it’s creamy. If it’s lumpy, don’t stress—once it bakes up, it's mostly fine. Fold in the drained pineapple. This is where I usually sneak a small spoonful—just to, you know, make sure it’s not poisonous.
- Pour (or dollop, if the batter's thick) over your crust. Smooth it out best you can. If your pineapple chunks are a bit chunky, you might have to poke them into the batter. No biggie.
- Bake for 30–35 minutes, or until the center is just set. If it jiggles just a bit, that’s perfect. Overbake and it gets dry—not the end of the world, but not ideal.
- Cool for at least an hour. Actually, I find it works better if you let it chill overnight, but sometimes I just can’t wait.
- Slice into squares, pop them out, and try not to eat three before anyone else gets a go.
Notes: Stuff I Learned the Hard Way
- Pressed for time? You can skip chilling, but the bars might be a bit oozy. (Still delish, just messier.)
- I tried once with low-fat cream cheese. It tasted okay, but the texture was a bit off, almost grainy.
- If your pineapple’s not drained well, the bars get a little soggy. So I actually press mine between paper towels now—learned that one after a particularly drippy disaster.
- Crust too crumbly? Add a smidge more butter, or just embrace the chaos.
If You Wanna Tweak Things (My Experiments, Good and Bad)
- I’ve added toasted coconut to the crust or the filling—kind of a Piña Colada vibe. It’s good, but my kids picked out the coconut so, maybe not for everyone.
- Swapped the pineapple with mango once. Tasted nice, but the bars were softer and a bit weepy. Not my best work!
- Adding a squeeze of lime juice gives it a nice zing, but go easy or it’ll overpower the pineapple. Trust me, I got a bit overzealous once.
What You Need (And What To Do If You Don’t Have It)
- 8-inch square baking pan (I used a round cake tin once—came out fine, just not bars anymore)
- Hand mixer or stand mixer (but I’ve mixed it all by hand with a fork before... my arm was sore, but it worked)
- Mixing bowls, spatula, measuring cups/spoons
- Baking parchment or foil (optional; I only bother if I want perfect edges)


Storing These (Though They Usually Don’t Last Long!)
Keep 'em in the fridge, covered, for up to 3 days. They do taste better the next day, in my opinion—flavors kind of meld together. But honestly, in my house, they barely make it through breakfast the next morning. If you want to freeze cheesecake bars, just wrap each one tightly then pop 'em in a freezer bag. They thaw pretty well, though the crust gets a bit softer.
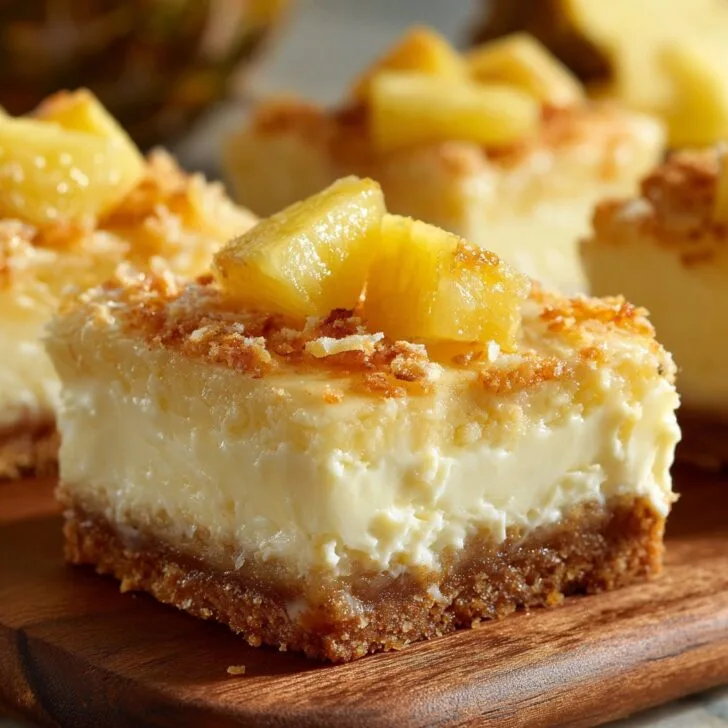
How I Love to Serve These (Family Traditions and All)
I like them plain, straight from the fridge with a cup of tea—no fuss. My cousin drizzles hers with honey or a bit of passionfruit syrup, which is fancy but honestly not needed. At birthdays, I cut them into triangles for a change—makes folks think they’re getting something extra special. Oh, and if you want to get cheesecake-bar-fancy, a little whipped cream on top is always a winner.
Pro Tips (aka Mistakes I’ve Made So You Don’t Have To)
- Don’t rush the cooling! I tried to slice them warm and it was just a goopy mess, tasted great, looked like a crime scene.
- Use parchment if you want to lift the whole slab out at once (which I always forget, so I usually just scoop the first one out and hope for the best)
- Don’t overmix the batter after adding eggs—it gets weirdly puffy. I learned that the tough way.
Your Questions (With Honest Answers!)
Can I use fresh pineapple?
Oh, for sure, but be sure to really drain it well—fresh tends to be juicier and can make the bars a bit wetter. And, I mean, prepping a whole pineapple is a faff, but go for it if you’re feeling energetic.
Can I make these gluten free?
Yep! Just use gluten-free graham crackers (I like Pamela’s). The rest is already gluten free.
Do I have to chill them overnight?
Nope, but I think the texture’s better if you do. If you’re impatient (like me half the time), just cool as long as you can stand.
My bars cracked on top—did I mess up?
Not even a little. Happens to me all the time. If it bugs you, cover the cracks with a dusting of powdered sugar or fruit. Or just eat 'em quick and no one will know.
Can I double the recipe?
Definitely! Use a 9x13 pan and bake a little longer. But, on second thought, maybe hide a few for yourself—they go fast.
So there you go. Pineapple Cheesecake Bars, in all their sweet, creamy glory. Let me know how yours turn out—or if you manage to keep them around longer than I ever do!


Ingredients
- 1 ½ cups graham cracker crumbs
- ⅓ cup unsalted butter, melted
- 2 packages (8 oz each) cream cheese, softened
- ⅔ cup granulated sugar
- 2 large eggs
- 1 teaspoon vanilla extract
- 1 cup crushed pineapple, drained
- 2 tablespoons all-purpose flour
Instructions
-
1Preheat oven to 350°F (175°C). Line an 8x8-inch baking pan with parchment paper.
-
2In a medium bowl, combine graham cracker crumbs and melted butter. Press mixture firmly into the bottom of the prepared pan to form the crust.
-
3In a large bowl, beat cream cheese and sugar until smooth. Add eggs one at a time, beating well after each addition. Mix in vanilla extract and flour until combined.
-
4Fold in the drained crushed pineapple. Pour the cheesecake mixture over the crust and spread evenly.
-
5Bake for 35 minutes, or until the center is set. Remove from oven and let cool completely. Refrigerate for at least 2 hours before slicing into bars.
Approximate Information for One Serving
Nutrition Disclaimers
Number of total servings shown is approximate. Actual number of servings will depend on your preferred portion sizes.
Nutritional values shown are general guidelines and reflect information for 1 serving using the ingredients listed, not including any optional ingredients. Actual macros may vary slightly depending on specific brands and types of ingredients used.
To determine the weight of one serving, prepare the recipe as instructed. Weigh the finished recipe, then divide the weight of the finished recipe (not including the weight of the container the food is in) by the desired number of servings. Result will be the weight of one serving.
Did you make this recipe?
Please consider Pinning it!!