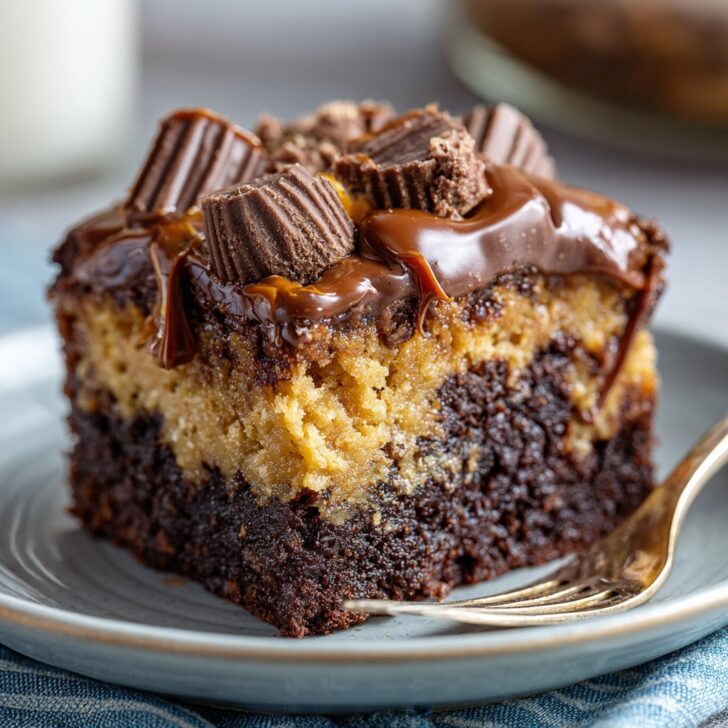
You Won't Believe How Easy This Is (Honestly)
Okay, here's the thing: Peanut Butter Cup Dump Cake isn’t one of those fancy, 2-hour recipes that require a tiny blowtorch or a soufflé pan you have to dust off once a year. Nope. This one came straight out of desperation—I needed something sweet, quick, and with as little washing up as possible (because, who loves dishes? Not me). First time I made it was actually for a backyard barbecue—my cousin ate almost half the tray before dinner. Or maybe I'm exaggerating, but still. Happens every time.
Why You’re Probably Going to Love This
I make this when we get those surprise visitors (the ones who text 'almost there!' instead of telling you the day before). My family goes bananas for it—especially my son who claims he’s "not a cake person," but has never turned down a slice of this. It’s quick, barely messy, and somehow tastes even better the day after… except honestly, it hardly ever makes it to Day Two. (Also, if you mess up the order of the layers a bit—no one will notice. Or they’re too polite to mention it.)
Here’s What You’ll Need (With a Few Substitutions)
- 1 box chocolate cake mix (I sometimes use devil's food when I’m feeling rebellious; my nan swore by Betty Crocker, but honestly any store brand's fine)
- 1 can (14 oz) sweetened condensed milk (I once accidentally used evaporated milk, and it was...not great. Trust me, stick to condensed.)
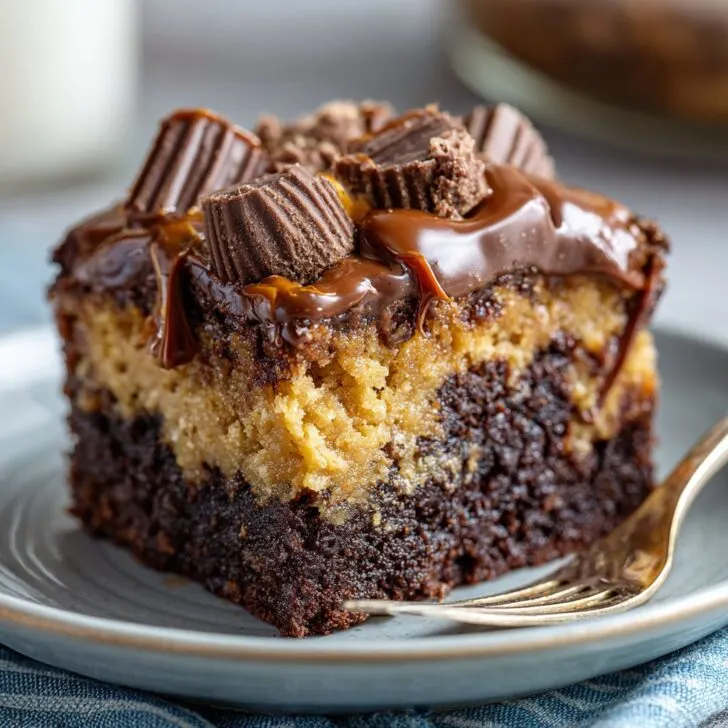
- 2 cups mini peanut butter cups, halved (You can swap in chopped peanut butter chocolate bars if you can't find the cups—Reese's is my go-to, but whatever’s on offer will do)
- ½ cup creamy peanut butter (chunky works too if you like extra crunch)
- 1 stick (½ cup) melted butter (some folks do a combo of butter and oil, but I didn't notice a difference worth the hassle)
- ½ cup chocolate chips (optional, but… why not?)
- A pinch of salt (seriously, just a pinch is enough; makes it pop)
Let’s Get Baking (Imperfect Instructions for Real Life Cooks)
- Preheat your oven to 350°F (or about 175°C, give or take a few degrees if your oven's like mine and retired last year). Grab a 9x13" baking dish—you don't have to grease it, but I do anyway to avoid the sticky aftermath.
- Layer it up: Start by sprinkling the peanut butter cup halves all over the bottom. Cover as much of the pan as you can. This is where I usually sneak a piece or two. Life is short.
- Pour the sweetened condensed milk right over those peanut butter cups. Don’t try to spread it; just kind of drizzle and tilt the pan around a bit so it's not all in one spot. (This might look a bit odd, but it always sorts itself out.)
- Mix the cake mix, melted butter, and peanut butter in a big bowl. I mostly just use a fork, but you do you. Gloopy is fine! Scatter this mixture roughly over the pan; it’s okay if it’s not even—actually, I find it’s tastier with small lumps.
- Sprinkle on those chocolate chips and a pinch of salt if you’re feeling wild. Sometimes I forget this part, and it still tastes fab!
- Bake it for 30-35 minutes. Check around half an hour; the top should be set, but if it's got a bit of wiggle, that's okay. (Don't panic if it looks weird or bubbly near the edges—that's just the condensed milk working its magic.)
- Let it cool for a good 15 minutes before diving in—unless you like molten chocolate burns on your tongue, which I, uh, don't recommend after one particularly impatient attempt.
Stuff I Learned (Sometimes the Hard Way)
- If you underbake it, it tastes like warm peanut butter fudge. Over-bake and it’s more brownie-like. Both are delicious… I just wish I could be consistent!
- Don’t use a glass pan if your oven runs hot; it can occasionally brown too fast at the edges.
If You Feel Like Mixing Things Up
- I once tried swapping caramel cups for the peanut butter ones—turned out way sweeter than expected. But white chocolate chips with the regular cups? Surprisingly solid move.
- Occasionally I toss in a handful of toasted chopped nuts on top (cashews! Go figure, right?)
- My latest experiment was trying crunchy cookie butter instead of peanut butter, but it just wasn’t quite right; maybe you’ll have better luck?
Equipment (But Don’t Sweat It If You’re Missing Something)
All you really need is a 9x13" pan, a bowl for mixing, and a fork or spoon. Don’t have a 9x13? Use a couple of smaller pans—just keep an eye on the bake time. Or, sometimes I use a square pan and make it thicker (which means you just eat bigger slices). No fancy stuff required, though a silicone spatula does make cleanup kinda easier.


Storing (Theoretically)
Store leftovers in an airtight container at room temp for up to 2 days… though honestly, in my house it never lasts more than a day! You can pop it in the fridge if you like firmer chunks—somehow it tastes a bit denser and fudgier on day two. Actually, now that I think of it, try warming it up in the microwave for 10 seconds; magic.
Serving: Family Traditions and Silly Arguments
We like to hack off gigantic squares and plop a scoop of vanilla ice cream on top (with a bit of extra peanut butter sauce if I’m feeling decadent). Sometimes someone insists on whipped cream, and occasionally my brother just eats it straight from the pan with a fork. No judgment here.
My Hard-Learned Pro Tips
- I once tried baking this at 400°F to "save time"—not recommended, unless you like a burnt top and raw middle. Just trust me and stick to 350.
- Don’t skimp on the cooling time. I know cake smells amazing, but I always regret it if I don’t let it settle. (I say this every single time, still break my own rule…)
Real Questions From Friends (a.k.a. FAQ)
Can I make this ahead? Totally—just cover and store. Actually, I think this tastes better the next day, but then again, I might just be weird.
Is it okay to use chunky peanut butter? Yep! Gives it extra texture. Plus, once I ran out of creamy and no one noticed the switch.
Could I use sunbutter for nut allergies? I probs would! Haven't tried myself, but a friend says it works fine—let me know if you do.
What's with the condensed milk—is that really necessary? Pretty much, yeah. Tried leaving it out once, and the whole thing was just...dry? Like eating sand. Only tastier. (But not as good as with the milk!)
If you’re looking for a good oven thermometer, Serious Eats rounded up their favorites which helped me tame my ancient, dodgy oven. And for peanut butter lovers, check out Sally’s homemade cups. Makes this cake even more bonkers, in a good way.
Last thing (and I'll stop rabbiting on): some folks say dump cakes are "cheating," but honestly, sometimes a shortcut is the only thing between you and a warm, gooey, chocolaty mess of happiness. That’s my soapbox for today—give it a whirl, and let me know if you think I’m nuts or a genius (or both?).


Ingredients
- 1 box (about 15.25 oz) chocolate cake mix
- 2 cups mini peanut butter cups, chopped
- 1 cup creamy peanut butter, melted
- ½ cup unsalted butter, melted
- 1 cup milk or semi-sweet chocolate chips
- 1 ½ cups whole milk
- ½ teaspoon salt
- 1 teaspoon vanilla extract
Instructions
-
1Preheat oven to 350°F (175°C). Grease a 9x13-inch baking dish.
-
2Evenly spread the chopped mini peanut butter cups across the bottom of the dish.
-
3Sprinkle the chocolate cake mix evenly over the peanut butter cups.
-
4In a medium bowl, whisk together melted peanut butter, melted butter, milk, salt, and vanilla extract until smooth.
-
5Pour the peanut butter mixture over the cake mix and sprinkle chocolate chips on top.
-
6Bake for 35-40 minutes or until the top is set and bubbling. Cool slightly before serving.
Approximate Information for One Serving
Nutrition Disclaimers
Number of total servings shown is approximate. Actual number of servings will depend on your preferred portion sizes.
Nutritional values shown are general guidelines and reflect information for 1 serving using the ingredients listed, not including any optional ingredients. Actual macros may vary slightly depending on specific brands and types of ingredients used.
To determine the weight of one serving, prepare the recipe as instructed. Weigh the finished recipe, then divide the weight of the finished recipe (not including the weight of the container the food is in) by the desired number of servings. Result will be the weight of one serving.
Did you make this recipe?
Please consider Pinning it!!