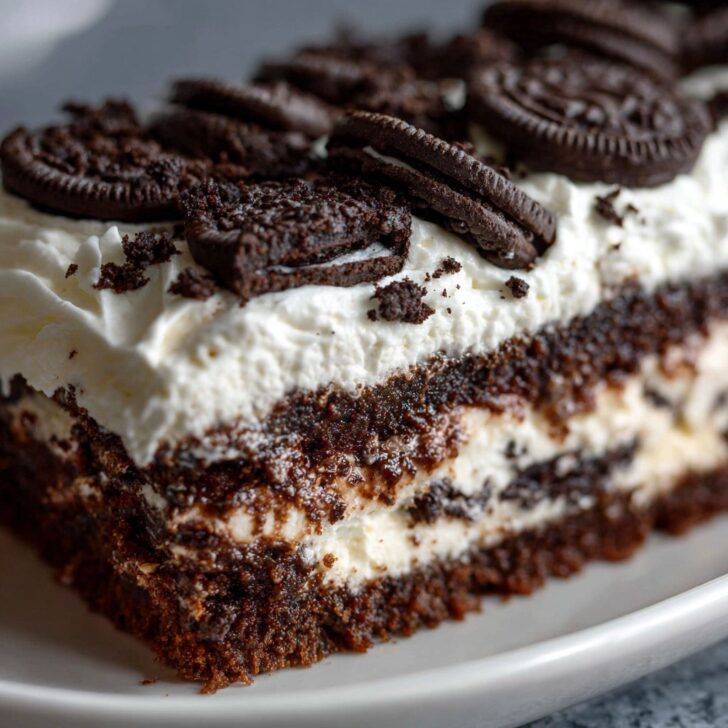

Let Me Tell You About This Oreo Lasagna Cake
Alright, so picture this: it's your niece's birthday, sun is shining, kids are running wild, and someone (me, probably) forgets to buy a cake. Enter: my trusty Oreo Lasagna Cake with Whipped Cream Layers. Seriously, this thing has saved my bacon more times than I care to admit. The first time I made it, I didn't even have the right pan—used a slightly dented casserole dish, and no one cared because, well, Oreos. Oh, and if you ever, ever need a dessert that looks like you spent hours but really didn't, this is the one. (Just don't tell my mother-in-law, she still thinks I labor over it.)
Why You'll Love It (or At Least Why I Do)
I make this when I want to impress people without breaking a sweat—or when I just want to eat half a pan myself on a random Tuesday. My family goes absolutely bonkers for this because, I mean, it's layers of Oreos, pudding, and fluffy clouds of whipped cream. Who can resist that? (Not me. I've tried.) There's something about smashing up those cookies that feels a bit therapeutic, too, especially after a long day. Oh, and the best part? You don't even have to turn on the oven. Because, honestly, who needs extra heat in July? Been there, regretted that.
Here’s What You’ll Need (Substitutions Welcome!)
- About 36 Oreo cookies (or any chocolate sandwich cookie, honestly—my grandmother swore by Hydrox, but Oreos are just easier to find)
- ¼ cup melted butter (sometimes I just eyeball it—close enough)
- 1 package (8 oz) cream cheese, softened (full-fat is best, but I've used the low-fat stuff when I was feeling guilty after holiday eating)
- ¼ cup granulated sugar, or swap for powdered sugar if that's all you have
- 2 tablespoons cold milk (I use 2%, but almond milk works if you have it)
- 1 tub (12 oz) whipped topping, thawed (Cool Whip, but any knockoff works; I tried homemade once and it was... extra work for not much difference)
- 2 packages (3.9 oz each) instant chocolate pudding mix
- 3 ¼ cups cold milk (for the pudding, but if you run out, I've mixed in some half-and-half)
- Extra crushed Oreos or chocolate chips for topping (totally optional, but my kids say it's not complete without them)
How to Make This Layered Oreo Beauty
- Crush the cookies: Toss your Oreos into a big zip-top bag and bash them with a rolling pin or wine bottle (no judgment). Or, if you're fancy and own a food processor, use that. Mix the crumbs with melted butter till it looks like damp sand. Press it all into the bottom of a 9x13 pan. Sometimes I use parchment paper, but usually I forget and it's fine.
- Make the creamy layer: Beat the softened cream cheese with sugar and two tablespoons of milk until smooth and fluffy. Add in about a third of your whipped topping—just kind of fold it in gently. Plop this over the cookie base and spread it out. Don't worry if it's a bit lumpy; it all evens out later.
- Pudding time: In another bowl, whisk together the pudding mixes and 3 ¼ cups milk. Whisk for 2 minutes (seriously, time it—otherwise it turns runny) until it gets thick. Spread this pudding layer over the cream cheese layer. This is where I usually sneak a spoonful. Oops.
- Top with more whipped cream: Spread the rest of that fluffy stuff all over the top. If you want to get fancy, swirl it. Or just plop it and call it rustic.
- Chill: Here's the hardest part: pop the pan in the fridge for at least 4 hours. Overnight is even better, if you have the willpower. (Confession: I usually don't.)
- Finishing touches: Sprinkle the top with more crushed Oreos, mini chocolate chips, or whatever feels right. Sometimes I forget. No one complains.
My Real-Life Notes (Trial, Error, and Cookie Crumbs)
- If you try to use regular pudding instead of instant, you'll be waiting forever for it to set. Don't ask me how I know.
- I've made this with gluten-free Oreos and, honestly, it's still delicious. And that's coming form someone who loves the classic version.
- Letting it sit overnight really does make those layers set up better. But it tastes great right away too—just a bit more messy (which is sometimes half the fun).
- Don't panic if your crust isn't perfectly flat. Mine never is.
Variations I've Tried (Some Winners, Some Not So Much)
- Peanut butter Oreos—amazing, especially if you drizzle a little melted peanut butter over the top. But, once, I tried mint Oreos and it was... well, let's just say not my favorite. Felt like brushing my teeth after dessert.
- Vanilla pudding instead of chocolate. It was good, but the color combo looked odd, so maybe add some chocolate chips on top?
- I once tried adding sliced bananas in the middle. Tasted great day one, but got weird and mushy on day two. Bananas just can't handle the commitment, I guess.
Equipment You’ll Need (or Not)
- 9x13-inch baking dish (or any large-ish pan—I've used a roasting pan in a pinch)
- Mixing bowls (at least two, three if you're like me and forget to wash one mid-recipe)
- Electric mixer for the cream cheese layer—though I've mixed by hand with a sturdy whisk before. Bit of an arm workout, but it gets the job done.
- Rubber spatula or large spoon. Your hands work too, but it's messier. Actually, I find a regular old butter knife is good for spreading, weirdly enough.
- Plastic wrap or foil for covering. Sometimes I just use a clean kitchen towel if I'm short on patience (or plastic wrap).


How to Store It (If It Lasts That Long!)
Cover the pan and pop it in the fridge. It'll keep for up to 3 days, but honestly, in my house it never lasts more than a day! Once, I tried freezing leftovers—don't bother, the texture gets all funky and weird. Just eat it while it's fresh.
How I Like to Serve It (And How My Family Argues About It)
Big squares, straight out of the pan, with extra crushed Oreos sprinkled on top. Sometimes, for birthdays, I'll plop a candle in a corner piece and call it a cake. A scoop of vanilla ice cream on the side never hurt anyone, either. Oh, and every Christmas Eve, my cousin insists we add red and green sprinkles. Not traditional, but hey—why not?
Things I’ve Learned (Or Messed Up) Along the Way
- Don’t rush the chilling step. I once tried serving after just an hour, and it oozed everywhere. Still tasted good, but not exactly Instagram-worthy.
- Use softened cream cheese. If it's too cold, it clumps, and no amount of mixing will save it. Trust me, I've tried.
- If your whipped topping isn’t fully thawed, it’ll be impossible to spread. I know this because I got impatient and tried anyway. Didn’t end well.
Questions I Get All the Time (And My Honest Answers)
- Can I make this ahead of time?
- Absolutely! In fact, I think this tastes better the next day. Just keep it covered in the fridge.
- Do I have to use Cool Whip?
- Nope! Homemade whipped cream is great if you have the time/energy. But honestly, store-bought saves a lot of effort, especially when you’re juggling other things.
- Can I use different cookies?
- Oh, for sure. I once used chocolate chip cookies, and it was a bit of a wild card, but folks loved it. Graham crackers are okay too, though you might need more butter.
- Is it super sweet?
- Well, it’s not what I’d call health food… but if you want it a little less sweet, just use less sugar in the cream cheese layer or opt for dark chocolate pudding.
- Where’d you learn this recipe?
- Picked it up years ago form Allrecipes, then tweaked it over time. And honestly, I get new ideas every time I browse Sally's Baking Addiction—it’s my go-to when I'm stuck.
- Hey, do I have to share?
- Ha! Not if you don’t want to. But it disappears fast, so maybe stash a piece in the back of the fridge just in case.
If you need a showstopper dessert that’s basically guaranteed to win friends (or at least keep your family happy for a few hours), give this Oreo Lasagna Cake with Whipped Cream Layers a shot. And if you end up adding your own spin, let me know—though I can’t promise I won’t steal the idea!


Ingredients
- 36 Oreo cookies, crushed
- 6 tablespoons unsalted butter, melted
- 8 ounces cream cheese, softened
- ¼ cup granulated sugar
- 2 cups whipped topping (such as Cool Whip), divided
- 1 package (3.9 ounces) instant chocolate pudding mix
- 2 cups cold milk
- ½ cup mini chocolate chips (optional, for topping)
Instructions
-
1In a medium bowl, combine crushed Oreo cookies and melted butter. Press the mixture evenly into the bottom of a 9x13 inch dish to form the crust.
-
2In a separate bowl, beat cream cheese and granulated sugar until smooth. Fold in 1 cup of whipped topping. Spread this mixture evenly over the Oreo crust.
-
3In another bowl, whisk together the instant chocolate pudding mix and cold milk until thickened, about 2 minutes. Spread the pudding layer over the cream cheese layer.
-
4Spread the remaining whipped topping evenly over the pudding layer.
-
5Sprinkle mini chocolate chips on top for garnish, if desired. Refrigerate for at least 4 hours before serving to allow the layers to set.
Approximate Information for One Serving
Nutrition Disclaimers
Number of total servings shown is approximate. Actual number of servings will depend on your preferred portion sizes.
Nutritional values shown are general guidelines and reflect information for 1 serving using the ingredients listed, not including any optional ingredients. Actual macros may vary slightly depending on specific brands and types of ingredients used.
To determine the weight of one serving, prepare the recipe as instructed. Weigh the finished recipe, then divide the weight of the finished recipe (not including the weight of the container the food is in) by the desired number of servings. Result will be the weight of one serving.
Did you make this recipe?
Please consider Pinning it!!