
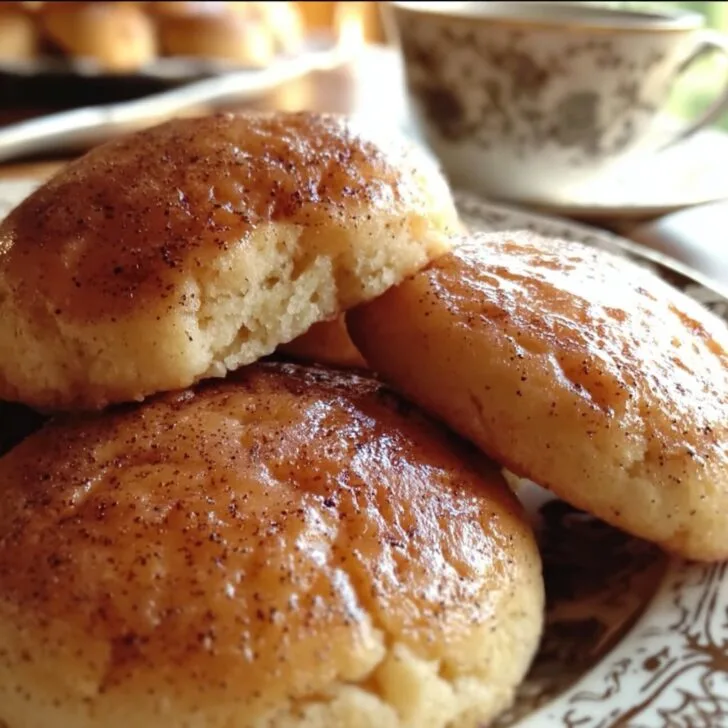
Pull Up a Chair: Let's Talk Tea Cakes
Okay y’all, so here’s the deal—if you’ve never had an old fashioned southern tea cake, you’re in for a memory-lane sort of treat. My first memory of these is honestly not even baking them myself but sneaking (okay, outright stealing) the soft middles off the cooling rack at my Aunt Jean’s kitchen. She’d fuss, but only half-heartedly, with a little smile. There’s something about the smell of real butter, sugar, and vanilla all mingling together that just feels like home. And listen, sometimes I get the urge to bake just because it’s raining or I’m missing someone. These are the answer every single time. Oh, and don't even get me started on the time I tried to make them with margarine... let's just say, lesson learned.
Why I Keep Coming Back to These
I make this when I want a bit of nostalgia and something easy (read: when life is a hot mess and I need to feel like I accomplished something). My family goes crazy for these, especially my brother, who claims they taste exactly like the ones from the bakery in town—though I’m pretty sure he’s just after another batch. I love that they’re not fussy; you don’t need anything fancy, and honestly, even if you mess up the shape, they still taste butter-soft and perfect. Also, they’re forgiving—if you forget to take the butter out to soften, just microwave it for a few seconds (just don’t melt it, unless you want weird chewy edges, which I learned the hard way).
My Usual Ingredients (And What I Swap When I’m Out)
- ⅔ cup (around 150g) butter, softened (sometimes I use salted if that’s all I have—just cut back on added salt)
- 1 ½ cups sugar (my grandmother always insisted on Dixie Crystals, but let's be real, store brand works fine)
- 2 large eggs (once I used 3 medium ones… they didn’t mind)
- ¼ cup buttermilk (regular milk is okay in a pinch—just add a splash of lemon juice if you want to fake the tang)
- 1 teaspoon vanilla extract (I occasionally swap in almond extract if I’m feeling wild)
- 3 cups all-purpose flour (if you have self-rising, skip the baking powder, but honestly, all-purpose is best)
- 1 teaspoon baking powder
- ½ teaspoon salt
How I Make 'Em: Step by Step (Or Thereabouts)
- Preheat your oven to 350°F. I usually forget and do this halfway through, but the pros say to start now.
- In a big ol’ bowl, cream together the butter and sugar until it looks pale and feels fluffy. I use a hand mixer, but a wooden spoon and some elbow grease works too (just brace yourself for a workout).
- Beat in the eggs, one at a time. Don’t panic if it looks a little curdled; it comes together, I promise.
- Add the buttermilk and vanilla. This is where I usually sneak a little taste—just to check for quality, obviously.
- In a separate bowl, whisk together the flour, baking powder, and salt. I sometimes skip the second bowl and just toss them in. So far, no disasters.
- Gradually add the dry stuff to the wet stuff. Go slow—unless you like clouds of flour poofing everywhere (kids love this, adults not so much).
- Mix until just combined. Don’t overdo it or you’ll have tough cookies (learned that one the hard way).
- Turn the dough out onto a lightly floured counter. Roll it out to about ¼ inch thick (or thicker if you’re feeling rebellious). If it sticks, just dust a bit more flour.
- Cut into rounds with a biscuit cutter or—if you can’t find yours, like me half the time—a drinking glass works just fine.
- Transfer to parchment-lined baking sheets. Space them out a bit, they do spread.
- Bake 8-10 minutes, until they look set and just barely golden around the edges. They should look a little pale—if you want crisp edges, let them go a minute longer. But I think they’re best soft.
- Cool on the pan for a minute (they can be fragile), then move to a wire rack. Or eat one warm, no judgment.
Notes: Stuff I’ve Figured Out The Hard Way
- If your dough feels sticky, just pop it in the fridge for 15 minutes—works like a charm.
- Once I tried adding lemon zest. Tasted nice, but not really a tea cake anymore, so probably skip unless you want something different.
- Actually, I find it works better if you don’t roll it too thin—they dry out fast.
What Didn’t Work (and a Few Variations I Actually Liked)
- I tried chocolate chips once—honestly, not my thing. The flavors fight each other. But colored sprinkles? The kids love it.
- If you like spice, a pinch of nutmeg or cinnamon is nice. But only a pinch!
- I swapped half the flour for whole wheat once. Edible, but not the classic vibe I wanted.
- Frosting on top? Too much for me, but my neighbor swears by it. To each their own.
Do You Really Need All the Fancy Tools?
You should have a rolling pin, but honestly, I’ve used a wine bottle more times than I’d like to admit. Biscuit cutters? Drinking glasses or even the rim of a mason jar work in a pinch. If all else fails, just shape ’em by hand—rustic is charming (that’s my story and I’m sticking to it).


How I (Mostly) Store These, Though Honestly They Don’t Last Long
Airtight container, room temp, good for 3 days—maybe longer but I can’t say I’ve ever had leftovers that made it that far. You can freeze the dough, too. Just wrap it tight and thaw before baking. Here’s a great storage guide I reference sometimes: King Arthur’s guide to storing cookies.
This is How We Eat 'Em at My Place
Mostly just as they are, but, sometimes with a cup of sweet tea (because, well, it’s the South). My cousin dunks hers in coffee, which I think is a crime, but she swears by it. Oh, and they’re oddly good with a little smear of strawberry jam.
Pro Tips I Learned the Hard Way
- I once tried to rush chilling the dough—big mistake. Dough stuck everywhere. So just be patient; grab a magazine or scroll through Southern Living’s cookie recipes while you wait.
- Don’t overbake. You can always pop ’em back in for a minute if they seem underdone, but you can’t go back from dry.
- Keep the dough a little thick; I know I said this already, but trust me, it matters.
Folks Ask Me These Things All the Time
- Can I use margarine? You can, but it’s not the same. Butter’s where the magic’s at—though if you’re desperate, go ahead.
- Do they freeze well? Actually, yes! Either baked or as dough. I find they taste better the next day, but maybe that's just me.
- What if I don’t have buttermilk? I just use regular milk with a splash of lemon juice or vinegar. Or, skip it and use plain milk. No one will know.
- Can I make them gluten free? I haven’t tried, but my friend swears by this gluten-free flour blend. Results may vary though!
- Why don't mine look like the picture? Ha, mine rarely do either. The taste is what matters—if they're a bit wonky, call it rustic.
Bit of a side note: if you ever find yourself with leftover dough and no patience, just bake rough little rounds—my kids call these “tea cake blobs.” They’re not pretty, but they’re perfect for snacking while you clean up (or, if you’re like me, while you pretend to clean up because you’re eating warm cookies instead).


Ingredients
- 2 ½ cups all-purpose flour
- 1 cup granulated sugar
- ½ cup unsalted butter, softened
- 2 large eggs
- ¼ cup whole milk
- 1 teaspoon vanilla extract
- ½ teaspoon baking soda
- ¼ teaspoon salt
Instructions
-
1Preheat the oven to 350°F (175°C). Line a baking sheet with parchment paper.
-
2In a large bowl, cream together the softened butter and sugar until light and fluffy.
-
3Beat in the eggs one at a time, then add the vanilla extract and mix well.
-
4In a separate bowl, whisk together the flour, baking soda, and salt. Gradually add the dry ingredients to the wet mixture, alternating with the milk, until a soft dough forms.
-
5Drop rounded tablespoons of dough onto the prepared baking sheet, spacing them about 2 inches apart.
-
6Bake for 10-12 minutes, or until the edges are lightly golden. Allow to cool on the baking sheet for a few minutes before transferring to a wire rack to cool completely.
Approximate Information for One Serving
Nutrition Disclaimers
Number of total servings shown is approximate. Actual number of servings will depend on your preferred portion sizes.
Nutritional values shown are general guidelines and reflect information for 1 serving using the ingredients listed, not including any optional ingredients. Actual macros may vary slightly depending on specific brands and types of ingredients used.
To determine the weight of one serving, prepare the recipe as instructed. Weigh the finished recipe, then divide the weight of the finished recipe (not including the weight of the container the food is in) by the desired number of servings. Result will be the weight of one serving.
Did you make this recipe?
Please consider Pinning it!!