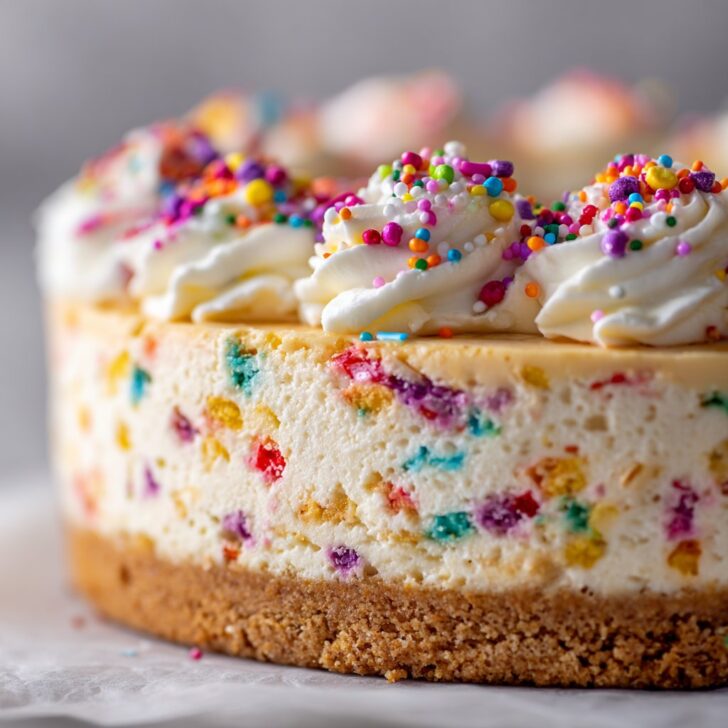
Hey There, Let's Talk Cheesecake
Alright, if you've ever found yourself somewhere between "I want cake" and "I can't be fussed to turn on the oven," let me just say—this No-Bake Funfetti Cheesecake has gotten me out of that pickle more than once. My niece calls it "birthday in a bowl," which, honestly, is about right. First time I made this, my sprinkles kind of exploded everywhere (pro tip: open the jar gently), but hey, more reason to vacuum under the fridge, right? Anyway, this is the kind of dessert that makes even a Tuesday feel like a party. Grab a snack 'cause this story might wander a bit—I've got cheesecake and opinions to share.
Why You'll Love This (Or at least, why I do!)
I make this when I want something that looks fancy but doesn't require a culinary degree. My family goes crazy for it because, not only does it have sprinkles (which is basically a cheat code for dessert joy), but it’s creamy, cold, and—major bonus—there’s no oven drama. Actually, I once tried a baked version, and my kitchen smelled like a burnt marshmallow for a week. This one's basically foolproof. Also, if you’ve got kids around, they can help stir (and sneak sprinkles, if they’re stealthy). And if you mess up a bit? Eh, just add more whipped cream, it distracts from everything.
What You'll Need (Ingredients & Swaps)
- 200g (about 2 cups) graham cracker crumbs (or digestive biscuits—my grandma always said McVitie’s but, honestly, any will do)
- 75g (⅓ cup) melted unsalted butter (I sometimes use salted, just because it’s what’s on hand, and it works fine)
- 400g (about 14oz) full-fat cream cheese, softened (use Philly if you want, but store brands haven’t failed me yet)
- 1 cup powdered sugar (I once accidentally used regular sugar—don’t recommend, but it’s not the end of the world)
- 1 teaspoon vanilla extract (a splash more if you’re feeling wild)
- 1 and ¼ cups heavy cream (whipping cream, double cream, whatever you call it—just make sure it’s cold)
- ½ cup rainbow sprinkles (the classic kind, not the little candy balls—those get weirdly crunchy)
- Pinch of salt (sometimes I forget this and, honestly, I don’t always notice)
So, How Do You Actually Make It?
- Mix up the crust: Combine graham crumbs and melted butter in a bowl using a fork (or just your hands, it’s not fancy). Squish it into a 9-inch springform pan, pressing down firmly. This is where I usually sneak a taste. Pop it in the fridge while you do the rest—ten minutes or so, longer if you remember.
- Whip the filling: In a separate big bowl, beat the cream cheese and powdered sugar together until smooth and dreamy. Add vanilla, keep whisking. Then pour in the cold cream and whip until it gets thick (soft peaks is the official term). If you don’t have an electric mixer, honestly, use a whisk and embrace the arm workout.
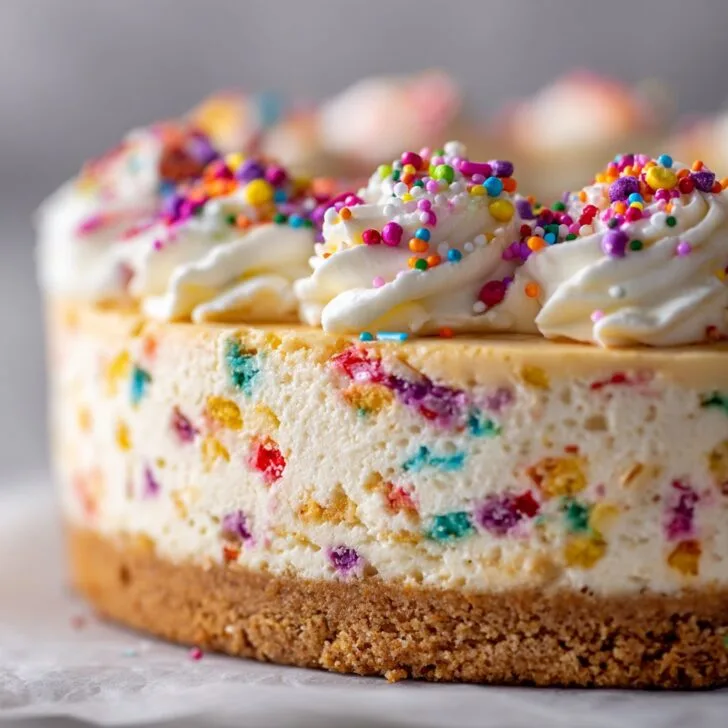
- Bring on the sprinkles: Gently fold in the rainbow sprinkles. It might look a bit like a unicorn had a meltdown at this stage, which is exactly what we want. If you stir too much, though, the colors can bleed. But I kind of like the tie-dye effect, so up to you.
- Assemble: Plop the filling on top of your crust. Smooth it out (or don’t—rustic is in, right?). I sometimes add extra sprinkles on top because, well, more is more.
- Chill: Cover and refrigerate for at least 4 hours, but overnight is even better. Don’t try to rush this—I once did, and it just slumped everywhere like a sad pudding.
- Serve: Run a butter knife around the edge before popping the springform. Slice and serve cold. Or just eat it straight from the pan; no judgment here.
Notes from My Kitchen (a.k.a. Things I’ve Learned the Hard Way)
- If your cream cheese isn’t soft, you’ll get lumps. Microwave it for a few seconds if you’re impatient—just don’t melt it by accident (been there).
- Sprinkles: I use classic jimmies. The little nonpareils end up looking like fish eggs, which is...not the vibe.
- If your crust looks too crumbly, just add a touch more melted butter. Or, on second thought, leave it crumbly—some folks like it that way.
Tried-and-True Variations (and a Fail or Two)
- I once swapped in crushed Oreos for the crust—delicious but a bit rich. Only for intense chocoholics.
- Lemon zest in the filling adds a zing. My aunt, though, said it made the cake taste like cleaning spray. Personal taste, I guess.
- One time, I tried swapping cream cheese with ricotta for a “lighter” version. Nope. The texture was weird, and it tasted off. Lesson learned.
What You Need (But Don’t Panic if You Don’t Have Everything)
- 9-inch springform pan (if you don’t have one, use a regular pie dish—the slices won’t be as neat, but who cares?)
- Mixing bowls
- Electric hand mixer, or a sturdy whisk and some elbow grease
- Rubber spatula (though, sometimes I just use a big spoon)
Sidebar: If you’re looking for a fun, affordable springform, I like this one (not sponsored, just what I use). And honestly, if you’re into baking, King Arthur Baking has a great guide to tools.


How To Store It (but good luck making it last)
Keep it covered in the fridge for up to 4 days. Though, honestly, in my house it never lasts more than a day! If you somehow have leftovers, the texture’s even better the next day—kind of like all the flavors had a sleepover and got to know each other.
How We Serve It (Personal Faves)
I like to slice it thick and serve with a mountain of whipped cream. My cousin insists on extra sprinkles tossed on right before serving so they don’t melt. Sometimes we do little candles for birthdays, no matter whose birthday it is. One time we had it for breakfast—no regrets.
Pro Tips (Learned the Hard Way)
- Don’t rush the chilling step. I once tried freezing it for an hour to speed things up—big mistake. It turned icy and weird.
- Make sure your cream is really cold before whipping. Warm cream just flops; trust me, I’ve tried.
Cheesecake Questions—Actual Ones I’ve Been Asked
- Can I freeze this? You can, but the texture gets a little iffy, sort of like eating cheesecake snow. Probably best just kept in the fridge.
- What if I only have low-fat cream cheese? It works, but the filling isn’t as rich or sturdy. Still tasty, though—nobody’s going to complain.
- Can I use gel food coloring to amp up the sprinkles? I mean, you can, but it’s a wild ride. Once ended up with neon green streaks everywhere; kinda fun but sorta off-putting.
- Is there a vegan version? I haven’t tried it, but I’ve seen recipes using coconut cream and vegan cream cheese—if you do it, let me know how it turns out!
- Why is my crust falling apart? Possibly not enough butter, or maybe it just needs to chill longer. Or maybe it’s just a little rebellious—it happens.
Anyway, that’s my not-so-polished, totally delicious, and slightly chaotic No-Bake Funfetti Cheesecake. If you give it a whirl, let me know how it turns out—I love hearing about kitchen adventures! And if you spill a few sprinkles along the way, well, that’s just part of the magic.


Ingredients
- 2 cups graham cracker crumbs
- ½ cup unsalted butter, melted
- 2 packages (8 oz each) cream cheese, softened
- 1 cup powdered sugar
- 1 teaspoon vanilla extract
- 1 ½ cups heavy whipping cream
- ½ cup rainbow sprinkles, plus more for topping
- Pinch of salt
Instructions
-
1In a medium bowl, combine graham cracker crumbs, melted butter, and a pinch of salt. Mix until the crumbs are evenly coated.
-
2Press the crumb mixture firmly into the bottom of a 9-inch springform pan to form the crust. Chill in the refrigerator while preparing the filling.
-
3In a large bowl, beat the softened cream cheese, powdered sugar, and vanilla extract until smooth and creamy.
-
4In a separate bowl, whip the heavy cream until stiff peaks form. Gently fold the whipped cream into the cream cheese mixture until well combined.
-
5Fold in the rainbow sprinkles, being careful not to overmix to prevent color bleeding.
-
6Spread the cheesecake filling evenly over the prepared crust. Top with additional sprinkles. Cover and refrigerate for at least 4 hours or until set before serving.
Approximate Information for One Serving
Nutrition Disclaimers
Number of total servings shown is approximate. Actual number of servings will depend on your preferred portion sizes.
Nutritional values shown are general guidelines and reflect information for 1 serving using the ingredients listed, not including any optional ingredients. Actual macros may vary slightly depending on specific brands and types of ingredients used.
To determine the weight of one serving, prepare the recipe as instructed. Weigh the finished recipe, then divide the weight of the finished recipe (not including the weight of the container the food is in) by the desired number of servings. Result will be the weight of one serving.
Did you make this recipe?
Please consider Pinning it!!