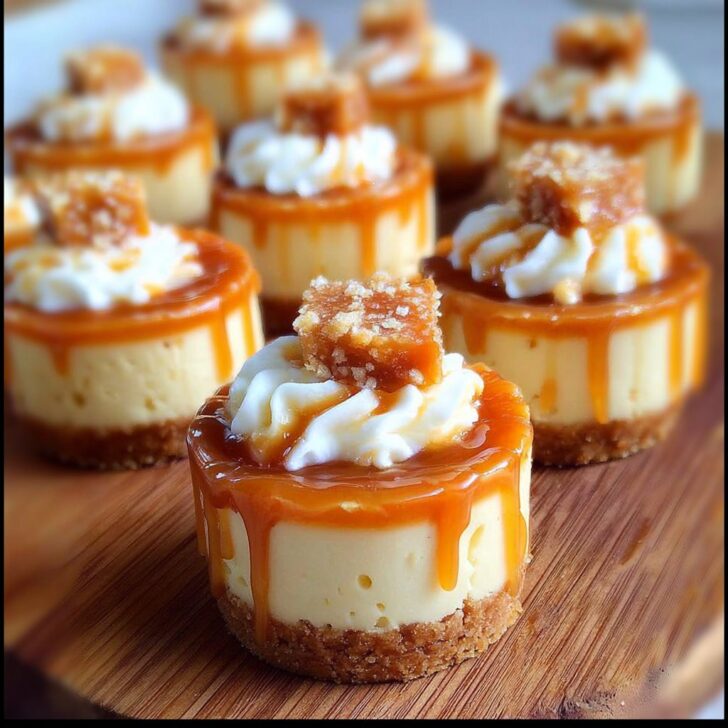
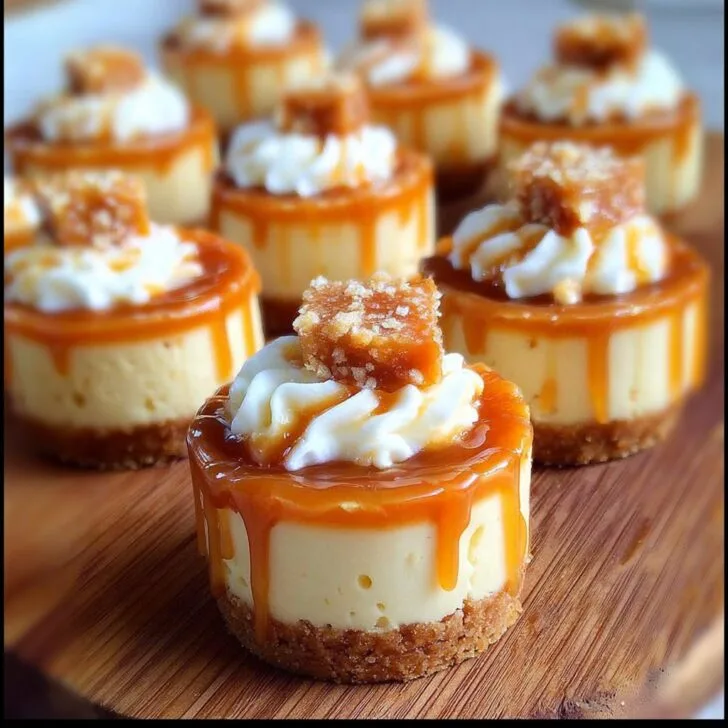
Let Me Tell You About These Mini Dulce de Leche Cheesecakes
I’ll be honest: the first time I made these, I was a total mess. You could practically hear the panic in my kitchen. Picture me, standing in front of the oven, wondering if I’d just invented some kind of caramel-flavored disaster. But hey, that’s how you find the good stuff, right? Now, these mini dulce de leche cheesecakes are requested for every family birthday, and my cousin once tried to sneak three of them into her purse (she’s not exactly subtle about it). I still laugh thinking about that time I forgot to line the muffin tin and had to chisel out each cheesecake with a butter knife. Live and learn!
Why You'll Love This (Or: Why I Keep Making It)
I make these when I’m craving something sweet but don’t want to commit to a full cheesecake (honestly, who wants to deal with that springform pan every time?). My family goes a little bonkers for these because you can eat them with your hands and there’s just the right amount of that creamy, dreamy dulce de leche. Plus, if you’re like me and sometimes lose patience with recipes that have a million steps, this one is pretty forgiving. Oh, and they look fancy enough for parties but not so fussy that you’ll cry if someone drops one. Which, in my house, happens more than I’d like to admit.
Stuff You'll Need (And Some Substitutes That Actually Work)
- 1 cup graham cracker crumbs (I’ve used digestive biscuits in a pinch—no one noticed!)
- 3 tablespoon melted butter (my grandmother insisted on unsalted, but I just grab whatever’s in the fridge)
- 2 tablespoon brown sugar (sometimes I skip this if I’m feeling lazy; it’s fine)
- 12 oz cream cheese, room temp (if you forget and it’s still cold, just microwave for 10 seconds—carefully)
- ½ cup granulated sugar
- 2 large eggs (once used three small ones—didn’t mess things up!)
- 1 teaspoon vanilla extract (the cheap stuff is totally fine, despite what fancy recipes say)
- ½ cup sour cream (plain Greek yogurt is a decent backup if that’s what you have)
- ¾ cup dulce de leche (you can make your own, but honestly, the jarred varieties at most Latin markets or even this method work just as well)
- Pinch of salt
How I Throw These Together (With Some Imperfect Steps)
- Preheat the oven to 325°F. Line a 12-cup muffin tin with papers. Or don’t—just grease the heck out of each cup (I forget the liners half the time, and it’s okay).
- Mix graham crumbs, melted butter, and brown sugar until it looks like sand after a rainstorm. Scoop a spoonful into each cup and smoosh it down (I use a shot glass for this; works like a charm).
- Bake the crusts for about 5 minutes. Just enough to set them. Don’t freak out if they look a bit pale—they’re fine.
- Beat the softened cream cheese and sugar together ‘til smooth, but don’t overdo it. This is where I usually sneak a taste. Then, one egg at a time, beat those in. Next, toss in the vanilla and salt, then the sour cream. The batter should look creamy and a bit glossy—don’t panic if it’s got a few lumps.
- Spoon the batter into the crusts, about ¾ full. Dollop a teaspoon (ish) of dulce de leche on top. Swirl with a toothpick or skewer, but don’t get too wild; a gentle swirl is all you need.
- Bake for 18–20 minutes. They’ll puff up a bit and the centers might jiggle—totally normal. Actually, I find it works better if you turn off the oven and let them sit for another 5 minutes so they don’t crack, but I forget half the time and they’re still lovely.
- Cool in the pan for 10 minutes, then take them out (carefully!) and cool on a rack. Pop in the fridge for a couple hours, or overnight if you’ve got the patience. I, for one, usually can’t wait that long.
Notes From the Trenches
- If you’re in a hurry, you can skip the crust baking step. It’s slightly messier but works.
- I once tried using condensed milk instead of dulce de leche. Spoiler: it just doesn’t set right.
- On second thought, let these cool completely before topping with more dulce de leche—it’ll stay prettier.
How I've Switched Things Up (Some Good, Some Not)
- Tried using Oreos for the crust. Tasted great but was a pain to crush. Wouldn’t recommend unless you’re feeling patient.
- Added a sprinkle of sea salt on top once. Big hit. Try it!
- Attempted a gluten-free version with almond flour. Didn’t quite hold together, but maybe you’ll have better luck?
What You'll Need (But Don’t Worry If You Don’t Have Everything)
- Muffin tin (I’ve used silicone molds in a pinch—just needed a bit more patience getting them out)
- Mixing bowls
- Electric mixer (hand-whisking takes ages, but if you’re feeling strong, go for it!)
- Toothpicks or skewers for swirling
- Shot glass to press down the crust (or just your fingers)


How To Store These (Not That You'll Need To)
In theory, these mini cheesecakes last 3–4 days in the fridge, sealed up tight. But honestly—in my house, they vanish within 24 hours. If you happen to have leftovers, you can freeze them (just wrap well). But I think they taste best fresh, or the next day if you’re lucky.
How We Serve Them (And A Little Family Quirk)
We usually top them with a little extra dulce de leche and a pinch of flaky salt. Sometimes I scatter a few berries on the platter because it looks pretty, though my nephew just picks them off. Oh, and a pot of strong coffee on the side is a must—it’s practically a tradition after Sunday lunch.
Pro Tips (Learned The Hard Way)
- I once tried to rush the chilling step. Big mistake. They just don’t set and you’ll end up with a gooey mess. Patience, grasshopper.
- Don’t over-swirl the dulce de leche. Once, I got carried away and just made caramel soup on top.
- If you forget to bring the cream cheese to room temp, you’ll get lumpy batter. I speak from (frustrating) experience here.
FAQ (Real Questions From The Family Group Chat)
Can you use store-bought dulce de leche?
Absolutely! I like the Goya brand, but honestly, any jar does the trick.
Can you make these ahead?
Yep. They’re actually even better the next day, which surprises me every time.
Do you need to use paper liners?
I say yes, but if you don’t have any, just grease the tin really well. Or maybe line with a strip of parchment—it’s what my friend Jess does.
Can you double the recipe?
You bet. Just use two muffin pans or bake in batches. Or, well, make a mess like I did the first time I tried (overflowed everywhere, ha!).
Want a deep dive into homemade dulce de leche? I once got lost in this Bon Appétit article—it’s got some wild ideas.
And if you ever have leftover dulce de leche, I highly recommend drizzling it on ice cream, or even just eating it with a spoon (zero judgment here!).


Ingredients
- 1 cup graham cracker crumbs
- 3 tablespoons unsalted butter, melted
- 8 ounces cream cheese, softened
- ⅓ cup granulated sugar
- 1 large egg
- 1 teaspoon vanilla extract
- ⅓ cup sour cream
- ½ cup dulce de leche, plus more for topping
Instructions
-
1Preheat the oven to 325°F (163°C). Line a 12-cup muffin tin with paper liners.
-
2In a small bowl, mix graham cracker crumbs and melted butter until combined. Divide the mixture evenly among the liners and press firmly to form the crust.
-
3In a medium bowl, beat cream cheese and sugar until smooth. Add egg, vanilla extract, and sour cream, mixing until just combined.
-
4Spoon the cheesecake batter over the crusts, filling each about ¾ full. Drop a teaspoon of dulce de leche onto each and swirl gently with a toothpick.
-
5Bake for 16-18 minutes, or until centers are set. Cool completely, then refrigerate for at least 2 hours before serving. Top with extra dulce de leche if desired.
Approximate Information for One Serving
Nutrition Disclaimers
Number of total servings shown is approximate. Actual number of servings will depend on your preferred portion sizes.
Nutritional values shown are general guidelines and reflect information for 1 serving using the ingredients listed, not including any optional ingredients. Actual macros may vary slightly depending on specific brands and types of ingredients used.
To determine the weight of one serving, prepare the recipe as instructed. Weigh the finished recipe, then divide the weight of the finished recipe (not including the weight of the container the food is in) by the desired number of servings. Result will be the weight of one serving.
Did you make this recipe?
Please consider Pinning it!!