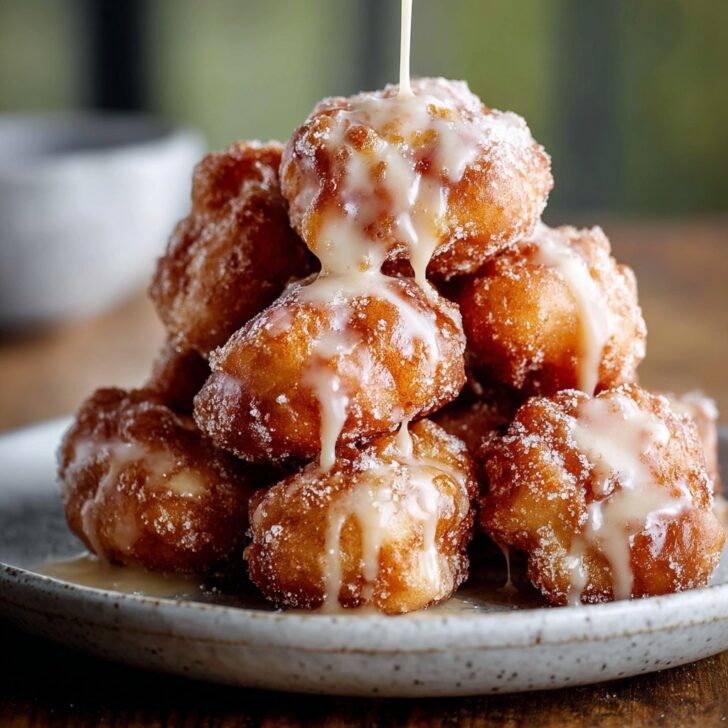

Let’s Chat About This Mini Cinnamon Apple Fritters Recipe
You know those rainy Saturdays when you’re not quite motivated, but you still crave something cozy–like, the sort of treat you’d eat standing over the stove because you can’t wait for it to cool off? That’s basically how these mini cinnamon apple fritters became a thing in my kitchen. My gran used to whip up apple fritters in a cast iron pan (she always claimed it made them crisper, I just liked stealing bites). I’ve since, probably to her dismay and my waistband’s, shrunk them down to mini size. More crispy edges, less splitting–no need to share. I’m not above licking the cinnamon sugar off my fingers, either. Anyway, if you have a spare apple and a couple of minutes, this is your sign. Besides, who needs perfection when you get such golden, spiced rewards?
Why I Keep Making These (and Maybe You Will Too)
I reach for this recipe when there’s half a sad apple rolling around the fridge drawer. And the house always smells incredible. My nieces actually text me (with emojis usually) asking if I’ll bring a bag over. Sometimes, I admit, the batter looks slightly off, or I forget the sugar in the mix, but honestly, they're super forgiving. There’s zero fuss with dough. Just chop, mix, and fry. Well, and eat way too many standing up. I love that they taste great for breakfast or late afternoon coffee breaks. If you’re someone who likes quick wins or recipes that hide a bit of chaos, say, from slightly mushy apples…this is your jam (fritter? Both!).
What You’ll Need, Substitutions & All
- 1 firm apple (I usually grab Granny Smith, but Fuji or even that random bruised Gala works. My gran said firm apples only; I say, use what’s not gone to cider.)
- ¾ cup (about 95g) all-purpose flour, but I’ve swapped in half whole wheat for “health”
- 1 tablespoon sugar—but brown sugar adds nice caramel notes if you have it
- ½ teaspoon ground cinnamon (sometimes I bump it up – go rogue!)
- ¼ teaspoon baking powder (or just a big pinch, if you’re using a weird old spoon)
- Pinch of salt
- 1 egg (room temp if you remember, cold if you forgot)
- ⅓ cup milk (dairy or honestly, I’ve used oat milk, it’s fine, nobody noticed)
- Vegetable oil for frying (about an inch in your skillet; don’t fuss, canola, sunflower or peanut all do the job)
- Extra cinnamon sugar for rolling (I mix about ¼ cup sugar + 1 teaspoon cinnamon in a bowl – official, right?)
Here’s How I Make ‘Em (Loose Directions Included)
- Chop that apple—I like to go small-ish cubes, probably less than 1 cm (for context, about baked bean size? Not scientific, but it works). No need to peel unless you’re fussy. Toss cubes in a little lemon juice if you don’t want browning (I don’t usually bother).
- Mix dry stuff together: flour, sugar, cinnamon, baking powder, and salt. I use a fork. I’d say sift, but really, who’s got time?
- Add egg and milk to the bowl. Stir until you’ve got a thick-ish batter. (Don’t be alarmed if it’s a bit more pancake batter than doughy. It’s supposed to look gloopy!) Fold in your apples.
- Heat your oil over medium. I usually test with a bit of batter—if it sizzles, you’re golden. Use a teaspoon or small cookie scoop to plop blobs into the oil – they puff as they cook. Don’t crowd the pan… I did that once, they glommed together. You want space.
- Fry until toasty brown, a couple minutes per side. Flip carefully (forks or tongs – or chopsticks if you’re fancy). Set on paper towels for a sec, just to let the oil run off. I always sneak the ugliest one right around here – chef’s rights.
- Toss in cinnamon sugar while warm. (If you wait too long and they cool off, the sugar won’t stick. Not the end of the world, they’re just less…cinnamony on the outside.)
Notes from Many, Many Fritter Sessions
- If your batter sits too long, it thickens – just sprinkle in a splash more milk and keep frying
- Don’t turn the heat up too high; impatient frying gives you burnt outsides and raw middles. Been there, regretted it every time.
- Sometimes I add a pinch of nutmeg. Not always—it’s a mood thing.
If You Want to Tinker (Because I Always Do)
- Tried adding raisins. Eh. Not my favorite, turned out kinda chewy.
- Slices of pear instead of apple actually worked really well. Give that a go if you’re feeling posh.
- A dusting of powdered sugar looks pretty for company, but we never wait that long.
- Once I chucked in chocolate chips. They didn’t melt much; I thought they might. Neat, but not necessary.
What If I Don’t Have All the Gear?
Look, a deep fryer would be handy, but I just use my battered old frying pan. No cookie scoop? Two teaspoons do the trick. I suppose in a pinch, you could try air frying? But honestly, pan-frying is the way (unless you’re philosophically against a bit of oil…in which case, maybe baked donuts are more your style–try this recipe from Sally’s Baking Addiction, it’s solid).


How to Keep (If You Even Need To)
If you’ve got leftovers—rare around here—just pop them in an airtight container. They’re fine at room temp for maybe a day, but by the following morning, they get a bit chewy. A quick nuke in the microwave helps, but, honestly, these usually disappear before anyone blinks. (Once, I did put them in the fridge… they got sad. Don’t recommend unless your house is hot!)
How We Eat Them (Besides Off the Paper Towel)
Sometimes, I dust them with extra cinnamon sugar and dunk in warm caramel sauce (homemade if I’m showing off, otherwise, I grab this King Arthur recipe). They’re good with coffee, tea, or just greedy hands. My uncle dunks them in sweetened yogurt. I’m not judging—try it sometime!
Lessons Learned (Or: Things I Messed Up So You Don’t Have To)
- Impatience is not your friend. Frying too many at once always leads to a bit of a mushy mess.
- Forgot the baking powder once. They still fried up, but were more dense than fluffy. Not the end of the world, but I wouldn’t skip it unless you’re out and desperate.
- Actually, letting the batter rest ten minutes while the oil heats up makes them puffier. I used to skip that, but now…sometimes I wait. Depends how hungry I am.
Honestly, I Get Asked These Things All The Time
- Can I freeze mini apple fritters?
- You can, sort of, but they lose crispness. Maybe try reheating in the oven around 180C (350F). Still not quite the same, though.
- What apples are best?
- People always have opinions! I usually say use what you have, but tart and firm works best. Overripe apples get soggy.
- Is there a way to make these gluten-free?
- Actually, yes—I swap in a 1:1 gluten-free baking blend (like Bob’s Red Mill). Texture’s slightly different but still yum.
- Can I bake instead of fry?
- Mmm, they just don’t get as crisp. If you hate frying, might as well make muffins or try baked donut holes. (But you might miss the crunch!)
- How small should I make them?
- I go for about walnut-sized blobs. Any bigger, they take longer to cook; any smaller and you’ll be frying forever.
Oh—and if you ever end up with leftover cinnamon sugar, sprinkle it on toast the next morning. You’ll thank me!


Ingredients
- 2 medium apples, peeled and diced
- 1 cup all-purpose flour
- 2 tablespoons granulated sugar
- 1 tablespoon ground cinnamon
- 1 teaspoon baking powder
- ¼ teaspoon salt
- ⅔ cup milk
- 1 large egg
- 1 teaspoon vanilla extract
- Vegetable oil, for frying
- Powdered sugar, for dusting
Instructions
-
1In a medium bowl, whisk together the flour, sugar, cinnamon, baking powder, and salt.
-
2In a separate bowl, beat the egg, then add milk and vanilla extract. Whisk until combined.
-
3Pour the wet ingredients into the dry ingredients and mix until just combined. Gently fold in the diced apples.
-
4Heat about 1 inch of vegetable oil in a deep skillet over medium heat. Once hot, drop heaping tablespoons of batter into the oil.
-
5Fry each side for 2-3 minutes or until golden brown and cooked through. Remove and drain on paper towels.
-
6Dust the warm fritters with powdered sugar before serving.
Approximate Information for One Serving
Nutrition Disclaimers
Number of total servings shown is approximate. Actual number of servings will depend on your preferred portion sizes.
Nutritional values shown are general guidelines and reflect information for 1 serving using the ingredients listed, not including any optional ingredients. Actual macros may vary slightly depending on specific brands and types of ingredients used.
To determine the weight of one serving, prepare the recipe as instructed. Weigh the finished recipe, then divide the weight of the finished recipe (not including the weight of the container the food is in) by the desired number of servings. Result will be the weight of one serving.
Did you make this recipe?
Please consider Pinning it!!