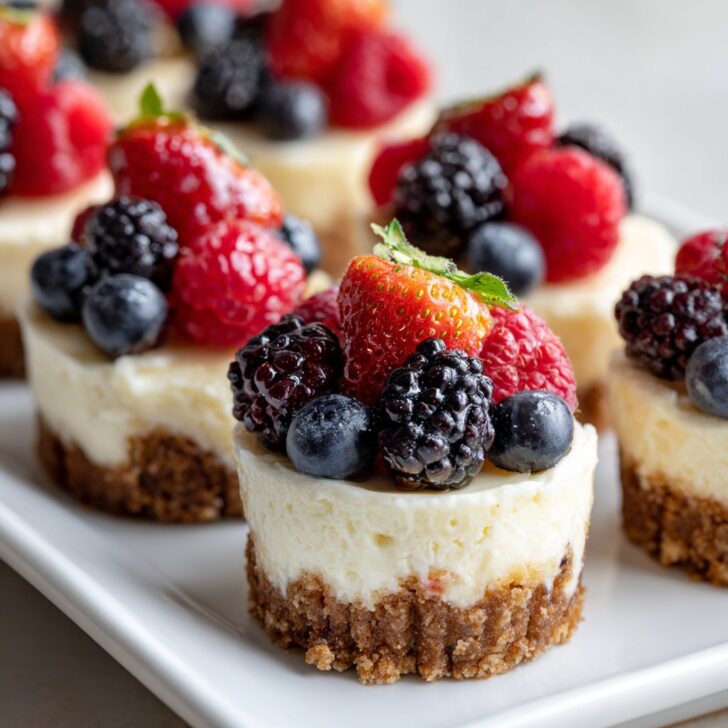
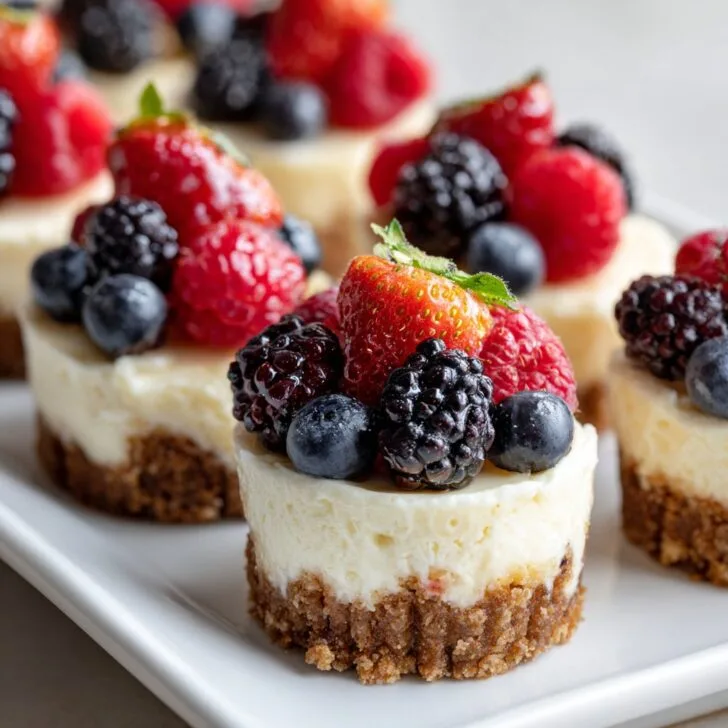
Mini Cheesecake Bites, Summer Memories, and a Little Chaos
Alright, so imagine this: it’s a balmy Sunday, my kitchen is a glorious mess (the kind that makes you slightly anxious but also weirdly proud), and I’m trying to wrangle a batch of mini cheesecake bites with summer fruits before my friends arrive for our annual backyard picnic. I first made these accidentally—no, really, I was aiming for a full cheesecake but my springform betrayed me and, well, muffin tins came to the rescue. And honestly? Never looked back. There’s something joyful about eating dessert with your fingers and pretending it’s portion control. Also, my neighbor once called these the “danger bites,” which I’m going to take as a compliment, even if she ate five without blinking.
Why I Keep Making These (And Probably Will Forever)
I make these mini cheesecake bites whenever I want to look like I’ve put in way more effort than I actually have. My family goes crazy for them because, well, they’re perfectly poppable (and yes, I just made up that word). Plus, if I’m honest, I like that everyone can pick their favorite fruit topping—no squabbling over slices! Also, there was this one time I forgot to let the cream cheese soften and ended up with lumpy batter. Nobody cared; they still disappeared. So, they’re pretty forgiving. Oh, and if you ever, ever try to rush the chilling stage, trust me, you’ll regret it. Been there, scraped cheesecake off the pan, got the t-shirt.
What You’ll Need (Ingredients & Substitutions)
- 1 cup graham cracker crumbs (or honestly, digestive biscuits work great—my gran swore by McVitie’s but any will do)
- 3 tablespoon melted butter (I’ve used coconut oil in a pinch, it’s fine but maybe a bit too tropical for my taste, though YMMV)
- 2 tablespoon sugar (sometimes I skip this if the crackers are super sweet)
- 2 x 8oz packages cream cheese, softened (full-fat is best, but I’ve used light cream cheese and lived to tell the tale)
- ½ cup granulated sugar
- 2 large eggs (room temp if you remember, but I rarely do)
- 1 teaspoon vanilla extract (I’m a splash-more kind of gal, honestly)
- Pinch of salt
- ½ cup sour cream (plain yogurt works if you’re out—I do this more often than I’d like to admit)
- Summer fruits: berries, peaches, nectarines, cherries, whatever looks good or is threatening to go off in the fridge
- Optional: lemon zest, a drizzle of honey, or some chopped mint for topping
How I Usually Throw These Together (Directions)
- Preheat your oven to 325°F (165°C). Line a 12-cup muffin tin with paper liners. Or silicone ones if you’re feeling fancy. I once tried just greasing the pan—wouldn’t recommend, unless you enjoy cheesecake archaeology.
- Mix graham crumbs, melted butter, and 2 tablespoon sugar in a bowl until it looks like wet sand. Spoon about a tablespoon into each liner and press down firmly—I use a shot glass, but your fingers are fine. (This is usually when someone wanders in and asks if they can have some. I say no. It’s not a snack. Yet.)
- Bake the crusts for about 5 minutes. Or until they smell good. Pull them out and let them cool while you deal with the filling.
- In a big bowl, beat the cream cheese until smoothish—don’t worry if it’s a little lumpy, nobody’s grading you. Add in sugar, eggs, vanilla, salt, and sour cream. Beat until just combined; overmixing makes it too airy, which I learned the hard way. Actually, I find it works better if you stop while there are still some streaks. Weird but true.
- Spoon the cheesecake batter over the cooled crusts, filling each about ¾ full. (This is where I sneak a taste. Quality control, right?)
- Bake for 15-18 minutes until they’re just set—jiggle the pan, they should wobble slightly in the middle but not slosh. Don’t panic if they puff up; they’ll sink back down as they cool.
- Let them cool in the pan for 10-15 minutes, then transfer to a wire rack. Stick them in the fridge for at least 2 hours—or overnight if you’ve actually planned ahead (I almost never do).
- Before serving, top with a riot of fresh summer fruits. I like to pile on strawberries, blueberries, and little dices of ripe peach. Sometimes I add a drizzle of honey or a scatter of chopped mint if I’m trying to impress someone.
Notes from the Trenches (a.k.a. Stuff I Learned the Hard Way)
- If the cream cheese isn’t truly soft, you’ll get lumps. Not a crisis, but you’ll notice. Or maybe you won’t, and that’s okay too.
- The crust can get a bit soggy if you don’t bake it first. I tried skipping this step once when I was running late. Regret.
- Don’t overfill the cups! The batter rises more than you’d think.
- Some days the cakes crack a bit. I just cover them with extra fruit and nobody suspects anything.
Variations I’ve Tried (and One I Wouldn’t Repeat)
- I’ve made these with an Oreo crust instead of graham crackers—great if you want to go full chocolate.
- Lemon zest in the batter gives them a bright zing. Go easy, though, or it takes over.
- Once I tried swirling in a bit of salted caramel. Tasty, but the texture went a bit weird—kinda gooey. Probably wouldn’t bother again.
- You can top with stewed fruits if berries aren’t in season, but in my opinion, fresh is best here.
Equipment (and What to Do If You’re Missing Stuff)
- Muffin tin (12-cup is ideal, but you can use a mini muffin tin—just reduce the bake time)
- Hand or stand mixer (a sturdy whisk and elbow grease works if you’re feeling brave, but you might curse me halfway through)
- Parchment or paper liners (or, you know, just grease really well and accept some stickage)
- Spoon or small scoop—honestly, I’ve used a tablespoon, and it’s fine
Oh, and if you have a food processor, it’s great for blitzing crackers. Otherwise, bash them up in a zip-top bag with a rolling pin. Good stress relief, actually.


Keeping Them Fresh (But They Never Last Long)
Store any leftovers in an airtight container in the fridge for up to 3 days. Though honestly, in my house it never lasts more than a day! If you want to make them ahead, you can freeze the baked (un-topped) cheesecakes for a couple of weeks. Thaw in the fridge before adding the fruit. They get a little denser but still taste fab.
How We Serve Them (Traditions, or Just Habit)
I love laying these out on a big platter and letting everyone top their own. My kids like to make faces with the berries (so yes, sometimes dessert gets a little weird). Sometimes I dust with icing sugar just because it looks like I tried harder than I did. If it’s hot out, I’ll add a dollop of whipped cream on the side. For a fancier touch, pair with some homemade berry compote. Oh, or check out this version at Serious Eats if you want even more ideas. But honestly, you can't go wrong.
Things I’ve Learned (a.k.a. Pro Tips from Experience)
- I once tried using warm cream cheese to speed things up, but it got kind of runny and wouldn’t set. Just wait it out. Trust me.
- If you try to remove them from the tin while still warm, they’ll probably stick or fall apart. I learned this the hard way—patience isn’t my strong suit, either.
- Leaving them in the fridge overnight makes the flavor even better. But I get if you can’t wait that long.
FAQ (Because Apparently People Really Want to Know!)
- Can I use frozen fruit? Yeah, absolutely! Just thaw and pat dry first, or it’ll get all watery and weird.
- Do I need to use liners? I’d say yes—makes life easier. But if you’re out, just grease the tin and expect some stickage. It’s not the end of the world.
- Is it okay to make these a day ahead? Actually, I think they taste better the next day (but good luck keeping them hidden until then).
- Can I double the recipe? Sure, but do it in batches if your oven’s tiny like mine. Learned that lesson when I tried to stack two tins. Spoiler: doesn’t work so well.
- How do I get them out neat? Cool them completely, then run a thin knife around the edge if they’re stubborn. Or just embrace the rustic look!
So that’s my not-so-secret way of bringing a little sunshine to the table, even if it’s just a Tuesday night and you’re eating off paper plates. And if you manage not to eat half the tray before serving, you deserve a medal—or at least another cheesecake bite.


Ingredients
- 1 cup graham cracker crumbs
- 3 tablespoons unsalted butter, melted
- 8 oz cream cheese, softened
- ¼ cup granulated sugar
- 1 large egg
- ½ teaspoon vanilla extract
- ¼ cup sour cream
- ½ cup mixed summer fruits (strawberries, blueberries, raspberries), chopped
Instructions
-
1Preheat the oven to 325°F (163°C). Line a mini muffin tin with paper liners.
-
2In a small bowl, combine graham cracker crumbs and melted butter. Mix until the crumbs are evenly coated.
-
3Spoon about 1 tablespoon of the crumb mixture into each liner and press firmly to form the crust.
-
4In a medium bowl, beat cream cheese and sugar until smooth. Add egg, vanilla extract, and sour cream, and mix until well combined.
-
5Divide the cheesecake filling evenly among the crusts. Bake for 16-18 minutes, or until centers are set. Let cool completely.
-
6Top each cheesecake bite with a spoonful of mixed summer fruits before serving.
Approximate Information for One Serving
Nutrition Disclaimers
Number of total servings shown is approximate. Actual number of servings will depend on your preferred portion sizes.
Nutritional values shown are general guidelines and reflect information for 1 serving using the ingredients listed, not including any optional ingredients. Actual macros may vary slightly depending on specific brands and types of ingredients used.
To determine the weight of one serving, prepare the recipe as instructed. Weigh the finished recipe, then divide the weight of the finished recipe (not including the weight of the container the food is in) by the desired number of servings. Result will be the weight of one serving.
Did you make this recipe?
Please consider Pinning it!!