
Let Me Tell You About These Trifles (Spoiler: They Save the Day)
Okay, so picture this: It’s the night before a family birthday, and I’m elbow-deep in the kitchen, realizing I’ve forgotten to bake the fancy cake I ambitiously promised. (Happens more than I'd like to admit, honestly.) Enter mini brownie trifles with berries. They're basically my secret weapon for looking like I tried way harder than I actually did—plus, the kids think I’ve invented some new dessert every time. I still remember the first time I pulled these together; I was half-panicked, just layering store-bought brownies, berries, and whipped cream, but it turned out so well that now it’s sort of a family legend. Also, once I dropped a whole berry on the floor and the dog got to it before me—so, you know, these trifles are technically dog-approved, too. (Just not recommended, obviously!)
Why You'll Love This (Or At Least, Why I Do)
I make these when: I need something sweet but don't want to babysit a cake in the oven, or when company’s due in an hour, and I’ve not even finished tidying up. My family goes a bit bonkers for these because they look all fancy-like in their little jars (but it’s mostly just brownies in disguise, shh). One time, I tried to whip the cream by hand—never again, my arm still remembers—so now, store-bought is totally fair game. And I'm not above sneaking a spoonful before serving. Actually, I’d say I’m about 50 percent responsible for the ‘mysteriously shrinking’ whipped topping in our fridge.
What You'll Need (Substitutions Absolutely Welcome)
- Brownies (homemade if you’ve got time, but honestly, those boxed mixes are fine. My Nana swore by Ghirardelli, but any fudgy ones work)
- Fresh berries – strawberries, raspberries, blueberries, blackberries, whatever’s on sale or lingering in the fridge. I sometimes just use all strawberries if that's what I have.
- Whipped cream – fresh or from a can, no judgment. If you’re feeling virtuous, Greek yogurt mixed with a bit of honey is surprisingly good here.
- Chocolate shavings or chips (optional, but let’s be real, chocolate is never truly optional)
- Mint leaves (for garnish if you want to look extra, or just skip, I usually do)
How To Throw These Together (Don’t Overthink It)
- Chop the brownies. Cut into bite-sized cubes. Or just break them up by hand—nobody’s judging your geometry skills. I sometimes steal a piece, but that’s between me and the brownies.
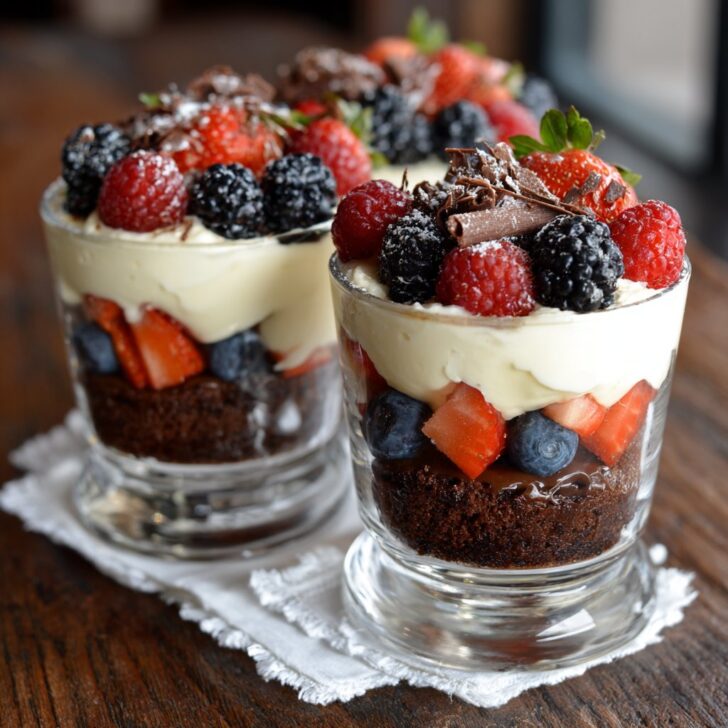
- Layer, layer, layer. Grab some small glasses, jars, or honestly, even teacups work if that’s all you’ve got. Start with a few brownie pieces in the bottom.
- Add berries. Scatter a good handful over the brownies. If your berries are a bit tart, toss them with a little sugar first. Or don’t, if you actually like that zing.
- Spoon on whipped cream. Be as generous as you like. I’ve learned that more is, in fact, more here. (This is also where I sneak a taste. Quality control and all that.)
- Repeat the layers. Go for two times if your glasses are tall enough, or just pile it up. No rules.
- Top things off. Sprinkle with chocolate shavings/chips and add a mint leaf if you’re feeling fancy. Or just leave them rustic. Either way, they’ll taste smashing.
Notes From My Many Attempts (And Mishaps)
- If your brownies are a day old and a bit dry, a tiny drizzle of coffee or berry syrup over them does wonders. Learned that one the hard way after attempting these with some, let’s say, “vintage” brownies.
- Don’t use frozen berries unless you’re okay with a bit of sogginess. Although, once I did, and it became more of a brownie-berry sundae situation. Not bad, just different.
- Actually, I find it works better if you chill them for about 30 mins before serving—but if you’re short on time, just dig in.
Variations I’ve Messed With (Including One Flop)
- Used lemon curd instead of whipped cream once—tasted like summer but was a bit sweet for me.
- Added toasted coconut on top. Surprisingly good, especially with strawberries.
- Subbed in pound cake for brownies as an experiment—my crew didn’t love it, so back to brownies for us.
Equipment Chat: Don’t Sweat the Small Stuff
Look, if you have fancy parfait glasses, great. If not, mugs or Mason jars totally work (I’ve even used a clean jam jar in a pinch—no one noticed). A hand mixer for whipping cream is handy, but a sturdy whisk (or even a fork, if you’re feeling old school) gets the job done with a bit of elbow grease.


How To Store – But Will You Even Need To?
Cover and pop in the fridge if you’ve got leftovers; they’ll keep for a day or two. Though honestly, in my house it never lasts more than a day! And I think it tastes even better after a little chill time. If you’re determined to make ahead, assemble everything but the final whipped cream layer until just before serving so it stays pretty.
How I Like To Serve These (Or: My Excuse For Extra Chocolate)
These are so great for parties; sometimes I set up a DIY trifle bar so everyone can pile up their own favorites. My youngest insists on extra chocolate chips on top. I love them with a coffee on the side—perfect for a lazy Sunday afternoon when you want to feel a bit fancy but also can’t be fussed. Or if you want to go all out, drizzle with a bit of homemade chocolate sauce (here's a great recipe I like).
Pro Tips (a.k.a. How I’ve Messed This Up Before)
- I once tried rushing the layering with still-warm brownies—big mistake; the cream melted everywhere and it was a sad puddle. Wait till things are cooled, trust me.
- If you use canned whipped cream, add it right before serving or it can deflate and look a bit sad. Learned that the hard way at a potluck.
FAQ (Because Folks Always Ask)
- Can I use frozen berries?
- Sort of. They'll get mushy, but if that's okay with you, go for it. Actually, makes it more like a brownie-berry mess, which can be nice in its own way.
- What if I don’t have brownies?
- You could use store-bought chocolate cake or even cookies in a pinch. I once used Oreos and no one complained.
- How far ahead can I make these?
- Maybe 4–6 hours tops, but honestly, the fresher the better (otherwise the brownies get soggy—unless you like that, in which case, go wild).
- Where do you get your jars?
- I save old jam jars, or you can grab cheap ones at IKEA. Don’t overthink it; any small glass is fine.
- Can I make this gluten-free?
- Absolutely, just use your favorite gluten-free brownie mix. King Arthur’s is pretty good.
And, a final, unrelated note—if you ever find yourself with leftover brownies (can't relate, but theoretically), try crumbling them over vanilla ice cream with berries. Not quite a trifle, but it gets the same happy noises around here.
Need more dessert inspiration? I sometimes browse Bigger Bolder Baking for ideas that don’t require a culinary degree.


Ingredients
- 1 cup all-purpose flour
- ½ cup unsalted butter, melted
- 1 cup granulated sugar
- 2 large eggs
- ⅓ cup unsweetened cocoa powder
- 1 teaspoon vanilla extract
- 1 cup mixed fresh berries (strawberries, blueberries, raspberries)
- 1 cup whipped cream or whipped topping
Instructions
-
1Preheat the oven to 350°F (175°C). Grease and line an 8-inch square baking pan.
-
2In a mixing bowl, combine melted butter and sugar. Add eggs and vanilla extract, whisking until smooth.
-
3Sift in flour and cocoa powder. Stir until just combined. Pour the batter into the prepared pan and bake for 20-25 minutes, or until a toothpick inserted comes out with a few moist crumbs. Let cool completely.
-
4Cut the cooled brownie into small cubes. Wash and dry the mixed berries.
-
5To assemble, layer brownie cubes, whipped cream, and berries in small glasses or jars. Repeat layers as desired.
-
6Top with extra berries and a dollop of whipped cream. Serve immediately or chill until ready to serve.
Approximate Information for One Serving
Nutrition Disclaimers
Number of total servings shown is approximate. Actual number of servings will depend on your preferred portion sizes.
Nutritional values shown are general guidelines and reflect information for 1 serving using the ingredients listed, not including any optional ingredients. Actual macros may vary slightly depending on specific brands and types of ingredients used.
To determine the weight of one serving, prepare the recipe as instructed. Weigh the finished recipe, then divide the weight of the finished recipe (not including the weight of the container the food is in) by the desired number of servings. Result will be the weight of one serving.
Did you make this recipe?
Please consider Pinning it!!