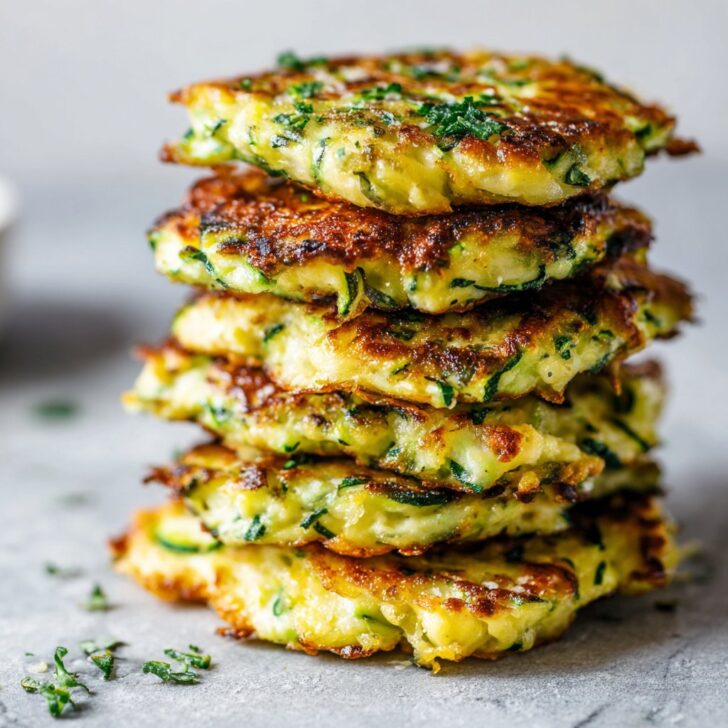
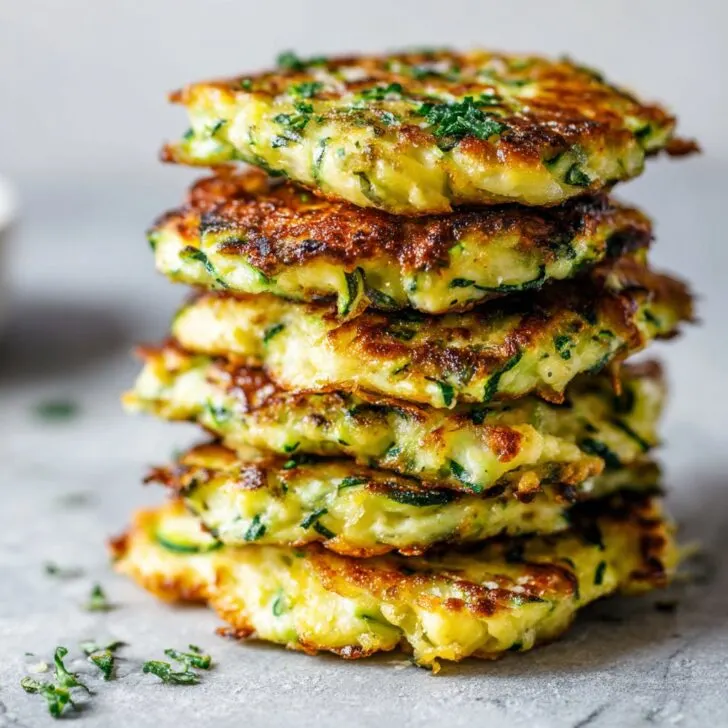
Just a Chat About These Cheesy Zucchini Fritters
If you’d told me a few years ago that I’d be singing the praises of zucchini fritters, I would’ve raised an eyebrow (or both) and asked if you wanted to see my freezer full of frozen waffles instead. But here we are. The first time I whipped these up was on one of those days when my youngest decided the only thing worth eating was cheese, and vegetables were the enemy (classic toddler mood). Honestly, half my kitchen experiments start off like that—me eyeballing the fridge, a bit panicked, trying to turn leftovers into something remotely edible. Sometimes it works; sometimes it’s a disaster, but these fritters actually got a cheer (okay, more like a happy giggle covered in crumbs) from across the table. And, weirdly enough, this is one of those recipes where I don’t end up with a mountain of dishes—just the odd cheese grater and a frying pan. Win-win, right?
Why You’ll Want to Make These (Again and Again)
I make this when the crisper drawer is overflowing with zucchini (how does it multiply so fast?!) or I need something quick for little hands. My family goes wild for them mostly because—let’s be honest—anything with cheese gets top marks, especially if I serve it with a dollop of plain yogurt or a bit of ketchup. I used to dread making fritters because it was always such a mess, but after a few tweaks, I’ve got it down to a routine where I barely use more than two bowls (and sometimes I just wing it with one if I’m feeling lazy). If you’re worried about picky eaters, don’t be—these somehow sneak veggies in without a fuss. I admit, though, there’s been the odd time when my batter got too soggy and I nearly gave up… but patience (and a tea towel) works wonders.
What You’ll Need (and What You Can Swap)
- 2 medium zucchini (about 250g) – I’ve used yellow squash too, when that’s what’s lurking in the fridge
- 1 large egg – Or, honestly, a flax egg if you’re out (it’s not perfect but it’ll do in a pinch)
- ½ cup grated cheddar cheese – My nan always insisted on strong cheddar, but I’ll use mozzarella or whatever’s cheap on special
- ⅓ cup flour (all-purpose or whole wheat) – I’ve even tried oat flour, which makes it a bit denser but still tasty
- 2 tablespoon finely chopped spring onion or chives (totally optional; half the time I forget this step)
- Salt and pepper, just a pinch (skip the salt if you’re making for babies under one)
- Olive oil or sunflower oil – Whatever’s closest, really
How I Actually Make These (Not Always By the Book)
- Grate the zucchini. Then, here’s the slightly annoying part: squeeze out as much water as you can. I wrap it in a clean tea towel and wring it out over the sink like I’m mad at it—if you skip this, they’ll be mushy (I learned the hard way).
- In a bowl, toss your zucchini with the cheese, flour, egg, and spring onion if you remembered it. Season with a bit of pepper. Mix with a fork or your hands—I won’t judge. If it looks a bit dry, add a splash of milk; if it’s soupy, sprinkle in a bit more flour.
- Heat a glug of oil in a nonstick pan (medium heat is safest—I always start too hot and end up with burnt outsides, raw insides). Scoop blobs of mixture (about a tablespoon each) into the pan. Flatten gently. This is where I usually sneak a taste of the raw mix (don’t tell the food police).
- Cook for 3-4 minutes per side. They should be golden and crisp, though sometimes mine get a bit too tan—still good! Don’t flip too early or they’ll fall apart (ask me how I know).
- Let them cool slightly before serving—molten cheese burns are no joke. Pile onto a plate and watch tiny hands go to town.
Notes Only Someone Who’s Made These Too Many Times Would Know
- If you use pre-shredded cheese, it sometimes doesn’t melt as nicely—but I do it anyway when I’m in a rush.
- Leaving the batter to rest for ten minutes (if you have the patience) actually makes fritters hold together better. Didn’t believe it till I tried.
- If your pan’s not nonstick, you might have to use a bit more oil or they’ll stick like a stubborn toddler to your leg.
If You Want to Mix It Up… (Or Not)
- I once tossed in grated carrot—looked pretty, but my kids spotted the orange flecks and vetoed it. Might work for yours.
- Swapping cheddar for feta gives them a salty kick, which is great for grown-ups but my kids weren’t convinced.
- Sometimes I add a sprinkle of dried thyme or oregano, but honestly, the cheese does most of the work flavor-wise.
Equipment You Might Need (But Don’t Panic if You Don’t Have It)
- Cheese grater – I’ve used a food processor once (what a faff), but a box grater does the trick
- Nonstick frying pan – If yours is a bit dodgy, just use more oil
- Mixing bowl, fork or wooden spoon
- Clean tea towel for squeezing the zucchini (or, in a pinch, paper towels doubled up, but that always feels a bit wasteful)


How to Store These… If There’s Any Left
These keep in an airtight container in the fridge for two days—though, honestly, in my house it never lasts more than a day! I’ve tried freezing them and while they’re edible, they lose that lovely crisp edge. But maybe that’s just me being fussy.
How We Serve Them at My Place (Take or Leave It)
I usually stack them up next to little bowls of yogurt for dipping—my eldest calls it the “puddle.” Sometimes I do a quick cucumber salad on the side, but most days it’s just these, some cherry tomatoes, and whatever else is knocking about. There’s something satisfying about watching toddlers feed themselves (and, let’s be honest, make a delightful mess).
Pro Tips I’ve Picked Up (Usually From Mistakes)
- I once tried rushing the squeezing step—regretted it because the fritters were a soggy mess. Don’t skip it, even if you’re hangry.
- Make small fritters, not big ones. It’s tempting to go big and be done faster, but they fall apart. I learned this the hard way on a Monday morning.
- Flipping too soon always ends in disaster—give them time to set up before you poke them.
FAQ (Because Friends Always Ask…)
- Can I bake these instead of frying? Yep! I’ve done it a few times at 200°C (about 400°F) for 20 minutes, flipping halfway. They’re not as crispy but way less mess. Actually, I find it works better if you line the tray with parchment paper (I learned that one the hard way, trust me).
- What if I don’t have zucchini? Try grated carrot or even sweet potato, but you’ll need to squeeze out the liquid just the same. Or don’t—live dangerously!
- Are these gluten-free? Not as written, but if you use oat or chickpea flour (like this one from Minimalist Baker), they’re pretty decent. I wouldn’t make them for a dinner party, but for snacks? Spot on.
- Can adults eat these? Oh, absolutely. I like them dipped in sriracha-mayo or even stacked in a sandwich with arugula. If you want more grown-up ideas, Bon Appétit does a posh version.
- Do I have to peel the zucchini? Nah, I never bother. Skin gives extra fiber and a bit of color. Plus, who has time for peeling?
- What’s the best cheese for toddlers? I usually stick to mild cheddar or mozzarella—less salt, melts well. But if yours are more adventurous, go wild.
Oh, totally unrelated, but have you ever tried squeezing a lemon by hand and it launches halfway across the room? Happens to me at least twice a month. Anyway, back to the fritters—let me know how yours turn out, and if you find a way to make them disappear slower, send help!


Ingredients
- 2 medium zucchinis, grated
- ½ cup shredded cheddar cheese
- ¼ cup grated parmesan cheese
- 1 large egg
- ⅓ cup all-purpose flour
- ¼ teaspoon garlic powder
- ¼ teaspoon dried oregano
- ¼ teaspoon salt
- 2 tablespoons olive oil (for frying)
Instructions
-
1Grate the zucchinis and squeeze out excess moisture using a clean kitchen towel.
-
2In a large bowl, combine grated zucchini, cheddar cheese, parmesan cheese, egg, flour, garlic powder, oregano, and salt. Mix until well combined.
-
3Heat olive oil in a non-stick skillet over medium heat.
-
4Scoop tablespoon-sized portions of the mixture into the skillet and flatten gently with a spatula.
-
5Cook fritters for 2-3 minutes on each side, or until golden brown and cooked through.
-
6Transfer to a paper towel-lined plate to cool slightly before serving to toddlers.
Approximate Information for One Serving
Nutrition Disclaimers
Number of total servings shown is approximate. Actual number of servings will depend on your preferred portion sizes.
Nutritional values shown are general guidelines and reflect information for 1 serving using the ingredients listed, not including any optional ingredients. Actual macros may vary slightly depending on specific brands and types of ingredients used.
To determine the weight of one serving, prepare the recipe as instructed. Weigh the finished recipe, then divide the weight of the finished recipe (not including the weight of the container the food is in) by the desired number of servings. Result will be the weight of one serving.
Did you make this recipe?
Please consider Pinning it!!