
Okay, so if you'd told me years ago that I'd be getting wildly excited about a recipe titled 'Low-Carb Bread Rolls,' I’d have laughed straight into my morning toast. But here we are, and honestly, these little rolls have somehow managed to wedge themselves into my family’s weekly dinner chaos. The first time I made them was after a rather enthusiastic (read: pushy) friend wouldn't let me leave her house without the recipe. I was skeptical. Low-carb bread that doesn’t taste like cardboard? Doubtful. But now, whenever I bake a batch, it's like a miniature feeding frenzy—my lot can demolish half a tray before they've even cooled. And, for what it’s worth, I’ve stopped keeping regular bread in the breadbox (mainly because there’s never any left anyway).


Why You’re Gonna Love These
I whip these up when I’m craving a bread fix but not the aftermath of a carb coma. On school nights, when I’m juggling homework policing and whatnot, these rolls come together quickly enough that I’m not eyeing the clock in frustration (or burning anything, mostly). My family goes nuts for these as burger buns or for mopping up soup—maybe because they can barely tell they’re not "real" bread. Full confession, I once tried hiding veggies in them and was caught instantly, so I don’t recommend that—but as low-carb rolls go, these are just right. Plus, the kitchen smells amazing, which somehow makes everyone act like I’m culinary royalty for about ten minutes. (Complete illusion, but I'll take it.)
Here’s What You’ll Need
- 1 ½ cups almond flour (sometimes I grab hazelnut flour instead if it’s lingering in the back of the pantry—also good!)
- ¼ cup coconut flour (or, if you’re me and have forgotten to restock, just a bit more almond flour in its place)
- 2 teaspoons baking powder (My gran swore by baking soda plus a splash of lemon juice. Honestly? Either way works.)
- ½ teaspoon sea salt
- 2 teaspoons apple cider vinegar (I admit to once grabbing white vinegar—didn’t ruin anything!)
- 3 large eggs
- 2 tablespoons olive oil (if your olive oil bottle is stubbornly empty, melted butter does a fine job; I’ve done it plenty)
- ½ cup warm water
- 2 tablespoons psyllium husk powder—you kind of need this for actual “bread” texture, but flax meal works in an absolute pinch (though they come out purpler—I kid you not).
- Optional: everything bagel seasoning, sesame seeds, or poppy seeds for sprinkling (kids fight over the ‘fancy ones’ so you know what I do…)
Let’s Make Some Rolls
- First off, preheat your oven to 350°F (180°C). If you’re like me and always forget, just call it “prewarming the kitchen.”
- Line a baking tray with parchment paper—or if you ran out, a well-buttered baking dish works, though clean-up is a bit grumpier.
- Mix your almond flour, coconut flour, baking powder, salt, and psyllium husk powder in a big bowl. Stir it up good; no need for perfection, just aim for even.
- In a separate bowl, whisk together the eggs, olive oil (or butter), apple cider vinegar, and warm water. (This is the bit where I usually spill a little something on the counter.)
- Pour the wet mix into the dry ingredients and mix until everything’s nicely combined. The dough looks a bit weird at this point—kinda sticky and odd—but trust me, it firms up after a minute or two.
- Let the dough sit for 2-3 minutes, so it thickens up a touch. Actually, now is when I sneak a taste—raw eggs be damned, but do as you please!
- Now, with wet hands (don’t skip this part or you’ll look like you’ve been mud wrestling), shape the dough into golf ball-ish rounds. I usually get 7 or 8, depends how generous I’m feeling (or my mood—hey, it matters).
- Plonk them on your tray and, if you're feeling fancy, sprinkle with seeds or seasoning.
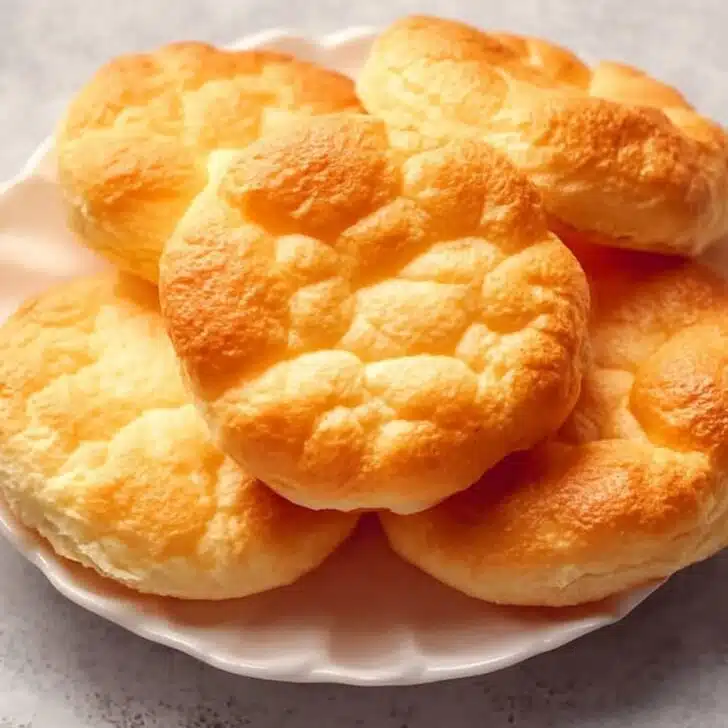
- Bake for about 25–30 minutes, until golden and smelling amazing. Don’t stress if they crack a little; all part of their rustic charm.
- Let them cool for a few minutes before you try prying one off the tray, or risk third-degree burns because you couldn't wait (ask me how I know).


A Few Honest Notes
- They always turn out a little different each bake—sometimes more puffy, sometimes a bit squat. I suspect it depends on the humidity (or, possibly, how distracted I get).
- The psyllium husk powder is weirdly essential for structure; tried skipping it, ended up with bread pancakes. Tasted fine but...ehh.
Stuff I’ve Tried (and You Might)
- Once swapped half the almond flour for sunflower seed flour—tasted distinctly nutty, not for everyone but worth a go.
- I tried tossing in grated cheese; tasted great, but they spread out much flatter—so, cheesy but more like flatbreads than rolls. Still, not a tragedy!
- Added chopped chives and garlic powder—really good, but the kids protested (apparently green bits in bread is heresy).
- Tried microwaving the dough to bake faster. Don’t. It’s a weird rubbery mess.


What If I Don’t Have All the Kit?
Honestly, a mixing spoon and your hands is all you need. But if you have a stand mixer, go ahead and use it—less sticky fingers. If parchment paper is nowhere to be found, just grease your pan extra thoroughly (my old enamel dish has seen it all, and still survives).
Keeping Your Rolls Fresh
Pop them, once cooled, into an airtight container. They’ll last two or three days at room temp, longer in the fridge (but, honestly, ours rarely stick around that long unless I hide them behind last week’s soup). And yes, you can freeze them—defrost in the toaster for best results. Slightly softer next day, but not the end of the world.
How I Like to Serve Them
We love these best warm, split and spread with salty butter (that melty, golden moment is pure joy). On Sunday mornings, I sometimes turn them into mini bacon and egg sandwiches, and my mum dunks hers straight in her tea, which I think is odd but who am I to judge?
Things I’ve Learned (Sometimes The Hard Way)
- If you try to skip the resting time after mixing, they come out a bit gummy inside. I once tried to speed things up for hungry kids…big mistake!
- Don’t overcrowd the tray—the sides won’t crisp and they’ll bake together into one mega roll (which the kids thought was brilliant but, eh, doesn’t slice well).
- If you use cold eggs straight form the fridge, the dough is stiffer and the rolls take a smidge longer to bake. I try to remember this, but often forget—so just add a minute or two more baking time.
Your (Frequently) Asked Questions
- Can I make these vegan? Someone asked me this at a picnic, actually. I tried flax eggs once—texture’s okay, but a bit dense; could work in a pinch if you’re determined.
- Why are my rolls purple? Oh! That’ll be if you use some brands of psyllium husk. It’s harmless, just looks like you’re trying to sneak veggies in.
- Can I use just coconut flour? I wouldn’t—it soaks up loads of liquid. You end up with little hockey pucks (voice of experience!).
- How do you know when they’re done? Great question. I go by color (golden, not pale) and they sound a bit hollow if you tap ‘em gently. Or, I just break one open and check (and eat it, obviously).
Well, that’s that—low-carb bread rolls without any fuss or food-processor drama. Let me know how your batch turns out (and if your family fights over who gets the last one—standard round here). Oh and, random side note: these are excellent for emergency sandwiches when those lunchbox requests suddenly pop up like mushrooms after rain. You’ll see what I mean.
Ingredients
- 1 ½ cups almond flour (sometimes I grab hazelnut flour instead if it’s lingering in the back of the pantry—also good!)
- ¼ cup coconut flour (or, if you’re me and have forgotten to restock, just a bit more almond flour in its place)
- 2 teaspoons baking powder (My gran swore by baking soda plus a splash of lemon juice. Honestly? Either way works.)
- ½ teaspoon sea salt
- 2 teaspoons apple cider vinegar (I admit to once grabbing white vinegar—didn’t ruin anything!)
- 3 large eggs
- 2 tablespoons olive oil (if your olive oil bottle is stubbornly empty, melted butter does a fine job; I’ve done it plenty)
- ½ cup warm water
- 2 tablespoons psyllium husk powder—you kind of need this for actual “bread” texture, but flax meal works in an absolute pinch (though they come out purpler—I kid you not).
- Optional: everything bagel seasoning, sesame seeds, or poppy seeds for sprinkling (kids fight over the ‘fancy ones’ so you know what I do…)
Instructions
-
1First off, preheat your oven to 350°F (180°C). If you’re like me and always forget, just call it “prewarming the kitchen.”
-
2Line a baking tray with parchment paper—or if you ran out, a well-buttered baking dish works, though clean-up is a bit grumpier.
-
3Mix your almond flour, coconut flour, baking powder, salt, and psyllium husk powder in a big bowl. Stir it up good; no need for perfection, just aim for even.
-
4In a separate bowl, whisk together the eggs, olive oil (or butter), apple cider vinegar, and warm water. (This is the bit where I usually spill a little something on the counter.)
-
5Pour the wet mix into the dry ingredients and mix until everything’s nicely combined. The dough looks a bit weird at this point—kinda sticky and odd—but trust me, it firms up after a minute or two.
-
6Let the dough sit for 2-3 minutes, so it thickens up a touch. Actually, now is when I sneak a taste—raw eggs be damned, but do as you please!
-
7Now, with wet hands (don’t skip this part or you’ll look like you’ve been mud wrestling), shape the dough into golf ball-ish rounds. I usually get 7 or 8, depends how generous I’m feeling (or my mood—hey, it matters).
-
8Plonk them on your tray and, if you're feeling fancy, sprinkle with seeds or seasoning.
-
9Bake for about 25–30 minutes, until golden and smelling amazing. Don’t stress if they crack a little; all part of their rustic charm.
-
10Let them cool for a few minutes before you try prying one off the tray, or risk third-degree burns because you couldn't wait (ask me how I know).
Approximate Information for One Serving
Nutrition Disclaimers
Number of total servings shown is approximate. Actual number of servings will depend on your preferred portion sizes.
Nutritional values shown are general guidelines and reflect information for 1 serving using the ingredients listed, not including any optional ingredients. Actual macros may vary slightly depending on specific brands and types of ingredients used.
To determine the weight of one serving, prepare the recipe as instructed. Weigh the finished recipe, then divide the weight of the finished recipe (not including the weight of the container the food is in) by the desired number of servings. Result will be the weight of one serving.
Did you make this recipe?
Please consider Pinning it!