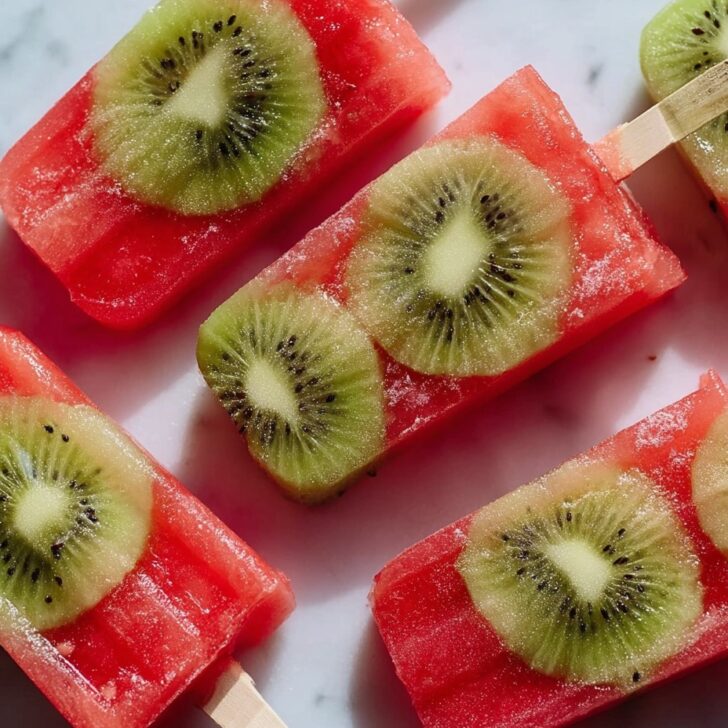

Chilling Out With Kiwi Watermelon Fruit Popsicles
So, here's the thing. Every summer, without fail, my kitchen turns into popsicle HQ. I started making these Kiwi Watermelon Fruit Popsicles one July when my nephew decided the supermarket ones were “too boring” (kids, honestly). Next thing I knew, the whole family wanted in, and folks, even my dad—who claims fruit is for rabbits—stole the last one from the freezer. That was an argument for the history books!


Anyway, there’s something gloriously simple about blending up real fruit, pouring it into molds, and waiting impatiently for them to freeze. But hey, half the fun is sneaking little tastes along the way, right? Oh, and one time my blender basically did the samba with all the fruit, but that’s a story for another day.
Why I Keep Coming Back To This Combo
I make these whenever the temperature is, well, unbearable (let’s just say the AC in my flat is more drama than it’s worth). My family goes absolutely wild for these popsicles because they’re mega-refreshing and—bonus—actually taste like real fruit, not that weird artificial stuff.
They’re the thing I whip up when I don’t want to bake (I mean, who wants to turn on an oven in July?), or when the kids invade the house looking for treats. Plus, you can customize them for picky eaters. I’ll admit, the first few times I made these, I didn’t strain the seeds. That was...interesting. Some people like the crunch; I secretly do, but don't tell anyone.
What You'll Need (With a Few Swaps I’ve Tried)
- 2 cups cubed, seedless watermelon (if you’ve only got one with seeds, no worries—just fish 'em out, or honestly, sometimes I leave a few in)
- 2 kiwis, peeled and sliced (my grandma insists on gold kiwis for extra sweetness—haven’t noticed a huge difference, to be honest)
- 1 tablespoon freshly squeezed lime juice (store-bought bottled stuff works in a pinch, but it’s not quite the same zing)
- 1-2 tablespoons honey or agave syrup (my friend once tried maple syrup; it was...let’s say “interesting”)
- Pinch of salt (skip if you must, but I find it actually lifts the flavors)
Alright, Let’s Make Some Popsicles
- Throw your watermelon chunks into a blender. Give them a good whizz until they’re basically liquid. Sometimes I do this in batches because my blender is tiny (London flats, eh?).
- This is where I usually sneak a taste. If it needs more sweetness, add some honey or agave syrup. Blend again. Oh, and toss in the lime juice, and that little pinch of salt—trust me.
- Pour the watermelon puree about two-thirds of the way into your popsicle molds. If you don’t have molds, honestly, a couple of sturdy paper cups work with wooden sticks jammed in. I’ve improvised with espresso cups when I was desperate; not exactly Instagrammable, but it works.
- Pop the molds (or cups) into the freezer for an hour, or until they’re a bit slushy, not rock solid. That’s your moment to prep the kiwi part.
- Meanwhile, blend up your kiwi slices until smooth. You can strain the seeds out if you want—sometimes I do, sometimes I don't, depends on the mood (or how much time I’ve got).
- Take the molds out of the freezer. Spoon the kiwi puree on top of the slushy watermelon base. Give the molds a little tap on the counter, just to settle everything. If you like, swirl it a tiny bit with a skewer for that marbled look (or just leave them layered, up to you).
- Stick the popsicle sticks in now (if your molds didn’t come with sticks attached already—ask me how many times I forgot this step).
- Freeze for another 3-4 hours, ideally overnight, until completely frozen. And yes, waiting is the hardest part. Sometimes I check way too early; half-frozen is still tasty, actually.
- When you’re ready, loosen popsicles by running the molds under a bit of warm water (not hot! I once turned one into soup this way).


Notes from Me (and From a Few Oops Moments)
- Don’t stress if your layers mix together. The kids call it “popsicle tie-dye” and honestly, it looks fantastic.
- If your watermelon is extra sweet, skip most of the honey. But if the fruit’s a little bland that day—as it sometimes is here—don’t be shy with the syrup.
- I’ve definitely tried using frozen watermelon before—just let it thaw a bit or you’ll have a blender revolt.
Variations I’ve Mucked About With
- Add a few mint leaves to the watermelon mix—very fresh, very summery. But I once added basil (don’t ask why)... it was, uh, not a repeat.
- Try half orange, half watermelon, if you’ve got no kiwis. My niece insists strawberries “make it work even better” but I’m dubious.
- If you love coconut, swirl a spoonful of coconut yogurt between the layers. Not traditional, but it makes the pops creamy as anything.


What If I Don’t Have Popsicle Molds?
Honestly, I’ve fashioned popsicles out of shot glasses, old yogurt containers, sometimes even ice cube trays. So, don’t let a lack of fancy gear stop you—wooden sticks or even little spoons stuck in halfway through freezing do the trick.
How Long Will These Keep? (Not Long, Probably)
Technically, you could keep these in the freezer for up to a week in a ziplock bag or airtight box (to avoid freezer funk). In my house, though, they’re usually goners by the end of the day.
How I Like To Serve Them
I think these popsicles are best straight outta the freezer on a sunny afternoon, with a bit of extra fresh fruit on the side—sometimes we dip them in yogurt if we’re feeling posh. But they also make for great bribes if you need kids to come in from outside. True story.
Little Lessons I’ve Learned (The ‘Pro Tips’ Bit)
- Don’t rush the freezing step! I did once because we were all desperate for a treat, and the bottom layer stayed slush—delicious but impossible to unmold.
- If you forget to add sweetener until after pouring, just stir a drizzle onto the top; it gets swirled in as you eat and is surprisingly great.
- On second thought, don’t bother with fancy molds unless you already have them—old-school works perfectly well.
FAQs (Because You Always Ask)
- Can I use other fruit? Oh, absolutely! Mango is lush, strawberries work, and I've even tried pineapple (bit odd, but fun).
- Is it okay to use bottled lime juice? Sure thing; I prefer fresh, but sometimes life happens. Just taste and see.
- Do I have to strain out all the seeds? Nah. Unless you absolutely hate them. A few kiwi seeds never hurt anyone (unless you’re making them for a picky toddler—ask me how I know).
- How do I keep the layers from mixing too much? Go slow with the second layer, but honestly, a swirl is pretty and not a dealbreaker.
- What if it’s raining? Should I still make them? Mate, I’ve eaten these while wrapped in a jumper watching the rain. Do you!
There you have it—possibly the most delightful, no-fuss pops you’ll try this summer. Go on, give it a whirl...and let me know if your dad steals the last one, too!
Ingredients
- 2 cups cubed, seedless watermelon (if you’ve only got one with seeds, no worries—just fish 'em out, or honestly, sometimes I leave a few in)
- 2 kiwis, peeled and sliced (my grandma insists on gold kiwis for extra sweetness—haven’t noticed a huge difference, to be honest)
- 1 tablespoon freshly squeezed lime juice (store-bought bottled stuff works in a pinch, but it’s not quite the same zing)
- 1-2 tablespoons honey or agave syrup (my friend once tried maple syrup; it was...let’s say “interesting”)
- Pinch of salt (skip if you must, but I find it actually lifts the flavors)
Instructions
-
1Throw your watermelon chunks into a blender. Give them a good whizz until they’re basically liquid. Sometimes I do this in batches because my blender is tiny (London flats, eh?).
-
2This is where I usually sneak a taste. If it needs more sweetness, add some honey or agave syrup. Blend again. Oh, and toss in the lime juice, and that little pinch of salt—trust me.
-
3Pour the watermelon puree about two-thirds of the way into your popsicle molds. If you don’t have molds, honestly, a couple of sturdy paper cups work with wooden sticks jammed in. I’ve improvised with espresso cups when I was desperate; not exactly Instagrammable, but it works.
-
4Pop the molds (or cups) into the freezer for an hour, or until they’re a bit slushy, not rock solid. That’s your moment to prep the kiwi part.
-
5Meanwhile, blend up your kiwi slices until smooth. You can strain the seeds out if you want—sometimes I do, sometimes I don't, depends on the mood (or how much time I’ve got).
-
6Take the molds out of the freezer. Spoon the kiwi puree on top of the slushy watermelon base. Give the molds a little tap on the counter, just to settle everything. If you like, swirl it a tiny bit with a skewer for that marbled look (or just leave them layered, up to you).
-
7Stick the popsicle sticks in now (if your molds didn’t come with sticks attached already—ask me how many times I forgot this step).
-
8Freeze for another 3-4 hours, ideally overnight, until completely frozen. And yes, waiting is the hardest part. Sometimes I check way too early; half-frozen is still tasty, actually.
-
9When you’re ready, loosen popsicles by running the molds under a bit of warm water (not hot! I once turned one into soup this way).
Approximate Information for One Serving
Nutrition Disclaimers
Number of total servings shown is approximate. Actual number of servings will depend on your preferred portion sizes.
Nutritional values shown are general guidelines and reflect information for 1 serving using the ingredients listed, not including any optional ingredients. Actual macros may vary slightly depending on specific brands and types of ingredients used.
To determine the weight of one serving, prepare the recipe as instructed. Weigh the finished recipe, then divide the weight of the finished recipe (not including the weight of the container the food is in) by the desired number of servings. Result will be the weight of one serving.
Did you make this recipe?
Please consider Pinning it!