
Let Me Tell You About My Italian Cookie Obsession
Okay, imagine this: you’re a kid and you walk into your grandma's kitchen on a Sunday afternoon. You get hit with a wall of buttery, almondy goodness—like the kind of thing that just stops you in your tracks. That’s what Italian cookies are to me. Honestly, the nostalgia alone could make me tear up a bit (don’t tell my cousins). And, full confession, I've probably eaten more dough raw than any adult should admit. One time, I tried hiding a half-eaten cookie in the potted plant, but the dog found it first. Classic.
")
")
Why You'll Love These (Or, Why I Keep Baking Them)
I pull out this recipe when I want the house to smell amazing (think holiday candle, but way tastier). My family goes wild for them—especially my nephew, who calls them "magic biscuits" for reasons he won't explain. And they're weirdly resilient—like, even when I mess up and forget to set the timer, they usually still taste pretty darn good. One thing, though: rolling out the dough can be a sticky mess, but hey, that’s half the fun, right? Plus, with a cup of coffee on a rainy morning—heaven. Oh, and they’re excellent for bribing people into forgiving you for little things like being late to dinner. (Not kidding.)
What You'll Need (With My Not-So-Secret Tweaks)
- 2 cups all-purpose flour (sometimes I swap in a handful of almond flour if I’m feeling fancy, or just out of regular flour, which happens more than I’d like to admit)
- 1 cup granulated sugar—my grandma swore by the superfine stuff, but I think any sugar does the trick
- ½ cup unsalted butter (room temp, though, honestly, I microwave it for a few seconds when I forget to plan ahead)
- 2 large eggs—or 3 smaller ones if that’s what you’ve got, I won’t tell
- 1 teaspoon vanilla extract (I occasionally use almond extract, and I think it actually makes them more "Italian")
- ½ teaspoon baking powder—don’t skip this, I did once and, well, they just turned into sugar hockey pucks
- Pinch of salt (and I do mean a pinch, like whatever fits awkwardly between your fingers)
- Powdered sugar, for dusting at the end—this is absolutely not negotiable in my family
How I Make Italian Cookies (Step by Mostly Step)
- Preheat your oven to 350°F (or 180°C, for any non-US friends). I always forget this step and have to wait for the oven mid-dough. Just me?
- Cream the butter and sugar in a bowl—use a mixer if you’re feeling pro, or a big wooden spoon if you need an arm workout. Get it pale and fluffy-ish. This is when I sneak a quick taste (don’t worry, the eggs will get cooked soon... theoretically).
- Beat in the eggs and vanilla. The mixture might look a little lumpy at first. Don’t panic; it always sorts itself out after a bit of mixing. If it doesn’t, maybe add a spoonful more flour and just call it rustic.
- In a separate bowl, combine flour, baking powder, salt. I’m supposed to say sift it. Sometimes I do, sometimes I don’t. I've never noticed a difference, honestly.
- Add dry to wet in a couple increments. Stir gently, or not-so-gently, until a slightly sticky dough forms. If it’s really gloopy, you probably need another sprinkle of flour—but not too much!
- OK, now shaping the cookies: Roll a walnut-sized lump between your palms (seriously, eyeball it; uniform is overrated). I stick them on a baking sheet lined with parchment (which makes cleanup way easier).
- Bake for 12-15 mins until the edges are just barely golden. They won't look super done, so don't overdo it. I once got distracted by a phone call; trust me, crispy Italian cookies are just sad.
- Let them sit for 5 mins, then move to a wire rack. Dust with heaps of powdered sugar. I usually lose patience and start eating before they’re fully cool. Whoops.
Notes: Stuff I Learned (the Hard Way)
- Don’t swap ALL the flour for almond flour. It turns into something more like pancakes, actually.
- Butter straight from the fridge is a pain. I tried mashing it once and it just flew all over. Maybe I just need a stand mixer? Or more patience?
- Don't be shy with the powdered sugar. I mean, you want that pretty, snow-dusted look. Besides, it's half the fun licking your fingers after.
Variations: My Experimentation (for Better, or...)
- Add lemon or orange zest to the dough for a bright twist. My uncle thought I’d lost my mind, but he ate four anyway.
- One time, I mixed mini chocolate chips in. Not traditional, but honestly, pretty delicious.
- Do NOT, I repeat, do NOT try to frost them with thick icing. That was a mess. They got soggy and weird.
- I also shape them into S’s or rings sometimes—because why not? It's your kitchen.
")
")
If You Don't Have the 'Right' Equipment
No stand mixer? No problem. A big sturdy spoon and some elbow grease does just fine. For the wire rack, I’ve used the top of my toaster in a pinch (just put some paper towels under to catch crumbs, learned that after the first time). Honestly, I’ve even made this on a dented old baking tray. Perfection’s overrated.
How to Store Them (Not That You’ll Need To)
Toss them in a cookie tin or an airtight jar—they'll stay good for a week, maybe even a bit more. But, let’s be real, they don't last more than a day or two in my house; people just sort of wander by and suddenly half the plate’s gone. If you do have leftovers, hide some at the back of a high cupboard. I do that sometimes just to make sure I have one with my afternoon coffee tomorrow.
How I Like to Serve These
My mum always brought them out with espresso after Sunday lunch. I like them best dunked in a cup of hot tea (controversial, maybe, but so good). Sometimes we make little sandwich cookies with jam between—try it, trust me. One Christmas, my cousin added a splash of limoncello to the dough, and that was a party.
Lessons I Learned (the Hard Way... Again)
- Don’t rush that last five minutes in the oven—seriously, underbaked is better than overbaked. Burnt bottoms are a crime against humanity, or at least, against cookies.
- Let the cookies cool for a couple minutes before moving. I got cocky once and half of them fell apart. Don't be like me. Patience pays off (sometimes).
- Go easy on the extract—even a little too much can make things taste like soap. As Mum says, less is more.
FAQ From Curious Friends (And You?)
- Can I freeze the dough? Yep, for sure! I wrap it tight in cling film, pop it in a zip bag, and it holds up a month or so. If you remember to label it, even better. One time I thought I was thawing soup. Turned out, cookies.
- Can I make these gluten-free? I’ve tried. They get a bit crumbly, but if you use a 1:1 gluten-free flour mix, it’s basically the same idea. Use extra caution moving them, though.
- Can I double the recipe? Absolutely. I do it all the time—just, maybe bake in batches, unless you have a gigantic oven. My friend tried to bake two sheets at once and some burned. On second thought, just do one at a time.
- What makes these 'Italian' anyway? Mostly the flavor, a little nostalgia, and probably the almond/vanilla extract. Plus, saying "Italian cookies" just brings people running, honestly.
- Isn't this the same as biscotti? Not really—these are way softer and you don’t have to slice and bake them twice. Biscotti is another adventure entirely!
Anyway, hope you love these little bits of joy as much as my family does. Or at least that they disappear quickly enough nobody notices any wonky shapes. Enjoy—and let me know if yours come out better than mine!
Ingredients
- 2 cups all-purpose flour
- ½ cup unsalted butter, softened
- ½ cup granulated sugar
- 2 large eggs
- 1 teaspoon vanilla extract
- ½ teaspoon almond extract
- 1 tablespoon milk
- 1 teaspoon baking powder
- ¼ teaspoon salt
- Glaze: 1 cup powdered sugar, 2-3 tablespoons milk, colored sprinkles
Instructions
-
1Preheat the oven to 350°F (175°C). Line a baking sheet with parchment paper.
-
2In a large bowl, cream together the butter and sugar until light and fluffy.
-
3Add eggs, vanilla extract, and almond extract. Mix until combined.
-
4In a separate bowl, whisk together flour, baking powder, and salt. Gradually add dry ingredients to the wet mixture, alternating with milk.
-
5Scoop tablespoon-sized portions of dough, roll into balls, and place on the prepared baking sheet. Bake for 12-15 minutes or until lightly golden.
-
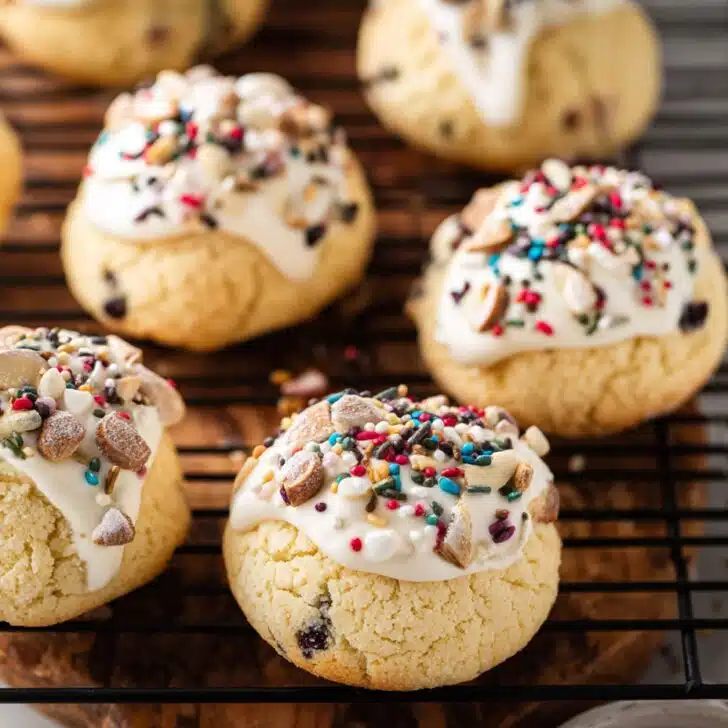
6Let cookies cool. Mix powdered sugar with milk to make a glaze. Dip cooled cookies into the glaze and decorate with colored sprinkles.
Approximate Information for One Serving
Nutrition Disclaimers
Number of total servings shown is approximate. Actual number of servings will depend on your preferred portion sizes.
Nutritional values shown are general guidelines and reflect information for 1 serving using the ingredients listed, not including any optional ingredients. Actual macros may vary slightly depending on specific brands and types of ingredients used.
To determine the weight of one serving, prepare the recipe as instructed. Weigh the finished recipe, then divide the weight of the finished recipe (not including the weight of the container the food is in) by the desired number of servings. Result will be the weight of one serving.
Did you make this recipe?
Please consider Pinning it!!