
Let Me Tell You About These Bars…
Okay listen, if you’ve ever found yourself in that sweet spot between craving cheesecake and wanting something a bit more, well, snackable (without hauling out pie plates and water baths), you really need to try these Honey Cinnamon Cheesecake Swirl Bars. I first made these on a rainy Saturday when my sister came over, mostly to gossip and scrounge my pantry for snacks. She claims she only visits for my company, but I know it’s these cheesecake bars she’s after. Anyway—I’d planned on classic brownies, but I was out of chocolate chips (classic me) and ended up winging it with what I had: a pot of honey, that last bit of cream cheese, and a mild obsession with cinnamon. Sometimes, lazy improvisation is the mother of invention, right?
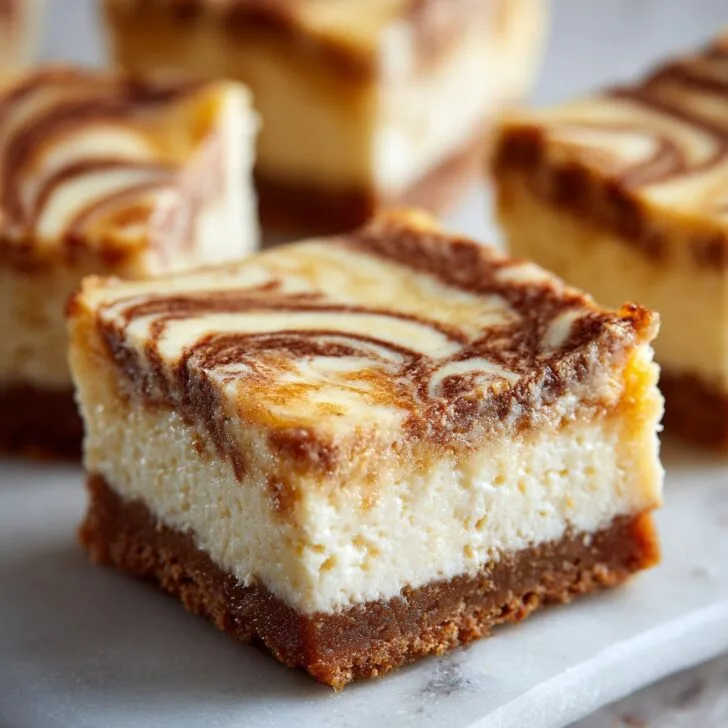
Honestly, I think my favorite thing about these bars is swirling the cheesecake layer and the cinnamon base together. Something about that marbled look just feels so much fancier than it actually is. Oh, and full disclosure: the first time I made these, I got distracted by a phone call from my mum and almost forgot to add the honey. Luckily, I caught it at the last second—so if you ever find yourself multitasking, maybe set a timer, just in case.
Why You'll Love This (Even If You're Not a Baker)
I make this recipe when I want a dessert that tastes like you made a lot more effort than you actually did. My family goes absolutely nuts for these, especially my cousin Jack, who claims he "doesn't even like cheesecake" (he always takes seconds, though). The honey adds this gentle sweetness that’s not in-your-face, and the cinnamon makes it feel oddly cozy—sort of like wearing your favorite jumper, but for your mouth. If you’re the kind of person who likes desserts that aren’t tooth-achingly sweet, you’ll appreciate these. And if, like me, you’re sometimes not in the mood for measuring everything down to the last gram, this recipe is a forgiving friend. Except once, I tried to swap in low-fat cream cheese, and honestly, it just wasn’t the same. Full-fat or bust, I say!
What You’ll Need (Or, What I Grab When the Pantry’s Low)
- 200g digestive biscuits (or graham crackers, if that’s what you’ve got—sometimes I use plain oat cookies, which works fine too)
- 100g melted butter (salted or unsalted, I use whatever’s around, to be honest)
- 1 teaspoon ground cinnamon (my friend insists on Ceylon, but supermarket stuff is grand)
- 250g cream cheese (full-fat, please; my cousin swears by Philadelphia but any will do)
- ⅓ cup runny honey (I’ve used orange blossom, wildflower, even that random squeezy bear honey—it’s all good)
- 1 large egg
- 60g caster sugar (or regular old granulated sugar, though it’s a little less smooth)
- 1 teaspoon vanilla extract (you can even throw in a splash of almond extract for kicks, I sometimes do)
- Pinch of salt
Let’s Get Swirling: Directions
- Prep time: First off, preheat your oven to 180°C (about 350°F). Line an 8-inch square tin with baking paper so you can pull these bars out easily—unless you fancy chiseling them out of the pan later (been there).
- Crust: Smash the biscuits into fine crumbs. Food processor works, or bash them in a bag with a rolling pin, which is actually quite therapeutic after a long day. Mix with melted butter, cinnamon, and a pinch of salt. Tip this mixture into your tin and press it down firmly. I use the bottom of a glass to pack it tight—otherwise, you risk a crumbly crust, which is never fun. Pop it in the oven for 10 minutes. Don’t worry if it looks a little uneven, it sorts itself out.
- Cheesecake layer: Beat together the cream cheese and sugar until smoothish (honestly, a few lumps are fine, no one’s judging). Add the honey, egg, and vanilla, and beat again until you’ve got a glossy mixture. This is usually when I sneak a taste—just to make sure the honey’s coming through, you know?
- Assembly: Pour about two-thirds of the cheesecake mixture over the crust. With the remaining third, stir in a ½ teaspoon more cinnamon (optional, but I love the extra warmth). Dollop it by the spoonful on top of the plain cheesecake layer, then swirl together with a butter knife. Don’t overthink the swirls—messy is good here.
- Bake: Bake for about 25–30 minutes, until the edges are just set but the centre has a wobble. If you poke it, it should jiggle a bit, like jelly. Resist the urge to overbake! I once left it for 40 minutes while on a Zoom call—big mistake, super dry.
- Cool: Let it cool completely in the tin. Then pop it in the fridge for at least 2 hours. Or overnight, if you’re patient (I never am, but it does taste better the next day in my opinion).
Little Notes from My Kitchen (aka: What I Learned the Hard Way)
- If your honey’s crystallized, just warm it a bit so it runs smooth—too thick and it won’t mix in right.
- You can double the cinnamon if you’re that way inclined, but maybe taste as you go. Once I added a full tablespoon and, well, let’s just say it was bold.
- Leaving a bit of the cheesecake mix plain makes the swirls so much prettier. I tried swirling all of it with cinnamon and it just looked like a muddy puddle.
Variations I’ve Tried (and Some I Wouldn’t Recommend...)
- I once added chopped pecans to the crust—gave it a nice crunch, but my niece picked them all out (kids, eh?).
- Drizzling a bit of extra honey over the top before serving is lovely, but if you use too much it gets very sticky (learned that the messy way).
- I tried swapping in maple syrup for honey; it was fine but honestly, the honey just works better with cinnamon.
- Don’t try using low-fat cream cheese. Trust me—it just goes weird and watery. I wish there was a way, but nope.
What You'll Need Equipment-Wise (or Not)
- 8-inch square baking tin (if you only have a round one, just go with it—bars might be triangles, but who cares?)
- Mixing bowls (I sometimes use a big saucepan to save on washing-up)
- Hand mixer or a sturdy whisk and some elbow grease (I’ve done both; mixer’s quicker, but hey—free arm workout)
- Baking paper (if you forgot to buy any, butter and flour the tin really well and cross your fingers!)


How to Store (Though, Honestly, Good Luck Having Leftovers)
Keep these in an airtight container in the fridge. They’ll stay nice for 3 days, maybe a bit longer—though in my house, leftovers are a myth. They’re usually gone by morning. If you’re somehow more restrained than us, you can even freeze them (wrap slices in cling film and then foil). Thaw overnight in the fridge for best results.
How I Like to Serve Them
We usually cut these into little squares and serve them straight from the fridge. Sometimes I dust a bit more cinnamon over the top, or toss on a handful of berries (raspberries are great). My sister likes hers with a cup of milky tea in the garden, if the weather’s playing nice. Oh, and for birthdays, I’ve stuck a candle right in the middle—works a treat, even if it’s not a fancy cake.
Lessons Learned: Pro Tips (The Hard Way)
- Let the bars cool completely before cutting. I once tried to slice them warm, and it was basically cheesecake soup. Patience is bitter, but the bars are sweet (or however that saying goes).
- Don’t rush the swirling. If you mix too much, you lose that marbled look. I got impatient once and, honestly, it tasted fine but looked like a toddler made it.
- If your oven runs hot, check at 23 minutes—every oven is its own beast. I've learned to trust my nose sometimes more than the timer.
Some Questions Folks Have Actually Asked Me (And My Honest Answers)
- Can I use gluten-free biscuits? Absolutely! I've used the Schär ones before (here’s their website) and they work great. Just keep the butter ratio the same.
- Do I have to use vanilla? Nah, you can skip it or try almond extract. Actually, I find almond gives it a nice twist, just go easy or it’ll overpower the honey.
- Why does my cheesecake crack? It’s probably just cooling too fast or baking too long. Mine cracks sometimes and honestly, I just cover it with more cinnamon. Problem solved.
- Can I double this recipe? For sure, just use a bigger tin and add a few minutes to the baking time. Keep an eye on it, though—no one likes burnt edges.
- Where do you get your honey? I get mine at the local farm shop, but honestly, supermarket honey is fine. If you want to get fancy, check out Local Honey Finder for some close to you.
Oh, and if you’re after more baking inspiration (or just want to drool over some photos), I love the stuff at Sally’s Baking Addiction. She does a mean swirl, too.
So, that’s my Honey Cinnamon Cheesecake Swirl Bars. Honestly, they’re a bit like comfort in a pan—simple, sweet, and always welcome at the table, even if your table’s got a few crumbs scattered on it like mine usually does.


Ingredients
- 1 ½ cups graham cracker crumbs
- ⅓ cup unsalted butter, melted
- 2 packages (8 oz each) cream cheese, softened
- ½ cup honey
- ½ cup granulated sugar
- 2 large eggs
- 1 teaspoon vanilla extract
- 1 ½ teaspoons ground cinnamon
- ¼ cup all-purpose flour
Instructions
-
1Preheat oven to 350°F (175°C). Line an 8x8-inch baking pan with parchment paper.
-
2In a bowl, combine graham cracker crumbs and melted butter. Press mixture firmly into the bottom of the prepared pan to form the crust.
-
3In a large bowl, beat cream cheese until smooth. Add honey, sugar, eggs, and vanilla extract; mix until well combined.
-
4In a small bowl, mix ground cinnamon and flour. Add to the cream cheese mixture and blend until just incorporated.
-
5Pour cream cheese mixture over the crust. Use a knife to swirl additional honey and cinnamon on top, if desired.
-
6Bake for 35 minutes or until the center is set. Cool completely, then refrigerate for at least 2 hours before slicing into bars.
Approximate Information for One Serving
Nutrition Disclaimers
Number of total servings shown is approximate. Actual number of servings will depend on your preferred portion sizes.
Nutritional values shown are general guidelines and reflect information for 1 serving using the ingredients listed, not including any optional ingredients. Actual macros may vary slightly depending on specific brands and types of ingredients used.
To determine the weight of one serving, prepare the recipe as instructed. Weigh the finished recipe, then divide the weight of the finished recipe (not including the weight of the container the food is in) by the desired number of servings. Result will be the weight of one serving.
Did you make this recipe?
Please consider Pinning it!!