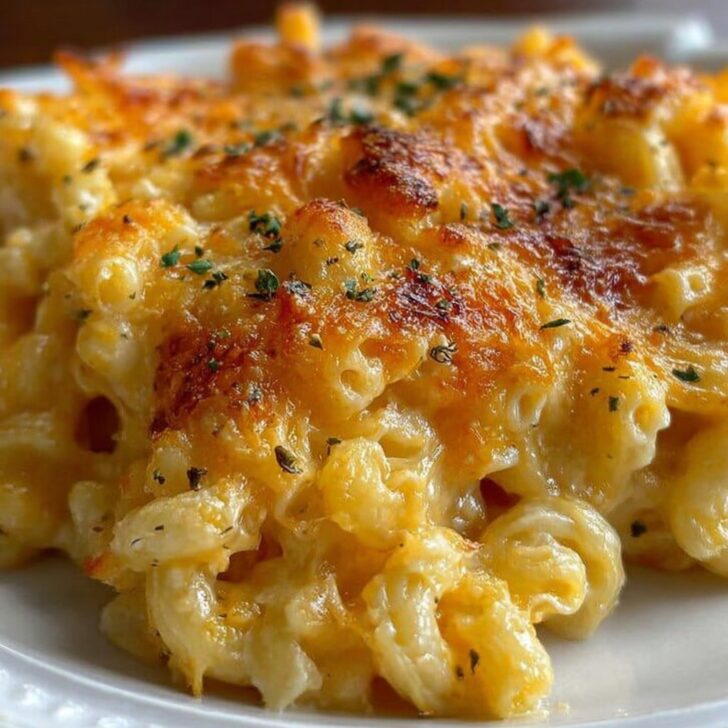
So, About This Mac and Cheese...
Alright, friend—let me just say right off the bat: homemade baked mac and cheese is the ultimate comfort food in my book. I think the first time I tried to make it myself, I ended up with more cheese on the counter than in the pan (not that I’m complaining—kitchen snacking is a sport here). Actually, the whole thing started because my mum used to make a version that was so creamy, it squeaked when you stirred it. There’s something about the smell of bubbling cheese in the oven that gets everyone out of their rooms—literally, even my dog used to sit by the kitchen door, just waiting for a taste.
Why I Keep Coming Back to This Dish
I make this when it’s cold out or I need a pick-me-up after a long week (or, honestly, when I have random cheese bits to use up). My family goes absolutely bonkers for this mac and cheese, especially with that golden, crispy topping—no one fights over the edge pieces because every piece is an edge if you cut it right. And if you’ve ever tried one of those boxed mixes and thought, "Eh, this is fine," well, once you try homemade, there’s no going back (except sometimes I’ll still make the blue box for nostalgia, but don’t tell anyone!).
What You’ll Need (and What I Sometimes Swap)
- 250g elbow macaroni (or any short pasta—penne works if that’s what you have, and my neighbor swears by shells)
- 2 ½ cups shredded sharp cheddar (Sometimes I throw in a bit of smoked gouda if I’m feeling fancy, or just whatever’s left in the fridge. My grandmother always insisted on Cracker Barrel, but literally any cheddar works fine.)
- 1 cup shredded mozzarella (adds that gooey stretch—I’ve skipped it when I ran out, still great)
- ¼ cup unsalted butter (or salted, just go easy on the added salt)
- ¼ cup all-purpose flour
- 2 ½ cups milk (whole milk makes it creamier, but I’ve used 2%—not the end of the world)
- ½ teaspoon dry mustard powder (honestly, I forget this half the time)
- ½ teaspoon paprika (sometimes I add a shake of cayenne if I want a kick)
- Salt and black pepper, to taste
- 1 cup panko breadcrumbs (or just crumble up some stale bread—done that often)
- 2 tablespoons butter (for the topping; this is not optional in my house!)
Let’s Get Cooking—Here’s How I Do It
- Preheat your oven to 375°F (190°C). I always forget this step until I’m halfway in, so don’t sweat it if you do too.
- Boil the pasta in a big pot of salty water. Cook until just al dente—maybe a minute less than the package says (it’ll finish in the oven). Drain and set aside. Sometimes I toss it with a dab of butter so it doesn’t stick (or just use a fork to break it up later).
- In a medium saucepan, melt the butter over medium heat. Whisk in the flour and cook for about 2 minutes until it’s all smooth and smells kinda nutty. Don’t wander off here—flour burns fast.
- Slowly pour in the milk, whisking constantly. This is where I usually sneak a spoonful to check for lumps (I know, I know, but it works). If it looks weird, keep whisking—it always comes together.
- Stir in the mustard, paprika, salt, and pepper. Once it’s thick enough to coat a spoon, lower the heat, then add in the cheeses by handfuls. Stir until melty and smooth. Try not to eat it all right now. (Actually, have a taste—it’s a chef’s right.)
- Combine your cooked pasta and cheese sauce in a big baking dish. Give it a good stir—make sure every noodle’s coated. It should look outrageously creamy.
- If you’re feeling extra (I usually am), melt the extra butter, toss with the breadcrumbs, and sprinkle this golden magic all over the top.
- Bake for about 25 minutes, or until the top is golden and bubbling at the edges. Sometimes mine takes a few minutes more—just depends how crispy you like it.
- Let it sit for a few minutes before serving. I know, waiting is agony, but it helps everything set up nicely.
Notes Form the Trenches (a.k.a. My Kitchen)
- I tried making this with pre-shredded cheese to save time, but it didn’t melt as smoothly—maybe it’s the starches they add.
- Once I used almond milk instead of regular milk by accident (grabbed the wrong jug!)—it worked, but wasn’t as creamy. Live and learn.
- Don’t stress about the topping. If you run out of breadcrumbs, crushed crackers or even cornflakes can make for a great substitute. On second thought…maybe skip the sweetened cereal.
If You Fancy a Twist (Or Not)
- I’ve stirred in cooked bacon bits—amazing. Diced jalapeños? Spicy fun. Broccoli florets? It’s practically health food.
- One time I tried blue cheese and…eh, not my favorite. Maybe you’ll like it, but my crew gave me the stink eye for that one.
- Oh and once, just for kicks, I mixed in caramelized onions. Surprisingly good but adds a whole other layer of work—some days it’s worth it, some days you just want cheese.
What You Need (But It’s Fine to Improvise)
- Baking dish (mine’s a 3-quart, but whatever fits your pasta will work)
- Whisk (a fork works if you’re in a pinch, though your arm might fall off)
- Saucepan and big pot
- Grater (side note: I once used a vegetable peeler and it took ages, but hey, it worked)


How to Store Leftovers
Just cover the pan with foil or scoop into a container and keep in the fridge—should last about 3 days. Reheat in the oven or microwave. That said, honestly, in my house, mac and cheese never lasts more than a day. There’s usually a midnight snacker (sometimes it’s me).
How I Like to Serve It
Usually, I just scoop it into bowls and call it a meal. But if we’re feeling fancy, I’ll serve it with a crisp green salad or even a few roasted tomatoes on the side. My little sister always insists on ketchup (I don’t judge, but…really?). Sometimes, if I’m making it for a family gathering, I’ll put out hot sauce or chutney. And honestly, a cold beer isn’t a bad match.
Pro Tips I Learned the Hard Way
- Don’t rush the sauce—once I tried cranking the heat to make it go faster, and it went lumpy. Take your time, watch an episode of something in the background if you must.
- Actually, I find letting it sit for 10 minutes before digging in helps it hold together. If you’re after that perfect slice, patience is a virtue (but if you can’t wait, just embrace the cheesy chaos).
- Always taste before adding salt—some cheeses are saltier than others.
FAQs (Seriously, People Ask Me These!)
- Can I make this ahead of time?
- Absolutely! You can assemble it, cover, and refrigerate for a day or two. Just remember it might need a few extra minutes in the oven—sometimes I forget and wonder why it’s still cold in the middle.
- What’s the best cheese combo?
- I’m partial to cheddar and mozzarella, but you can mix in gruyere, fontina, or anything melty. I did try feta once though—don’t recommend that, unless you like surprises.
- Is it freezer-friendly?
- Sort of. It can get a bit grainy after thawing, but it’s still tasty. If you do freeze it, reheat gently and maybe add a splash of milk. Or just eat it all fresh—problem solved!
- Do I really need breadcrumbs on top?
- Nope. It’s classic, but sometimes I skip it when I can’t be bothered. The cheese gets a lovely crust all on its own.
- Where do you get your cheese?
- Honestly, wherever’s cheapest—sometimes the local market, sometimes [Trader Joe’s](https://www.traderjoes.com/home/products/pdp/sharp-cheddar-cheese-054665) or [Whole Foods’ cheese bar](https://www.wholefoodsmarket.com/product-category/cheese). If you want to geek out about cheese, check out [Serious Eats’ cheese guide](https://www.seriouseats.com/cheese). It’s a rabbit hole, but a fun one.
By the way, did I ever tell you about the time I tried to bake mac and cheese in a toaster oven because my oven broke? Let’s just say…never again. But hey, sometimes disaster makes the best stories (eventually).
I really hope you give this homemade baked mac and cheese a try—it’s warm, cheesy, and just a little bit messy; just the way I like it. If you have a go, let me know how it turned out—unless you add blue cheese, in which case, you’re on your own!


Ingredients
- 12 oz elbow macaroni
- 3 cups shredded sharp cheddar cheese
- 2 cups whole milk
- ¼ cup unsalted butter
- ¼ cup all-purpose flour
- ½ cup grated Parmesan cheese
- 1 cup panko breadcrumbs
- ½ teaspoon salt
- ¼ teaspoon black pepper
Instructions
-
1Preheat oven to 350°F (175°C). Grease a 9x13 inch baking dish.
-
2Cook elbow macaroni according to package instructions until al dente. Drain and set aside.
-
3In a large saucepan, melt butter over medium heat. Whisk in flour and cook for 1-2 minutes until bubbling but not browned.
-
4Gradually whisk in milk, stirring constantly until the mixture thickens, about 3-5 minutes. Remove from heat and stir in cheddar and Parmesan cheese until melted. Season with salt and pepper.
-
5Add cooked macaroni to the cheese sauce and mix well. Pour into the prepared baking dish.
-
6Sprinkle panko breadcrumbs evenly over the top. Bake for 25-30 minutes, until the top is golden and bubbly. Let cool slightly before serving.
Approximate Information for One Serving
Nutrition Disclaimers
Number of total servings shown is approximate. Actual number of servings will depend on your preferred portion sizes.
Nutritional values shown are general guidelines and reflect information for 1 serving using the ingredients listed, not including any optional ingredients. Actual macros may vary slightly depending on specific brands and types of ingredients used.
To determine the weight of one serving, prepare the recipe as instructed. Weigh the finished recipe, then divide the weight of the finished recipe (not including the weight of the container the food is in) by the desired number of servings. Result will be the weight of one serving.
Did you make this recipe?
Please consider Pinning it!!