
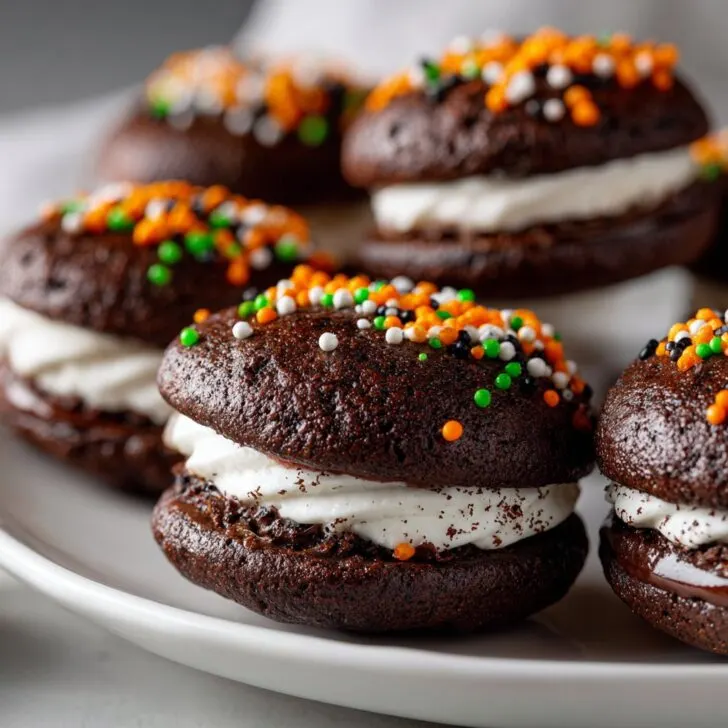
Alright, Let’s Talk Halloween Whoopie Pies
So, every October, my kitchen gets a little wild—and a little orange—and it’s all in the name of Halloween Whoopie Pies. I started making these as an excuse to eat dessert before dinner (don’t tell my kids that’s why!), but honestly, now it’s just pure tradition. Last year, I ended up with orange food coloring on the dog’s tail. No clue. Still, these little cakey sandwiches have become the stuff of family legends around here. If you’ve never made whoopie pies before, don’t sweat it. They look fancy but they’re the baking version of putting on a costume: a bit messy, a lot of fun, and nobody cares if it’s not perfect.
Why I Keep Making These Every Year
I make this recipe when I want to impress the neighbors, but also when I just want to avoid buying yet another bag of supermarket Halloween candy. My family goes nuts for these; my partner claims to hate pumpkin, but somehow always manages to eat two. (Kids, on the other hand, just want to help with the sprinkles and sneak marshmallow filling when they think I’m not looking.) I also like that you can jazz them up or tone them down. One year, I tried using fancy cocoa powder—didn’t make a huge difference to the kids, but made me feel like a pro.
What You’ll Need (Plus My Optional Swaps)
- 2 cups all-purpose flour (my grandma swore by King Arthur, but honestly, store brand is fine)
- ½ cup unsweetened cocoa powder (I’ve used Dutch process, but regular works—no worries)
- 1 ¼ teaspoons baking soda
- ½ teaspoon salt
- 1 cup sugar (sometimes I swap in brown sugar for half, and it’s lovely)
- ½ cup room-temp butter (margarine in a pinch, but I think real butter gives a richer taste)
- 1 egg (I once forgot this—didn’t recommend it!)
- 1 teaspoon vanilla extract
- 1 cup buttermilk (or a cup of milk with a splash of vinegar if you’re in a jam)
- Orange food coloring (for the Halloween vibes—red and yellow mixed works too!)
- Sprinkles, candy eyes, or whatever fun Halloween bits you want
For the filling:
- ½ cup room-temp butter
- 1 ½ cups powdered sugar (plus more if you want it thicker)
- 1 (7 oz) jar marshmallow creme (I love Fluff, but store brand is just fine)
- ½ teaspoon vanilla
- Pinch of salt
- Orange food coloring (optional but festive)
How I Actually Make Halloween Whoopie Pies
- Preheat your oven to 350°F (about 180°C for my metric mates). Grab two baking sheets and line them with parchment paper—or just grease them if parchment seems too fancy today.
- In a biggish bowl, whisk together flour, cocoa, baking soda, and salt. (I always end up with a little flour on the counter. Oh well.)
- In another bowl, beat sugar and butter until it’s all fluffy. Sometimes I use a hand mixer. Sometimes I just use a wooden spoon and elbow grease if I’m feeling old-school. Crack in the egg and vanilla, beat it again until smooth. If your kid is hanging around, let them add the food coloring here. Mine always gets a little carried away, so our pies go from orange to pumpkin-carrot hybrid sometimes.
- Add the flour mix to the wet stuff in two or three goes, alternating with the buttermilk. Mix until it just comes together—don’t overmix, it’s not bread! The batter will be thick but not doughy.
- Drop spoonfuls (I use a rounded tablespoon, but a cookie scoop if you have one is pretty slick) onto the baking sheets. You should get about 24 rounds if you don’t eat too much batter. Don’t worry if they look uneven—mine always do.
- Bake for 10 to 12 minutes, or until they puff up and spring back if you poke them gently. (This is where I usually sneak a taste of the warm one—quality control, right?)
- Let them cool completely; trust me, filling melts into a puddle if you rush this step. Ask me how I know…
For the filling:
- Beat the butter and marshmallow creme together until smooth. Add the powdered sugar, vanilla, salt, and a little orange food coloring if you’re feeling festive. If it’s too runny, just add more powdered sugar. Too thick? Splash in a bit of milk.
- Spread (or pipe, if you’re fancy) the filling on half the cakes. Top with another cake to make a sandwich. This is a good time to stick on candy eyes or roll the edges in sprinkles. Or both! Go wild—it’s Halloween.
Some Notes From My Many, Many Batches
- Don’t overbake. Dry whoopie pies are sadder than an empty candy bowl.
- I’ve tried freezing the baked cakes before filling—actually, I find it works better if you fill them the day you serve. They get a bit chewy otherwise.
- If your filling oozes too much, pop it in the fridge for 20 min before assembling.
How I’ve Experimented (and What Didn’t Work)
- Once tried a peanut butter filling—good if you love PB, but maybe too rich for Halloween night.
- Made mini whoopies with a teaspoon scoop. They looked cute, but half the neighborhood kids grabbed two at a time. So, not really less work.
- I wouldn’t recommend using coconut flour. That batch was, uh, memorable for the wrong reasons.
Equipment I Use (But There’s Always a Workaround)
- Mixing bowls (one big, one medium)
- Hand mixer or just a good old wooden spoon. If you don’t have a mixer, just use some extra muscle—it works!
- Baking sheets and parchment. Wax paper in a pinch, but watch it doesn’t scorch.
- Cookie scoop is nice but two spoons do the trick (and there’s less to wash)


How Long These Keep (Sort Of)
Officially, you can store Halloween Whoopie Pies in an airtight container at room temp for 2 days or in the fridge for about 4. But honestly, in my house, they never last more than a day! If you do manage to hide a few, I think they taste a tiny bit better the next day—the flavors settle in, you know?
Serving Them Up (Our Family Traditions)
We set them out on a big orange platter with some plastic spiders (not edible, but always hilarious when someone freaks out). Sometimes I’ll serve them alongside a mug of hot apple cider—the tartness balances the sweetness. My partner likes dunking theirs, which is… unusual. But hey, whatever floats your boat.
What I’ve Learned Not to Rush (Pro Tips)
- I once tried filling them while still warm. Oops. The filling melted everywhere—it was a gooey disaster.
- Chill the filling if your kitchen’s too hot. It’ll hold up better, especially if you’ve got little helpers who take their sweet time with sprinkles.
- Don’t stress about perfect circles. Honestly, the more rustic-looking, the more homemade they feel.
FAQ—From Friends, Family, and the Occasional Random Neighbor
- Can I make these ahead? Oh, totally. Just keep the cakes and filling separate until the day you want to serve. They’ll stay fresher that way.
- Do I have to use food coloring? Nope! They taste the same. The orange just makes them look extra festive. Or use purple/green if you want to be different.
- What about gluten-free? I’ve tried using Bob’s Red Mill 1:1 gluten-free flour blend, and it turned out pretty well. Not exactly the same texture, but still snackable. Worth a shot!
- Marshmallow fluff substitute? In a hurry, you could try thickening up a basic buttercream with extra powdered sugar, but honestly, Fluff is magic here.
- Where’d you get those sprinkles? I usually order a Halloween sprinkle medley from Fancy Sprinkles or sometimes just raid the baking aisle at Target. (Not sponsored, I just like their stuff!)
So, that’s my not-quite-perfect, always-good Halloween Whoopie Pie recipe. If you mess up a step, just remember: the dog wore orange last year and lived to bark about it. Happy baking, and may your kitchen smell like chocolate and marshmallow all week!