
Let’s Chat: Why I Love Making Halloween Jack-O-Lantern Hand Pies
Okay, confession time: I started making these Halloween Jack-O-Lantern Hand Pies a few years ago after my youngest niece, Alice, insisted our pumpkin carving needed a snack break (she was right, obviously). I was aiming for something easy, festive, and portable—since no one in my family can sit still for more than ten minutes when we’re in costume. Making these is now as much a tradition as arguing over the best pumpkin face (I’m Team Classic Grin, but my brother’s always pushing for something "edgy"). I keep thinking one year we’ll outgrow them, but nope—even my dad sneaks a few into a napkin for "later". This recipe is less about perfection and more about fun—if your pies look a bit derpy, you’re doing it right. And hey, the kitchen always smells amazing after, so even if your jack-o-lantern faces come out more "abstract art" than "Michelangelo", you’re definitely winning.
Why You’ll Love These (Or: Why I Keep Making ‘Em)
I whip these up when I want a dessert that’s playful but not fussy—like, sometimes I use store-bought pie dough even though I know my grandma would side-eye me for it (sorry, Grandma, but sometimes the shortcut just wins). My family goes a bit bonkers for these because each one gets a different face—if you accidentally give one a lopsided grin, someone will call it their favorite. Plus, they’re perfect for sneaking a little pre-party sugar rush without a full pie commitment. Also, and I can’t stress this enough, if you’re wrestling with pie crust and it tears, that’s your cue to laugh and call it a “ghost” pie. The trickiest bit is carving out the faces—one year, I used a steak knife and almost lost a finger (don’t do that, please).
What You’ll Need (And What You Can Improvise)
- Pie dough: 2 rounds, homemade or store-bought (I won’t tell if you go the easy route—sometimes I use Pillsbury; my mom swears by the crust recipe here, but honestly, any crust that rolls is fine)
- Filling: About ¾ cup pumpkin puree (the canned stuff works; I once used leftover sweet potato mash and, weirdly, it was pretty good!)
- Brown sugar: 2 to 3 tablespoons, depending on your sweet tooth
- Spices: 1 teaspoon cinnamon, a pinch of nutmeg and ginger (sometimes I just use a pre-mixed pumpkin spice blend because, well, convenience)
- Egg: 1, for sealing and brushing (but milk works in a pinch if you’re out)
- Optional: Mini chocolate chips, for silly monster eyes (I tried raisins once. That was... not a hit.)
How I Actually Make Them (Or: My Not-Quite-Perfect Method)
- Preheat your oven to 375°F/190°C. (I always forget to do this first and end up waiting. So—do it now!)
- Roll out your pie dough on a floured surface. You want it about ⅛ inch thick; at least, that’s what the pros say. Sometimes I just eyeball it until it looks "hand pie appropriate." Cut out pumpkin shapes using a cookie cutter (about 4 inches wide is ideal). If you don’t have a cutter, just freehand with a paring knife—it’s Halloween, wobbly pumpkins totally work.
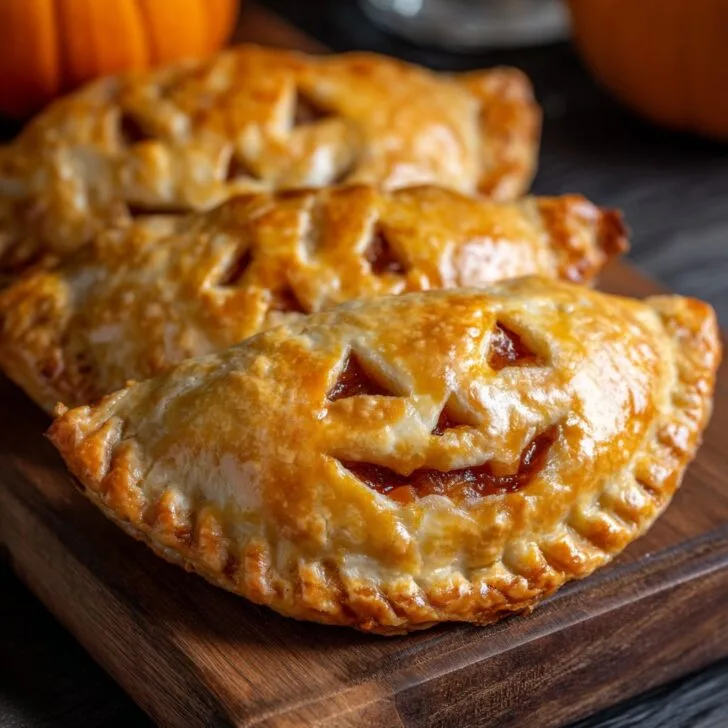
- Set half your pumpkins aside—they’ll be the backs. On the other half, use a small sharp knife to cut jack-o-lantern faces (triangle eyes, zig-zag mouths, whatever you like—this is the part where things get silly and I usually end up giggling at my own bad art).
- Mix your pumpkin puree, sugar, and spices in a bowl until smooth. This is where I sneak a taste—it’s basically the best part.
- Spoon a small heap (about a tablespoon? I rarely measure) of filling onto each bottom pumpkin. Don’t pile it too high or it’ll ooze out the sides—learned that the messy way.
- Brush edges with beaten egg (or milk, if you forgot the egg like I have more than once), top with a face pumpkin, and crimp the edges with a fork. If things get sticky, dip your fork in flour.
- Transfer to a parchment-lined baking sheet. Brush the tops with more egg wash for that shiny finish (or don’t, but it does make ‘em look fancier).
- Bake 18-22 minutes, or until golden. The faces might puff up and get wacky—don’t sweat it. I usually peek in at 15 minutes. If your oven runs hot (like mine), check early.
- Let them cool before devouring. Or at least, try. Warm hand pies are a whole mood.
Notes: Stuff I’ve Messed Up So You Don’t Have To
- If you overfill, the pies will leak. But then again, the crispy caramelized edge bits are kind of my favorite. So, silver lining?
- Chill your shaped pies in the fridge for 10 minutes before baking if your kitchen’s hot. I always forget, but it does help hold the shape.
- Don’t use watery pumpkin puree—it’ll make soggy pies. If yours is thin, blot with a paper towel.
Variations I’ve Tried (And a Goof or Two)
- Apple pie filling instead of pumpkin—so good, especially with a bit of cinnamon sugar on top.
- Chocolate hazelnut spread and mini marshmallows—my nephew’s favorite (but it gets super gooey).
- Once I tried a savory version with cheese and roasted red pepper. It looked awesome but honestly tasted kind of... meh. Maybe needs more experimenting.
Don’t Sweat the Equipment
You’ll want a baking sheet and some parchment, plus a cookie cutter if you have one. But actually, I find it works better if you just draw a pumpkin on a piece of paper, cut it out, and trace with a knife. If you have no pastry brush for the egg wash, just use your fingers or even a clean paintbrush (my kids love that part, though it gets messy fast).


How to Store (If You Have Any Left)
In theory, these’ll keep in an airtight container for 2-3 days at room temp or in the fridge. I think they taste better the next day—but honestly, in my house it never lasts more than a day! If you do manage to save some, pop ‘em in the toaster oven for a quick warm-up (microwave gets them a bit soggy, just saying).
Serving: What We Do at My Place
We usually set these out on a big platter next to our carved pumpkins—sometimes with a bowl of whipped cream or a quick vanilla glaze for dipping (here’s a glaze recipe I like from Preppy Kitchen). My cousin dunks his in hot cider, which I thought was weird until I tried it. Now I’m converted.
Pro Tips (Aka, I Learned the Hard Way)
- I once tried to assemble and bake all at once, skipping the egg wash and chilling. Regretted it—the pies fell apart and looked like pumpkin roadkill.
- Don’t be tempted to use too much filling. Seriously, it always seeps out the sides, and then you’re scraping burnt sugar off your pan for days.
- Keep your knife sharp for the faces—dull blades make for sad, squished pumpkins.
FAQ: Real Questions, Real Answers
- Can I make these ahead? Totally! You can freeze the filled, unbaked pies and bake straight from frozen (just add a few minutes to the bake time). Or, bake ahead and reheat, though I think they’re best fresh.
- Can I use puff pastry instead of pie dough? Yep! They’re flakier, but don’t overfill or you’ll get leaks. (I learned that the hard way—big, buttery mess.)
- Can kids help? Oh, for sure. It gets messy, but it’s half the fun. Let them make the faces—even the weird ones. Just keep sharp knives out of reach (I keep a dull kid’s knife handy for them).
- Help, I have no pumpkin spice! Just use cinnamon, or a dash of whatever you’ve got—honestly, no one’s grading your spice blend. I sometimes just use a bit of allspice and it’s still tasty.
- Do I have to use pumpkin? Haha, no! Apple, cherry, or even a spoonful of jam; the filling’s the easy part to tweak. Experiment and see what you like best!
And that’s it—Halloween Jack-O-Lantern Hand Pies, as imperfect and fun as the holiday itself. If you want more Jack-O-Lantern inspiration, I sometimes check the templates on Pumpkin Lady and adapt them for my pies (not sponsored, just a fan!). So, ready to get baking? Let me know how your faces turn out—bonus points for wonky smiles.