
Let Me Tell You About These Bars (And My Sweet Tooth!)
Okay, so here’s the deal: The first time I made these German Chocolate Pecan Pie Bars was for a potluck, and I genuinely thought nobody would touch them because—well, there were three types of brownies on the table, and who can compete with classic brownies? Turns out, these disappeared first (I barely snagged one myself, and I'm not above hiding a bar behind the salad bowl next time). They're like the fancy cousin of pecan pie, but less fussy and way easier to eat with your hands, which is honestly the main thing I want in a dessert.
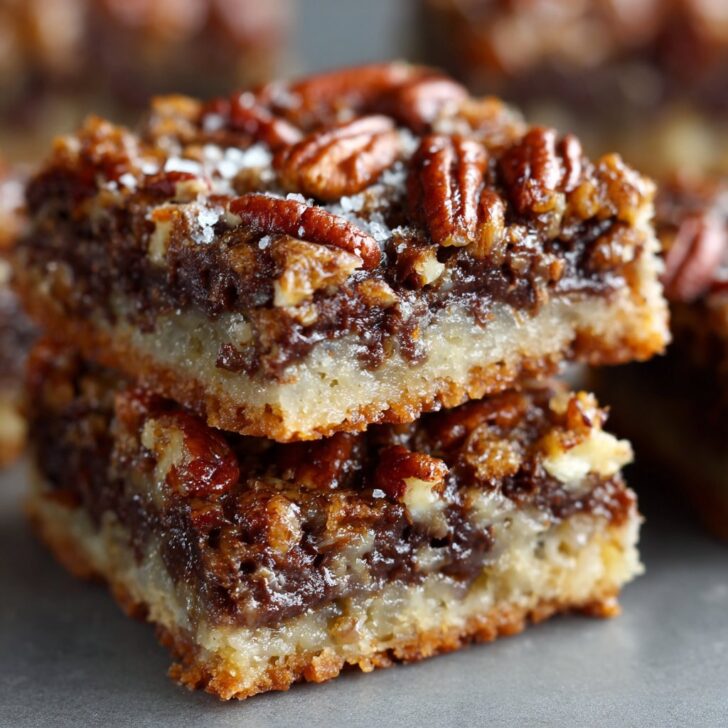
Oh, and side note: I once tried sprinkling sea salt on top, thinking I was being fancy. My dad said, “Why’d you put salt on candy?” Still, I liked it! Just goes to show, not everyone appreciates my creative genius.
Why You'll Love This (Or At Least, Why I Do)
I make these anytime I want to impress people without actually working that hard (don’t tell anyone). My family goes wild for that gooey chocolate-pecan filling, especially when it’s still a bit warm from the oven. Actually, I find it works better if you let them cool fully, but who am I kidding? I hardly ever wait.
When I’m in a rush (read: running late, again), I’ll even skip toasting the pecans. Is it better with toasted? Yeah, probably. Do I always bother? Nope. Life’s short! Oh, and for anyone who thinks you need to use some special brand of chocolate—my grandmother swears by Baker’s German sweet chocolate, but honestly, whatever’s in my cupboard goes straight in.
What You Need (And What You Can Get Away With)
- For the crust:
- 1 cup (2 sticks) unsalted butter, melted (Salted works too; just skip the pinch of salt later)
- 2 cups all-purpose flour (I sometimes do half whole wheat, but it does make it a bit crumblier)
- ½ cup brown sugar—light or dark, both taste great
- ¼ teaspoon salt
- For the filling:
- 1 cup light corn syrup (I’ve used golden syrup in a pinch; honey made it too sticky for my taste)
- 1 cup granulated sugar
- 4 large eggs
- ¼ cup unsalted butter, melted
- 1 teaspoon vanilla extract (the real stuff is nice, but I don’t judge fake vanilla—budget is budget!)
- 2 cups pecans, roughly chopped (toasted if you feel like it)
- 1 ½ cups sweetened flaked coconut (unsweetened works, but it’s just not as dessert-y)
- 1 ½ cups German sweet chocolate, chopped or chips (or honestly, any semi-sweet chocolate goes great)
- Optional: Flaky sea salt, for finishing
So, How Do You Make These? Here’s My Not-So-Perfect Process
- Preheat your oven to 350°F (175°C). Line a 9x13 inch pan with parchment paper—let some hang over the sides, so you can lift the bars out later. Or just grease it like mad if you’re out of parchment, I’ve done both.
- Mix the melted butter, flour, brown sugar, and salt for the crust in a big bowl. I usually just use a wooden spoon, but you could go fancy with a mixer if that's your thing. Press into the pan—get it as even as you can, but don’t stress if it looks patchy. Bake for about 15 minutes, or until it’s just starting to look set and maybe the edges are going a bit golden.
- While the crust is in the oven, whisk together the corn syrup, sugar, eggs, melted butter, and vanilla. You don’t have to use a mixer here, just a good old whisk. Stir in the pecans, coconut, and chocolate. (This is where I usually sneak a taste, but then remember the eggs aren’t cooked yet. Oops.)
- Pour the filling over the hot crust. Try to spread it evenly so every bar gets a bit of everything. Pop it back in the oven for 30 to 35 minutes. The top should look set, but a little jiggle is fine—kind of like a cheesecake, you know?
- Let it cool completely in the pan. If you try to cut them early, you’ll get a gooey (but still delicious) mess. Or just eat it with a spoon, I’m not judging.
- Once cool, lift out with the parchment (if you used it) and slice into bars—big or small, up to you. I go for 24 pieces, but sometimes it’s more like 18 if I’m feeling generous (aka hungry).
Notes From Real Life (aka My Kitchen)
- If you only have sweetened coconut but don’t like things too sweet, just knock the sugar down a tad. That’s what I do.
- Once I forgot to melt the butter for the filling and just threw it in cubed—it worked, but the bars were a little patchy. Still disappeared, though!
- A glass pan works fine, but metal browns the crust better. Or so I’ve convinced myself.
Variations I’ve Tried (Some Better Than Others)
- Chopped walnuts instead of pecans—tastes a bit earthier, but not everyone loved it (my sister said it was "too nutty," whatever that means).
- No coconut? Just add extra pecans. Or throw in some oats for a slightly chewier vibe. I tried marshmallows once—let's not talk about that.
- Use dark chocolate instead of German chocolate for a more grown-up flavor. Personally, I still like the original best.
Equipment (And Some DIY Fixes)
- 9x13 inch baking pan (honestly, I once used two smaller pans side by side, just watched them in case one baked faster)
- Parchment paper or plenty of nonstick spray
- Mixing bowls—one really big one helps with the filling
- Wooden spoon or spatula—you can use your hands for the crust if you like, it’s not fancy
- Whisk, but a fork will do for the filling in a pinch


How To Store (Though Ours Rarely Lasts...)
Keep these in an airtight container at room temp for up to 3 days. Honestly, in my house, it never lasts more than a day! If you do want to save some for later (good luck), refrigerate for up to a week. The flavor actually gets deeper on day two—if you can wait that long.
So, How Should You Serve These?
I love them just as they are, but sometimes I go wild and warm one up for 10 seconds in the microwave, then top with a scoop of vanilla ice cream. When my cousin comes over, she insists on whipped cream instead. One friend dunks hers in coffee, which, honestly, is genius.
A Few "Pro" Tips (Learned The Hard Way)
- Don’t rush the cooling! I once cut into them too soon and ended up with a puddle (still tasted great, but not very bar-like).
- If you use parchment, let it hang over the sides. Makes your life easier—unless you enjoy chiseling bars out of a pan, of course.
- Try to chop the pecans, not pulverize them. Big chunks make for better texture.
FAQ From Friends and Family
- Do I have to use German chocolate? Nope! Honestly, any semi-sweet or dark chocolate will work. The "German" part is about the type of chocolate, not the country. Who knew?
- Can I freeze these? For sure. Just wrap tightly and freeze up to 2 months. Thaw at room temp (or eat straight from the freezer—I won't judge).
- Why is my filling runny? Might've underbaked a bit, or maybe cut them too soon. Honestly, though, runny or not, they’ll still get eaten!
Looking for more bar goodies? I often turn to Sally’s Baking Addiction for inspiration. Or if you want a deep dive on chocolate, Serious Eats covers all the basics (though their pie bars aren’t as messy as mine tend to be).
One last thing—you really should try these at least once. Unless you’re allergic to nuts, in which case, maybe bring them to a potluck and just enjoy how happy everyone else is. That’s what I’d do.


Ingredients
- 1 cup all-purpose flour
- ½ cup unsalted butter, melted
- ¼ cup granulated sugar
- 1 cup semisweet chocolate chips
- 1 cup sweetened shredded coconut
- 1 cup chopped pecans
- ¾ cup light corn syrup
- ½ cup packed brown sugar
- 2 large eggs
- 1 teaspoon vanilla extract
- ¼ teaspoon salt
Instructions
-
1Preheat oven to 350°F (175°C). Line a 9x9-inch baking pan with parchment paper and lightly grease.
-
2In a medium bowl, combine flour, melted butter, and granulated sugar. Press mixture evenly into the bottom of the prepared pan to form the crust.
-
3Bake the crust for 10 minutes. Remove from oven and sprinkle chocolate chips, shredded coconut, and chopped pecans evenly over the crust.
-
4In another bowl, whisk together corn syrup, brown sugar, eggs, vanilla extract, and salt until well combined. Pour this mixture evenly over the layered ingredients in the pan.
-
5Return pan to oven and bake for 30 minutes, or until the filling is set and golden brown. Cool completely before cutting into bars.
Approximate Information for One Serving
Nutrition Disclaimers
Number of total servings shown is approximate. Actual number of servings will depend on your preferred portion sizes.
Nutritional values shown are general guidelines and reflect information for 1 serving using the ingredients listed, not including any optional ingredients. Actual macros may vary slightly depending on specific brands and types of ingredients used.
To determine the weight of one serving, prepare the recipe as instructed. Weigh the finished recipe, then divide the weight of the finished recipe (not including the weight of the container the food is in) by the desired number of servings. Result will be the weight of one serving.
Did you make this recipe?
Please consider Pinning it!!