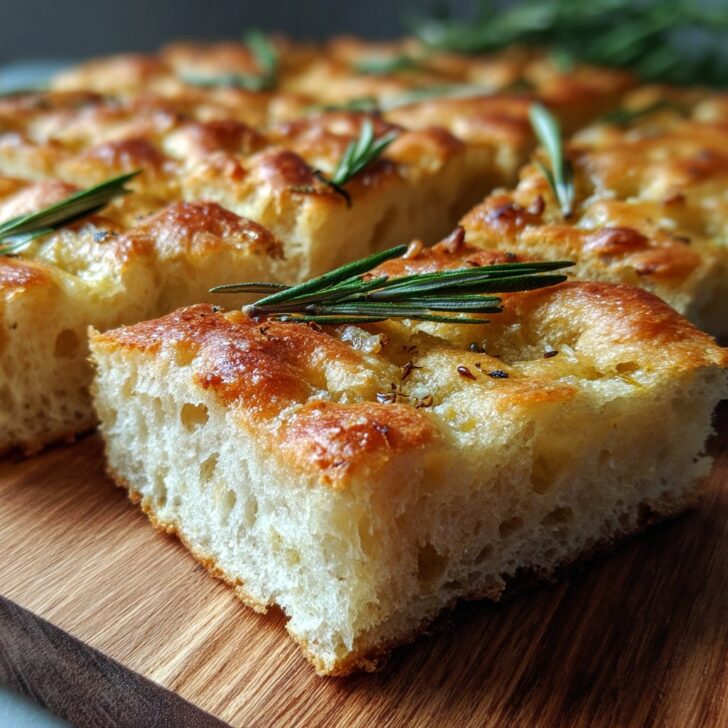

Oh Hey—Let’s Talk About This Garlic Rosemary Sourdough Focaccia
I have to tell you, the first time I baked this focaccia I was convinced it was going to flop—like, the dough looked so weird and bouncy, my kitchen smelled like a pizza shop, and I kept second-guessing myself because, well, sourdough is tricky, right? But then my neighbor popped in (she always seems to sense when I’m baking bread, by the way) and before I knew it, half the loaf was gone. It’s now basically my party trick, and if I don’t make it for Sunday dinners, my brother gets a bit dramatic about it. Anyway, this focaccia has become a bit of a legend around here. If you’re looking for a bread that makes you look like you know what you’re doing—even when you don’t—this is it.
Why This Focaccia Is a Keeper (Trust Me)
I make this bread when I want something that feels a little fancy but is honestly pretty forgiving. My family goes wild for it because it smells like an Italian bakery, and seriously, garlic plus rosemary is just *chef’s kiss* (I know, I know, but it’s true). Oh, and here’s the thing: I used to hate working with sticky dough—thought I’d never get it off my hands—but now, weirdly, I kind of like it (just don’t answer the phone mid-knead). It’s my go-to for potlucks, too, though I do get annoyed cutting neat squares because it’s so pillowy it wants to squish all over. Worth it, though!
What You’ll Need (and Maybe What You Don’t)
- 2 ½ cups (about 330g) bread flour (sometimes I just use whatever plain flour I have—my grandmother always used Gold Medal, but honestly, anything works)
- 1 cup active sourdough starter (fed and bubbly is best, but I’ve used sluggish starter in a pinch, just let it rise longer)
- ¾ cup water (lukewarm—though if I’m distracted and use cold it still works, just slower)
- ¼ cup good olive oil (plus extra for drizzling; don’t stress about it being extra-virgin unless you’re feeling fancy)
- 1 ½ teaspoon kosher salt (or a big pinch of sea salt—flaky salt for topping if you’ve got it)
- 4-5 garlic cloves, minced (I sometimes roast them ahead if I’m feeling patient, but most days it’s just raw and chopped)
- 2 tablespoon fresh rosemary, chopped (you can sub dried but use less—a teaspoon or so, otherwise it gets too piney)
- Optional: A handful of cherry tomatoes, sliced (if you want to get all artsy), or olives—taste is totally up to you
How I Usually Throw This Together
- Wake up your starter: A few hours before, make sure your sourdough starter is bubbly and ready. If you forgot, just feed it, go do something else, and come back. (I once left it too long and it worked okay, bread just tasted more tangy.)
- Mix it up: In a big bowl, throw in your flour, starter, water, salt, and half the olive oil. I start with a wooden spoon, but honestly, sometimes I just use my hand. Mix until it’s a shaggy mess. Don’t panic—it’ll look rough. This is the part where I sneak a whiff, because fresh dough just smells like home to me.
- Rest: Cover the bowl with a damp towel (or cling film if you’re out of towels, which sometimes happens here), and let it sit for 30 minutes. This is a good time to make a cup of tea.
- Add the fun stuff: Sprinkle in the chopped garlic and rosemary. Knead it in with your hands (or a dough scraper—sometimes I just poke it around a bit and call it good). Don’t worry if it feels sticky, that’s normal.
- Stretch and fold: Every 30 minutes for about 2 hours, give the dough a little stretch and fold—just grab a bit, pull it up, and fold it over. Four times total is usually plenty. Don’t stress if you forget one or two, honestly, I’ve done that and it’s been fine.
- Let it rise: Drizzle a bit of olive oil in your baking dish (a 9x13-inch pan works, or a round cake tin—use what you’ve got). Plop the dough in, cover again, and let it rise at room temp until it’s all puffy and doubled—this can take 3 to 5 hours or even overnight in the fridge. Somehow, it always looks underwhelming until the very end, then it suddenly gets all dramatic and poofy.
- Dimple and top: Here comes the fun part—drizzle more oil over the dough, then use your fingertips to press dimples all over. (Don’t mash it flat, just poke little valleys.) Top with flaky salt, more rosemary, and anything else you like (tomatoes, olives, or honestly, nothing—still great).
- Bake: Pop it in a 425°F (220°C) oven for about 25-30 minutes. You want it golden and slightly crispy on top. The smell will drive you nuts (in the best way). If you’re unsure, just tap the top and listen—it should sound hollow-ish.
- Cool (kind of): Let it rest for at least 10 minutes before slicing. Actually, I find it’s easier to slice if you wait, but sometimes I just can’t and it’s still delicious.
What I’ve Learned (Sometimes the Hard Way)
- If your dough seems too wet, add a spoonful of flour—but not too much, or it’ll get dense (learned that the hard way).
- Letting it rise overnight in the fridge gives the best flavor, but also, sometimes I forget and leave it out—still works, just a bit different.
- I used to skip the dimpling step, but honestly, the olive oil pools make it magic.
- Don’t overthink the garlic. If you love it, add more; if not, cut back. It’s your kitchen, after all.
Variations I’ve Tried (Some Successful, Some...Not)
- Swapped rosemary for thyme once—actually, pretty tasty, but not quite as wow.
- Added caramelized onions: amazing, though more effort than I usually want to put in on a weeknight.
- Tried it with gluten-free flour once—let’s just say it didn’t really resemble bread at the end. Maybe you’ll have better luck?
- Sliced olives and roasted red peppers: my mum’s favorite, but the kids pick them off (go figure).
Equipment: What You Need, and What You Can Improvise
- Big mixing bowl (or a really clean stockpot, if that’s all you have—I’ve done it!)
- 9x13 baking pan or cake tin (if you only have a sheet tray, just make a rustic, thinner focaccia—more crispy bits!)
- Dough scraper or your trusty hands (I lost my scraper ages ago, hands work fine)
- Measuring cups/spoons (or eyeball it, if you’re feeling brave—sometimes I do, but don’t tell the purists)


Storing Leftovers (If That Ever Happens)
Wrap any leftover focaccia in foil or a tea towel and keep it at room temp for a day or two—but honestly, in my house it never lasts more than a day. If you must, you can freeze it, but it loses a little something. Toasting leftovers in a hot pan actually brings it back to life, though!
How We Love to Eat It (And Some Odd Traditions)
I love it sliced warm, dunked in soup or just with a slab of butter. Sometimes we use it as the base for impromptu sandwiches (try prosciutto and arugula, trust me). My brother, for some reason, loves dipping it in balsamic vinegar, which I always thought was a bit much, but to each his own.
Lessons I’ve Learned—Aka My Pro Tips
- I once tried to rush the rising step and regretted it: flat focaccia sadness. Give it time, even if you’re impatient.
- Don’t skip the olive oil. I did once (ran out, oops), and it was just... dry. Not the same at all.
- Actually, letting it cool a bit before cutting does help keep it fluffy. I know, it’s hard to wait.
FAQ: Real Questions I Get Asked (Or Ask Myself)
- Can I use instant yeast instead of sourdough starter? Honestly, yeah, just use about a teaspoon and skip the long rise. The flavor won’t be as zingy, but it works. Here’s a good yeast-based focaccia recipe from King Arthur, if you want it.
- What if I don’t have fresh rosemary? No worries; dried works. Use about a third as much, or try thyme or oregano (or just whatever’s in your spice rack, really).
- Do I have to use bread flour? Nope. I use plain all-purpose more often than I should admit. Bread flour just makes it a tad chewier.
- How do I know when it’s baked through? Give it a tap—if it sounds kind of hollow, you’re probably good. Or, poke it—if it springs back, that’s a good sign. But honestly, if you overbake it a little, it’s still great dunked in soup.
- Do I really need that much olive oil? Well, yes and no. I’ve cut back before, but the crispy, golden edges really are from all that oil. Your call (but I recommend going for it).
If you’re curious about wild sourdough starter, I found Maurizio’s step-by-step guide super helpful. Also, if you’re into deep-dives, have a look at Serious Eats’ focaccia breakdown. Both are fun to read—if you need a bread rabbit hole, anyway.
Alright, that’s it from me. Hope your kitchen smells incredible soon, and may your focaccia be fluffy and never flat! If you make it, let me know how it turns out—or if you discover a new twist I should try next time.


Ingredients
- 3 cups bread flour
- 1 cup active sourdough starter
- 1 ¼ cups warm water
- 2 teaspoons sea salt
- ¼ cup extra virgin olive oil, plus more for drizzling
- 4 cloves garlic, roasted and minced
- 2 tablespoons fresh rosemary, chopped
- 1 teaspoon flaky sea salt, for topping
Instructions
-
1In a large bowl, combine bread flour, sourdough starter, warm water, and sea salt. Mix until a sticky dough forms.
-
2Add olive oil, roasted garlic, and chopped rosemary to the dough. Knead gently until well incorporated.
-
3Cover the bowl and let the dough rise at room temperature for 4-6 hours, or until doubled in size.
-
4Transfer the dough to a well-oiled baking pan. Gently stretch and press the dough to fit the pan. Dimple the surface with your fingers.
-
5Drizzle with olive oil and sprinkle with flaky sea salt. Let rest for 30 minutes while preheating the oven to 425°F (220°C).
-
6Bake for 25-30 minutes or until golden brown. Cool slightly before slicing and serving.
Approximate Information for One Serving
Nutrition Disclaimers
Number of total servings shown is approximate. Actual number of servings will depend on your preferred portion sizes.
Nutritional values shown are general guidelines and reflect information for 1 serving using the ingredients listed, not including any optional ingredients. Actual macros may vary slightly depending on specific brands and types of ingredients used.
To determine the weight of one serving, prepare the recipe as instructed. Weigh the finished recipe, then divide the weight of the finished recipe (not including the weight of the container the food is in) by the desired number of servings. Result will be the weight of one serving.
Did you make this recipe?
Please consider Pinning it!!