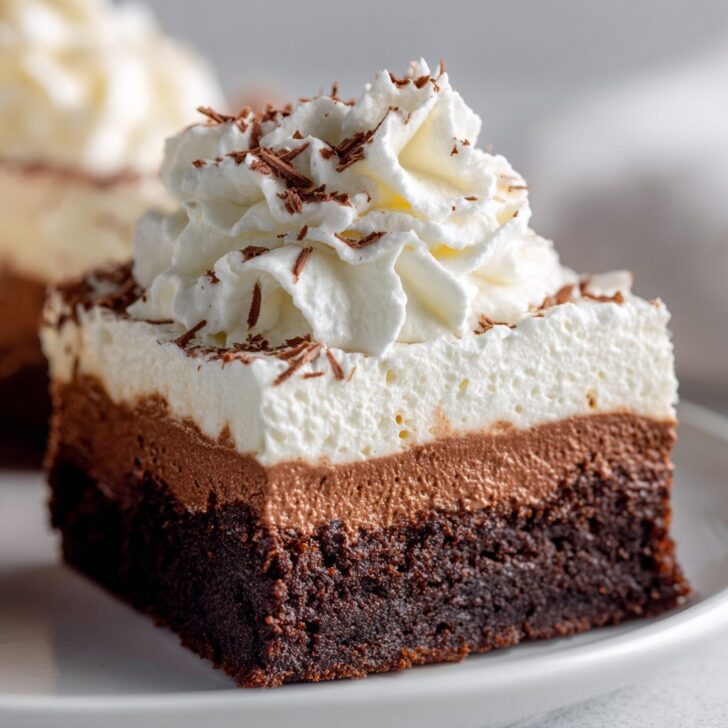
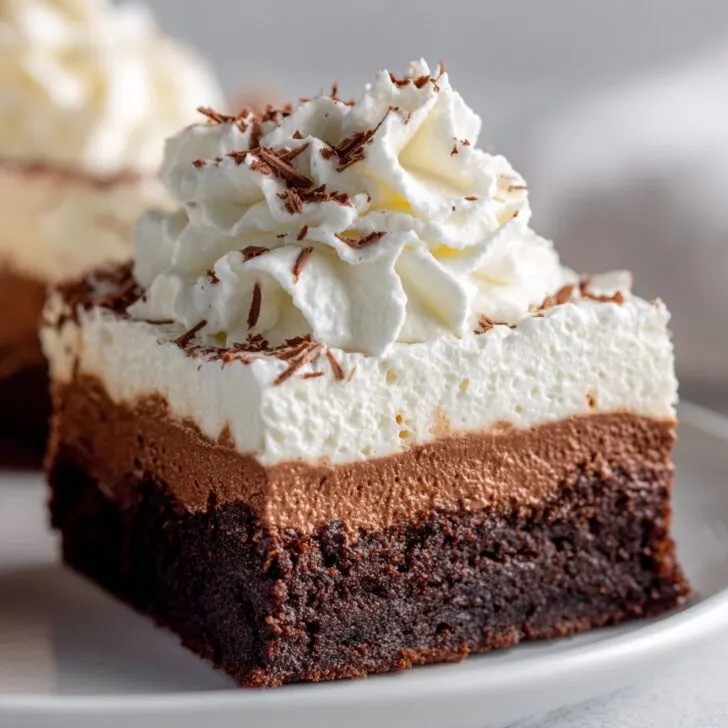
Let's Talk About These French Silk Pie Brownies (Yes, With Whipped Cream!)
Alright, friend, I have to tell you about the time I decided to combine two of my all-time favorite desserts—rich, chocolatey brownies and the silky, decadent filling from French silk pie. It started because I couldn't make up my mind what to bring to my cousin's birthday (shout out to Laura, who always asks for something chocolate at her parties). And, honestly, I was craving both. So, after a bit of kitchen chaos—and a minor incident involving cocoa powder on the cat—the French Silk Pie Brownies with Whipped Cream were born. If you ever wanted a dessert that makes people pause mid-bite, this is it.
Why Do I Keep Making These?
I make this when I want to look like I've got it together (even if I'm winging half of it). My family goes absolutely nuts for them—especially my brother, who claims he can eat half a pan in one sitting (I’ve seen him try, the results are not pretty). Sometimes I whip these up when I need something to impress, but honestly, I love eating them straight from the fridge, usually after midnight. Once, I tried making just the brownies without the silk pie topping, but it just wasn’t the same; like, why settle for good when you can have mind-blowing?
Gather These Ingredients (No Need to Stress)
- For the Brownie Layer:
- 1 cup (2 sticks) unsalted butter, melted (salted works too, just skip the extra salt)
- 2 cups granulated sugar (I sometimes swap in half brown sugar if I'm low—makes 'em chewier)
- 4 large eggs
- 1 teaspoon vanilla extract (my grandmother always insisted on Nielsen-Massey, but I honestly just grab whatever's on sale)
- 1 cup all-purpose flour
- 1 cup unsweetened cocoa powder (Dutch process, natural, whatever you have lurking in the pantry)
- ½ teaspoon salt
- For the French Silk Layer:
- 1 cup (2 sticks) unsalted butter, softened (don’t microwave it or it gets weirdly greasy)
- 1 cup sugar (superfine if you have it, but regular works—I've even used powdered in a pinch)
- 4 ounces dark chocolate, melted and cooled (anything 60-70% is great, but milk chocolate will work if you’re desperate for sweetness)
- 2 teaspoon vanilla extract
- 4 large eggs (pasteurized if you're nervous about raw eggs—though, I've always just used store eggs and crossed my fingers)
- Pinch of salt
- For the Whipped Cream:
- 1 cup heavy whipping cream (I’ve used the shelf-stable stuff once—never again, just get the real thing)
- 2–3 tablespoon powdered sugar (or honey if you’re feeling wild)
- 1 teaspoon vanilla extract (optional, but tasty)
- Optional: Chocolate shavings, cocoa nibs, or even a dusting of cinnamon (my friend Jen loves this with a pinch of chili powder—no judgment)
Here’s How I Actually Make These
- Brownie Base: Preheat your oven to 350°F (175°C). Grab a 9x13-inch pan—parchment lining is nice, but if you forget (like I do half the time), just grease it well. In a big bowl, whisk melted butter and sugar until it kind of looks like wet sand. Add eggs, one at a time, mixing after each (this is where I usually get a bit of shell in there, oops). Stir in the vanilla.
- Now, dump in the flour, cocoa, and salt. Stir until mostly smooth—don’t overthink it, a few lumps are fine. Pour the batter into the pan and bake for about 22–28 minutes. It should look set around the edges but still a little fudgy in the center. (If you poke a toothpick in and it’s got moist crumbs, you’re golden.) Let this cool completely—seriously, or the silk layer turns to soup.
- French Silk Layer: Beat the softened butter and sugar together for a few minutes, until it looks almost fluffy (I use my hand mixer, but elbow grease is fine). Mix in the melted, cooled chocolate, then the vanilla and salt. Now comes the eggs—add one at a time, beating for at least a minute after each. Yes, four whole minutes; it feels excessive but that’s what makes it silky. (I used to rush this—big mistake, the texture just isn’t right.) Spread this luscious mixture over your cooled brownies. Try not to eat all of it with a spoon, but if you do, I won’t judge.
- Whipped Cream: Whip the cream, powdered sugar, and vanilla together until soft peaks form (that’s when it holds its shape but still looks a little wavy). Plop, swoosh, or spread it over the silk layer.
- Finish off with chocolate shavings or whatever (totally optional). Chill at least 2 hours, overnight is even better—if you can wait that long.
Some Notes (AKA Things I Learned the Hard Way)
- Don’t try to make the silk layer while the brownies are warm. Just… don’t.
- If your chocolate seizes, add a splash of cream and stir—usually fixes it (unless it’s really burned, then just start over, sorry).
- The first time I used salted butter in the silk layer, it was weirdly good. So if that’s all you have, give it a go.
- If your whipped cream flops, just call it a "creamy sauce" and drizzle—it still tastes great.
What Else Can You Try? (Experiments Galore)
- I once swapped half the butter in the silk layer for coconut oil. The flavor was nice, but it set up way too hard in the fridge (so, not my best idea).
- Adding a bit of espresso powder to the brownie base is amazing if you love deep chocolate flavor.
- Made it gluten-free for a friend by using a 1:1 GF flour blend—worked a treat!
- Actually, tried making it dairy-free once with margarine and coconut cream. Not quite the same, but it scratched the itch.
Do You Really Need Fancy Gear?
Technically, a stand mixer makes the silk layer easier, but I’ve done it with a plain old hand mixer (and once, a whisk and a lot of patience—my arm was sore for days). No mixer? Grab a wooden spoon and mix like you mean it. And if you don’t have a 9x13 pan, just use two smaller ones or a square one and make a few extra "brownie edges"—those are the best bits, anyway.


How to Store (Good Luck With Leftovers)
Keep these in the fridge, covered, for up to 3 days. Though honestly, in my house, if it lasts more than a day, I consider that a miracle. Sometimes I hide a square at the back behind the pickles, just for myself. You can freeze the base and silk layers (not the whipped cream) if you want to get ahead, but, on second thought, it’s best fresh.
Best Ways to Serve (According to My Family)
I love slicing these into small squares and serving with extra whipped cream and a sprinkle of flaky salt. My uncle puts a scoop of vanilla ice cream on top (he says it’s “mandatory”). Sometimes we drizzle a little warm caramel sauce over the top when we’re feeling fancy. Oh, and birthday candles work a treat—don’t ask me how many times these have been a last-minute birthday cake.
Pro Tips I Learned the Hard Way
- I once tried rushing the chilling time. Big mistake; the silk layer oozed everywhere. Just wait, trust me.
- Don’t skimp on beating the eggs into the silk layer. I used to rush this part, but the difference is wild—fluffy and mousse-like vs heavy and sad.
- Actually, I think this tastes better the next day, but good luck not eating it right away.
FAQ (Seriously, People Ask Me These Things!)
- Can I use boxed brownie mix? Totally! When I'm short on time, I grab a box (usually Ghirardelli, but honestly whatever’s cheapest works fine). Just bake and let cool before adding the silk layer.
- Is it safe to eat raw eggs in the silk layer? Good question—I usually use regular store eggs and have never had a problem, but if you're nervous, look for pasteurized eggs. The Egg Safety Center has a handy guide if you want to geek out.
- Can I make this ahead? Yes! Actually, it gets better after a night in the fridge. Just hold off on the whipped cream until right before serving for best texture.
- What's the best chocolate for the silk layer? I usually go with Ghirardelli or Trader Joe's Pound Plus bar—here’s a great list of baking chocolates if you wanna get picky.
- Do I really need a mixer? Not technically, but your arm will get a workout. No shame in using what you’ve got.
- Oops, my silk layer is runny—what do I do? Chill it longer. If it’s still runny, you might have under-beaten the eggs (done that myself!). Next time, just beat each in for a full minute.
Bonus: A Totally Unrelated Tangent
You know, every time I make this dessert, I remember the year my dog managed to eat an entire stick of butter I accidentally left on the counter. He was fine (vet said he was just “well-lubricated”), but now I’m much more vigilant about where I leave my ingredients. Anyway, back to brownies…
Let me know if you try this! Or, if you have a weird hack for making whipped cream in a jar—I hear it works, though I haven’t braved it myself yet.


Ingredients
- 1 box (18 oz) brownie mix (plus ingredients required on box: eggs, oil, water)
- 1 cup unsalted butter, softened
- 1 cup granulated sugar
- 4 large eggs (room temperature)
- 8 oz semisweet chocolate, melted and cooled
- 1 teaspoon vanilla extract
- 1 cup heavy whipping cream
- 2 tablespoons powdered sugar
Instructions
-
1Preheat oven to 350°F (175°C). Prepare a 9x13-inch baking pan with parchment paper or nonstick spray.
-
2Prepare the brownie mix according to package instructions. Pour batter into the prepared pan and bake for 25-30 minutes, or until a toothpick inserted comes out with a few moist crumbs. Let cool completely.
-
3In a large bowl, beat together softened butter and granulated sugar until light and fluffy. Add eggs one at a time, beating well after each addition.
-
4Mix in melted chocolate and vanilla extract until smooth. Spread the French silk layer evenly over the cooled brownies.
-
5In a separate bowl, whip heavy cream and powdered sugar until stiff peaks form. Spread whipped cream over the French silk layer.
-
6Chill brownies for at least 1 hour before slicing and serving. Enjoy!
Approximate Information for One Serving
Nutrition Disclaimers
Number of total servings shown is approximate. Actual number of servings will depend on your preferred portion sizes.
Nutritional values shown are general guidelines and reflect information for 1 serving using the ingredients listed, not including any optional ingredients. Actual macros may vary slightly depending on specific brands and types of ingredients used.
To determine the weight of one serving, prepare the recipe as instructed. Weigh the finished recipe, then divide the weight of the finished recipe (not including the weight of the container the food is in) by the desired number of servings. Result will be the weight of one serving.
Did you make this recipe?
Please consider Pinning it!!