
Let's Bake: A (Slightly Distracted) Sugar Cookie Chat
I should warn you, making these cookies might be as much about nostalgia as it is about sugar. My first attempt at baking them was, well, a glorious disaster—the dough stuck to everything except itself, my cat tried to swipe a piece, and somehow I got flour on the ceiling. But you know what? Even the burnt ones were rescued with a cup of tea. These soft-centered sugar cookies have since rescued many a Monday afternoon at my place. If you're after that magical combo of crispy edges and gooey, melt-in-your-mouth middles... you’re in the right spot (and if the dog gets a rogue cookie, well, that's life).
Why You'll Love This (Besides the Fact You Can Eat the Dough)
I make this when I want to impress my cousins who always show up early, or when I've forgotten it's my turn to bring a treat (again). My family honestly fights over who gets the softest one in the middle of the tray—no shame here. They're quick, they're no-fuss, and if you sneak a spoonful of dough, I won't tell. The best part? No rolling pins to scrub later. (Not that I mind using a wine bottle as a pin... but that's another story!) Oh, and I can finally stop buying those store cookies that taste like sweet cardboard.
The (Mostly) Flexible Ingredients List
- 2 and ¾ cups plain flour (all-purpose, but I once used bread flour when I was out, and it worked—cookies were just chewier)
- 1 teaspoon baking soda
- ½ teaspoon salt (My grandmother swore by Maldon, but I reach for whatever's handy)
- 1 cup (225g) unsalted butter, softened (if I'm rushed, I just nuke it for 10 seconds)
- 1 and ½ cups white sugar (sometimes I mix in light brown for a bit more flavor)
- 1 large egg (duck egg? Sure! Worked once, actually)
- 2 teaspoons vanilla extract (imitation, real, or honestly... almond extract in a pinch—a wild card but yum)
- Extra sugar for rolling, optional (though in my house it's not really optional)
How I Actually Make These Cookies (Warts and All)
- Preheat the oven to 350°F (180°C). Or just guess if your oven’s grumpy—mine has hot spots and a mind of its own.
- Mix flour, baking soda, salt in a bowl. Set aside. This is the "dry stuff.”
- Cream butter and sugar together till fluffy-ish. (I once did this with a wooden spoon—doable, but my arm hated me.)
- Beat in the egg and vanilla. Side note: you can use an electric mixer, but I've gotten decent results with a sturdy whisk and good intentions.
- Gradually add the dry mixture to the wet. Here’s where it looks strange—kind of crumbly at first, but just stick with it, it comes together. (This is where I usually sneak a taste. Quality control... right?)
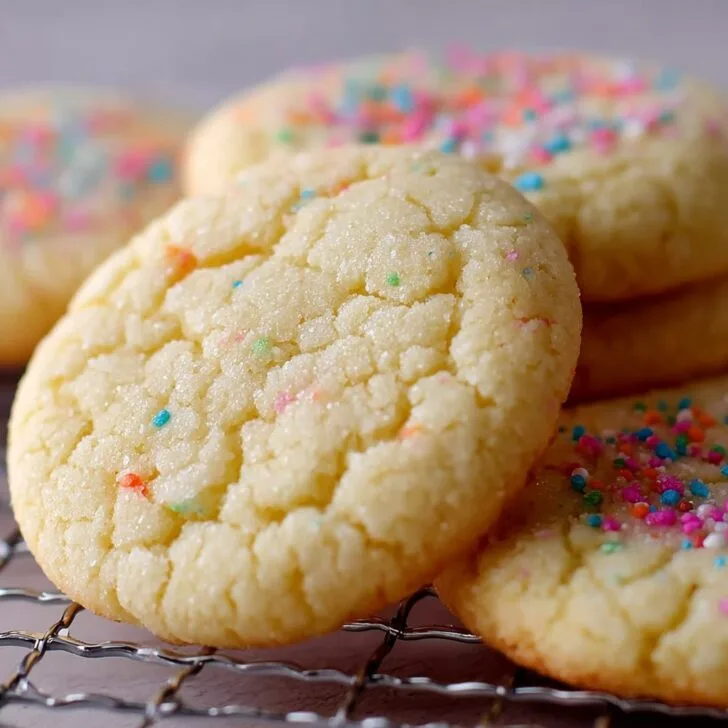
- Roll dough into golf ball-sized lumps—absolutely nothing bad happens if you go bigger or smaller. Roll in that extra sugar, if you fancy the crackly tops.
- Place on baking parchment–lined tray, maybe 2 inches apart. Honestly, they mound up rather than spread much, so crowd them a little if you’re low on space.
- Bake 8–10 minutes. Don’t overbake! If the edges are just barely golden, they're done, even though the centers look like "meh"—they’ll set as they cool.
- Cool on the tray a few minutes—unless you want to burn your fingers like I always do. Then move to a rack.
The Random Discoveries (a.k.a. Notes)
- If the dough feels too sticky, chuck it in the fridge for 20 mins. Actually, I sometimes just leave it outside in winter. Works a treat in Yorkshire weather.
- Butter straight form the fridge might make your life difficult—you've been warned…
- Somehow, the cookies taste even better the next day, though mine rarely survive that long.
Tinkering: Variations I’ve Actually Tried
- Tried swapping half the vanilla for orange zest—honestly delightful, but a bit posh for Tuesday.
- Added mini chocolate chips once; they were gone before they cooled.
- Used whole wheat flour instead of white. Regretted it. Was like eating slightly sweet cardboard. Your mileage may vary!
About the Gear (Because Not Everyone Owns Every Gadget)
I use a hand mixer but a fork and some enthusiasm will do—in uni, I used to bash the butter and sugar together with a potato masher. For cooling racks, I’ve used the top of my grill pan with a bit of kitchen roll underneath. Improvisation: the unsung ingredient.


How to Store 'Em (But Who Are We Kidding?)
Supposedly, these will keep 3–4 days in a sealed tin. Personally, I think that's a myth—they’re usually gone by breakfast the next morning. You can freeze the dough (rolled or unbaked) for about a month, if you have more self-control than me. I read this trick on Sally’s Baking Addiction—she's a genius.
Serving Ideas (Steal My Traditions!)
My mum puts jam on hers (don't ask, it's good). At birthday parties, we sandwich two together with ice cream—total showstopper, if you've got five mins to spare. For Christmas, I drag out the colored sugars and let the kids go wild. That's half the fun, isn't it?
Lessons Learned—My Best Pro Tips
- Seriously, don’t bake till the tops look totally cooked—or you’ll end up with biscuit discs. I once tried to "cheat" by turning up the oven... nope. Crispy as Ryvitas.
- If you skip the sugar-rolling step the cookies still taste great, but lack that fancy café look.
- Creaming the butter and sugar properly is the secret. I’ve rushed this and… yeah, regrets.
FAQ—You Asked, I Answered
Can you use margarine instead of butter?
I mean, you can, and it works, but I think you lose a bit of flavor (one of my mates swears it gives a better texture, so maybe try for yourself?).
How do you get them extra soft in the middle?
Big secret: just underbake them a smidge. Really. Also, don’t flatten the dough balls too much before baking—they’ll spread a little on their own.
What if my dough is too crumbly?
Honestly, a splash of milk will rescue it every time. Once I added an egg yolk by mistake—wasn't bad either!
Can I freeze the baked cookies?
Yep, put them in a ziplock; they thaw within a couple hours. Great for sneaky snacks. I got this tip from The Kitchn, which is one of my time-sink food sites.
Help! My cookies spread too much.
Ah, classic. Usually means too-warm butter or the tray was hot. Chill the dough for a bit next time—it fixes pretty much everything.
On a completely unrelated note, isn't it weird how biscuits mean something totally different in the UK and US? I sometimes forget, then show up to a picnic with scones thinking I'm on the right track. Happens more than I'd like to admit.
If you end up with flour all over your jeans and dough on your nose, you’re doing it right. Happy baking—and let me know if you discover any other fun tweaks, because I’m always up for a kitchen experiment (successful or... otherwise).


Ingredients
- 2 ¾ cups all-purpose flour
- 1 cup unsalted butter, softened
- 1 ½ cups granulated sugar
- 1 large egg
- 2 teaspoons vanilla extract
- ½ teaspoon almond extract
- ½ teaspoon baking powder
- ½ teaspoon salt
Instructions
-
1Preheat oven to 350°F (175°C). Line baking sheets with parchment paper.
-
2In a large bowl, cream together butter and granulated sugar until light and fluffy.
-
3Beat in the egg, vanilla extract, and almond extract until well combined.
-
4In a separate bowl, whisk together flour, baking powder, and salt. Gradually add dry ingredients to the wet mixture, mixing just until incorporated.
-
5Scoop tablespoons of dough and roll into balls. Place on prepared baking sheets, spacing about 2 inches apart.
-
6Bake for 9-11 minutes or until edges are set but centers are still soft. Cool on sheets for 5 minutes before transferring to wire racks.
Approximate Information for One Serving
Nutrition Disclaimers
Number of total servings shown is approximate. Actual number of servings will depend on your preferred portion sizes.
Nutritional values shown are general guidelines and reflect information for 1 serving using the ingredients listed, not including any optional ingredients. Actual macros may vary slightly depending on specific brands and types of ingredients used.
To determine the weight of one serving, prepare the recipe as instructed. Weigh the finished recipe, then divide the weight of the finished recipe (not including the weight of the container the food is in) by the desired number of servings. Result will be the weight of one serving.
Did you make this recipe?
Please consider Pinning it!!