
My Kinda Lazy Sunday Brunch: Sweet Pastries!
Okay, so picture this—it's a lazy Sunday, my hair's doing that thing where it sticks up on one side (please tell me that happens to other people), and the only plan I have is to make something sweet and easy for brunch. Whenever I say I'm whipping up brunch pastries, my family appears out of nowhere like I've rung a dinner bell they actually hear. The smell of baking sugar and butter, honestly, is all it takes. Actually, one time my neighbor wandered over, "just to see what was up!" If these easy pastries can summon extra humans to your kitchen, you know they’re the real deal.


Why I Gravitate To These On Mornings When I Can't Think
I make these whenever I’m craving pastry but can’t face making croissant dough (life’s too short, right?). My kids go bonkers for these, especially if I let them sprinkle the sugar toppings (sometimes too much, but what’s brunch without a sugar spill or two?). I tried skipping the chill step once—don’t do it. It was a sticky disaster, but hey, we scraped up the evidence and called it “pastry bark."
The Magic Shopping List (And a Few Sneaky Swaps)
- 1 sheet of puff pastry (thawed; I just grab whatever’s on sale, but my grandma used to swear by Jus-Rol—I honestly think any brand does the job)
- 3 tablespoon granulated sugar (sometimes I use brown sugar if it’s what I’ve got—adds a bit of a caramel flavor)
- 1 teaspoon cinnamon (or pumpkin pie spice, which I did once by accident and pretended was on purpose)
- 1 egg, beaten (for that shiny finish, though I’ve gone without and survived)
- 1 handful chocolate chips (optional, but my son basically declares mutiny if I skip these)
- 2 tablespoon flaked almonds (if you want crunch—I usually forget until halfway through, but add them if you remember!)
- Powdered sugar for dusting (not actually vital, but it looks super posh)
Alright, Here's How I Throw It All Together
- Heat your oven to 400°F (200°C) and line a big baking tray with parchment—unless you like dishes, then knock yourself out with just a greased tray.
- On a lightly floured surface, unroll your puff pastry; don’t worry if it’s a bit cracked, patch it with your fingers (I do it every time).
- Beat your egg in a small bowl, and brush that over the top of your pastry (sometimes I just use my hands if I can’t find a brush, but maybe don’t tell any French chefs).
- Mix your sugar and cinnamon together, then sprinkle it all over the pastry. This is where I usually sneak a taste—no regrets.
- Toss on your chocolate chips and almonds wherever feels right (the more random, the better, honestly).
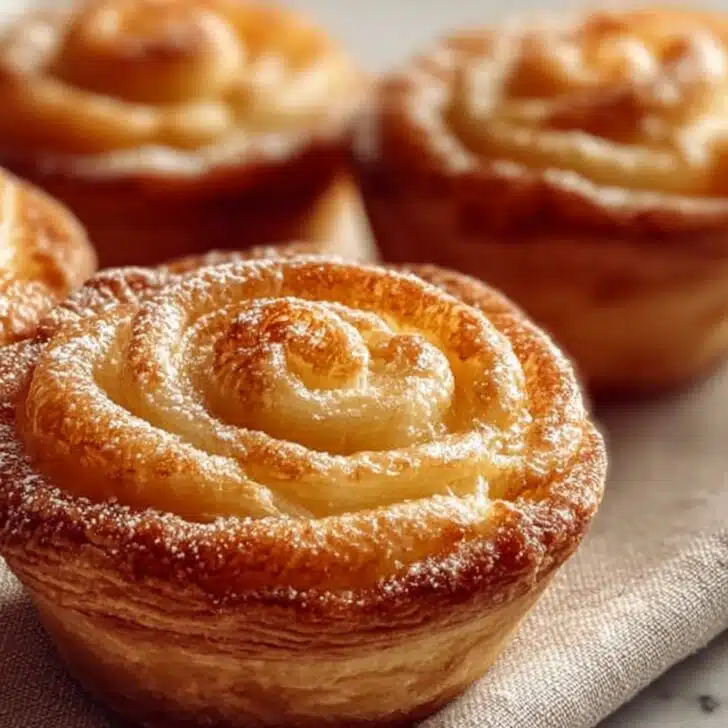
- Slice the pastry into strips, or little twists if you’re feeling fancy. I just use a dull butter knife most of the time. Twist each one a few times and lay them out on your tray. If they look a bit wonky, that's perfect.
- Bake for about 12–15 minutes till golden and audibly crispy. If your oven's temperament is anything like mine, check after 10 minutes anyway.
- Let them cool for a hot second, dust with powdered sugar (if you remember), and try to resist eating them all before calling everyone else in.


Notes: Don't Be Hard On Yourself
I used to panic when a few twisty pastries came out uneven, but seriously, none of my friends have ever complained or even noticed. A couple times the bottoms got too brown—turns out moving the tray up a rack halfway helps loads. Also, the more misshapen they look, the more “homemade” vibes you’ve got going on, or so I tell myself.
Some Silly Variations to Try (Some Better Than Others)
- I’ve swapped in chopped dried apricots and it was surprisingly tasty. Raisins? Not my bag but give it a shot.
- Nutella instead of cinnamon sugar. Try it—very gooey, very delicious, but quite a mess.
- One time I tried blueberry jam, but it leaked everywhere and fused my pastries into one super pastry. Weird but edible.
- Sprinkles for birthdays, because why not?


No Pastry Brush? No Sweat
If you don’t have a pastry brush, just pat the egg wash gently with your (clean!) fingers or even use the back of a spoon. One day, I might invest in a fancy brush, but till then, I like my mishmash system.
How To (Try To) Store These
Put any leftovers (ha!) in an airtight container—they’ll stay crisp-ish for a day or so. I think they kinda taste even better the next morning with strong coffee, but honestly, in my house these things don’t last. Once I hid a few in the microwave to “save” them for myself, but my youngest found them anyway!
If You’re Sharing: My Favorite Ways To Serve
Dust with extra powdered sugar right before serving and stack them up on a big plate—looks rustic, which I pretend is intentional. Sometimes we do a little dish of berry jam and clotted cream on the side, especially when company’s around. On Christmas, I once made them with extra spices and tied a ribbon around the stack for the table. Festive, right?
Lessons Learned (The Hard Way)
Don’t try to rush the thawing of puff pastry—it somehow always ends up uneven, and you don’t want frozen spots, trust me. Also, wait five minutes before eating, or you’ll burn your tongue and be unable to taste anything else at brunch. Not that I’ve done that. (Okay, maybe twice.)
Questions I've Actually Been Asked (or Just Imagined)
- Can I use filo pastry instead? Technically, yes, but it’s really not as forgiving; you’ll need more layers and more melted butter. The result is crunchier, though, if crunchy’s your thing!
- What if I don’t have almonds? Skip ‘em or use chopped pecans or just extra chocolate chips. No one will know you went off-script.
- Oven temp's too high for me? Drop it to 375°F; they’ll need a couple extra minutes but should come out just fine.
- Can I make it a day ahead? Sure, reheat them for a few minutes at a lower temp and they crisp right up. Actually, I like them cold too—in fact, grab one for a midnight snack. Go wild!
Alright, enough of my rambling—go wrangle some puff pastry and see if you end up with more pastries... or just more admirers in the kitchen. Either way, job done.
Ingredients
- 1 sheet of puff pastry (thawed; I just grab whatever’s on sale, but my grandma used to swear by Jus-Rol—I honestly think any brand does the job)
- 3 tablespoon granulated sugar (sometimes I use brown sugar if it’s what I’ve got—adds a bit of a caramel flavor)
- 1 teaspoon cinnamon (or pumpkin pie spice, which I did once by accident and pretended was on purpose)
- 1 egg, beaten (for that shiny finish, though I’ve gone without and survived)
- 1 handful chocolate chips (optional, but my son basically declares mutiny if I skip these)
- 2 tablespoon flaked almonds (if you want crunch—I usually forget until halfway through, but add them if you remember!)
- Powdered sugar for dusting (not actually vital, but it looks super posh)
Instructions
-
1Heat your oven to 400°F (200°C) and line a big baking tray with parchment—unless you like dishes, then knock yourself out with just a greased tray.
-
2On a lightly floured surface, unroll your puff pastry; don’t worry if it’s a bit cracked, patch it with your fingers (I do it every time).
-
3Beat your egg in a small bowl, and brush that over the top of your pastry (sometimes I just use my hands if I can’t find a brush, but maybe don’t tell any French chefs).
-
4Mix your sugar and cinnamon together, then sprinkle it all over the pastry. This is where I usually sneak a taste—no regrets.
-
5Toss on your chocolate chips and almonds wherever feels right (the more random, the better, honestly).
-
6Slice the pastry into strips, or little twists if you’re feeling fancy. I just use a dull butter knife most of the time. Twist each one a few times and lay them out on your tray. If they look a bit wonky, that's perfect.
-
7Bake for about 12–15 minutes till golden and audibly crispy. If your oven's temperament is anything like mine, check after 10 minutes anyway.
-
8Let them cool for a hot second, dust with powdered sugar (if you remember), and try to resist eating them all before calling everyone else in.
Approximate Information for One Serving
Nutrition Disclaimers
Number of total servings shown is approximate. Actual number of servings will depend on your preferred portion sizes.
Nutritional values shown are general guidelines and reflect information for 1 serving using the ingredients listed, not including any optional ingredients. Actual macros may vary slightly depending on specific brands and types of ingredients used.
To determine the weight of one serving, prepare the recipe as instructed. Weigh the finished recipe, then divide the weight of the finished recipe (not including the weight of the container the food is in) by the desired number of servings. Result will be the weight of one serving.
Did you make this recipe?
Please consider Pinning it!