
Let Me Tell You Why I Love Making These Balls
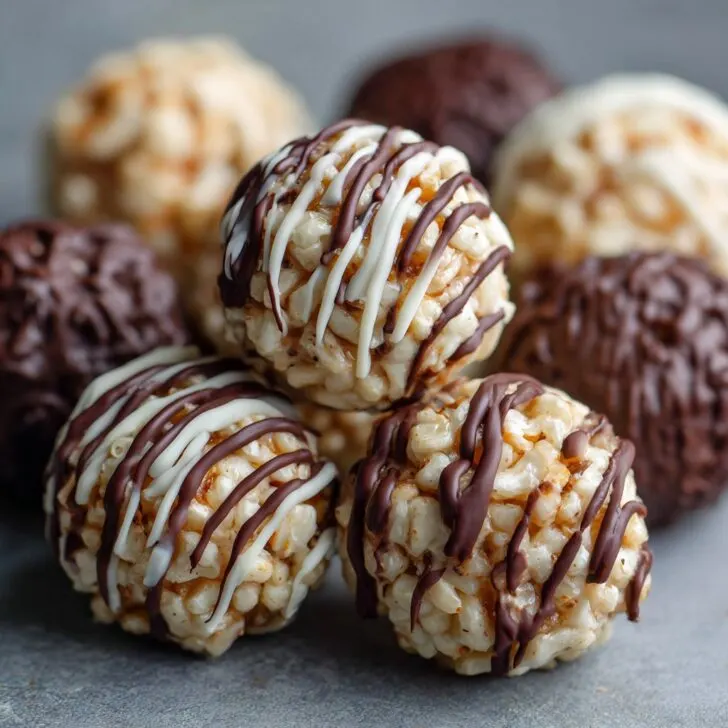
Okay, so I have to start by saying: Chocolate Rice Krispie Balls are my go-to when I need a sweet fix but can’t be bothered to fuss about. Do you know that feeling when you just want to make something fun, and edible, and you don't have to turn the oven on? That’s these. My kids used to call them "choco bombs"—which, honestly, makes them sound way more intimidating than they are. I have this memory of my little one (now he's taller than me, go figure) sneaking one straight from the tray, chocolate smeared right across his nose. Basically, they’re a mess—but a good one.
Why You'll Get a Kick Out of These
I make these when I’m in a rush before a bake sale, or when I just can't face another batch of cookies (not that I don’t love cookies, but you know what I mean). My family goes absolutely bananas for these because they’re crunchy, chocolatey, and bite-sized (which means you can pretend you're not eating that many—ha). I used to get so frustrated when the chocolate coating wouldn’t set properly, but now I just pop the tray in the fridge and call it a day. Also, they're a hit at parties. Even the adults end up hovering around the dessert table trying to act casual, but we all know what's going on.
Here’s What You’ll Need (Plus My Oddball Substitutions)
- 3 cups Rice Krispies cereal (or any crispy rice cereal, honestly; my grandma swore by the brand name but I’ve used the store stuff and no one’s noticed)
- 1 cup semi-sweet chocolate chips (milk chocolate works too, or that fancy dark stuff if you’re in the mood)
- ½ cup peanut butter (sometimes I use almond butter if my mate with the peanut allergy comes round)
- ¼ cup honey (or maple syrup—tried agave once, but it was a bit too runny for me)
- 1 tablespoon butter (salted or unsalted, I use whatever’s in the fridge)
- Pinch of salt (skip this if your butter’s already salted, or don’t—taste is king)
- Optional: Sprinkles, shredded coconut, or crushed nuts for rolling
How I Actually Throw These Together
- First, grab a biggish mixing bowl and dump in your Rice Krispies. (I like to do this bit first so I’m not stuck wrestling sticky chocolate while trying to measure cereal.)
- In a saucepan, melt the chocolate chips, peanut butter, honey, and butter over low heat. Keep stirring; don’t wander off to check your phone because it can burn pretty quick. (Trust me, I’ve scorched it, and it’s not the vibe.)
- Once it’s smooth and glossy, pour it all over the cereal. Stir quickly with a big spoon—at this point, it’ll look a bit like you’ve made a mistake, but it sorts itself out.
- Scoop the mixture out by the tablespoonful and roll into little balls with your hands. Sometimes I use a cookie scoop if I can find it, but usually, I just get messy. (This is where I usually sneak a taste—just to check for quality, obviously.)
- If you’re feeling fancy, roll the balls in sprinkles, shredded coconut, or nuts. Or skip it—it’s your kitchen.
- Pop them on a baking tray lined with parchment, then into the fridge for at least 30 mins. Or as long as you can stand to wait. (I once tried the freezer, but they got a bit rock solid. Not my best idea.)
Notes, or: What I’ve Learned by Messing Up
- If the mixture seems too loose to roll, stick it in the fridge for 10 minutes and try again. Actually, sometimes I just accept lopsided balls. They're still tasty.
- I used to make these with plain cornflakes when I was out of Rice Krispies. It works in a pinch, but they’re crunchier (sometimes too much). Live and learn.
- Don’t stress if the chocolate doesn’t coat everything perfectly. It’s rustic, like you meant to do it that way.
Variations I’ve Tried (And One I Gave Up On)
- Try swapping peanut butter for sunflower seed butter if allergies are a thing at your house. It’s actually pretty good.
- Little bit of orange zest in the chocolate? Sounds weird, but very festive. My family was suspicious, but then they asked for it next time.
- I once tried adding mini marshmallows to the mix. They melted into goo and made shaping almost impossible. So, maybe don’t do that, unless you like a challenge.
Equipment—And What to Do If You Don’t Have It
You’ll want a saucepan and a big bowl. A baking tray is handy for chilling, but honestly, I’ve just used a big plate covered in foil before. If you haven’t got a cookie scoop, use your hands (just wash ’em first, obviously). That’s the beauty of recipes like this—no fancy kit required.


How I Store ‘Em (But They Rarely Last Long Enough)
In a lidded container in the fridge, these keep for up to 5 days. Though honestly, in my house, they never survive more than a day… maybe two if I hide them behind the broccoli. You can freeze them for a couple weeks, but they’re best fresh. And if you notice they’re a bit sticky after sitting out, just pop them back in the fridge for a few.
How We Serve Them (Your Mileage May Vary)
I like piling them up in a big bowl in the middle of the table, then watch everyone pick at them during movie night. For birthday parties, I’ve stuck candles in a few and called them a "cake tower". My sister likes hers dunked in coffee (don’t knock it till you’ve tried it!)
Lessons Learned (Or: My "Oops" Moments)
- I once tried to rush the chilling step, thinking the freezer would be faster. Ended up with chocolate bricks. Don’t do that.
- If you don’t stir the chocolate mixture enough, it can get weirdly grainy. Take a couple minutes and just stir.
- And don’t make them too big—if you do, the middles stay kind of soggy. Aim for walnut-sized.
Questions I Actually Get Asked
- Can I use cocoa powder instead of chocolate chips?
Well, you can—but you’ll need extra sweetening and it’s a bit more fiddly. I’ve done it in a pinch, but it’s not as smooth. - Are they gluten-free?
As long as your cereal is gluten-free, you’re golden. Always double-check; sometimes brands sneak wheat in (I learned the hard way). Here’s a handy gluten-free cereal list if you want to be sure. - Can I double the recipe?
Absolutely, and honestly, you probably should. But, use a bigger bowl than you think—ask me how I know. And if you want more snack ideas, Gemma's no-bake recipes are fun too. - Do I have to refrigerate them?
Technically no, but they’ll get a bit squishy at room temp. On second thought, I’d stick with the fridge if you can spare the space. - What cereal brands work best?
I’ve honestly tried a few—store brands, the classic, even some organic one once when I was feeling fancy. They all get the job done. Though the original Rice Krispies do stay crunchier, I think. - Can I make these nut-free?
Yep! Try sunflower butter or cookie butter (Biscoff is wild in these, but in a good way). If you want more ideas, this nut-free dessert collection is full of good swaps.
Oh, and one last thing—if you end up with chocolate under your nails, you’re in good company. It’s the price of admission, I reckon. Happy snack-making!


Ingredients
- 2 cups Rice Krispies cereal
- 1 cup semi-sweet chocolate chips
- ½ cup creamy peanut butter
- ¼ cup unsalted butter
- 1 cup powdered sugar
- ½ teaspoon vanilla extract
- ¼ teaspoon salt
- 1 tablespoon coconut oil (optional, for smoother chocolate coating)
Instructions
-
1In a large mixing bowl, combine the Rice Krispies cereal and powdered sugar. Set aside.
-
2In a small saucepan over low heat, melt the unsalted butter and peanut butter together, stirring until smooth. Remove from heat and stir in vanilla extract and salt.
-
3Pour the peanut butter mixture over the cereal mixture. Mix well until all ingredients are evenly combined.
-
4Shape the mixture into 1-inch balls and place them on a parchment-lined baking sheet. Chill in the refrigerator for 15 minutes.
-
5Melt the chocolate chips with coconut oil (if using) in a microwave-safe bowl in 30-second intervals, stirring until smooth.
-
6Dip each chilled ball into the melted chocolate, coating completely. Return to the baking sheet and refrigerate until the chocolate is set.
Approximate Information for One Serving
Nutrition Disclaimers
Number of total servings shown is approximate. Actual number of servings will depend on your preferred portion sizes.
Nutritional values shown are general guidelines and reflect information for 1 serving using the ingredients listed, not including any optional ingredients. Actual macros may vary slightly depending on specific brands and types of ingredients used.
To determine the weight of one serving, prepare the recipe as instructed. Weigh the finished recipe, then divide the weight of the finished recipe (not including the weight of the container the food is in) by the desired number of servings. Result will be the weight of one serving.
Did you make this recipe?
Please consider Pinning it!!