
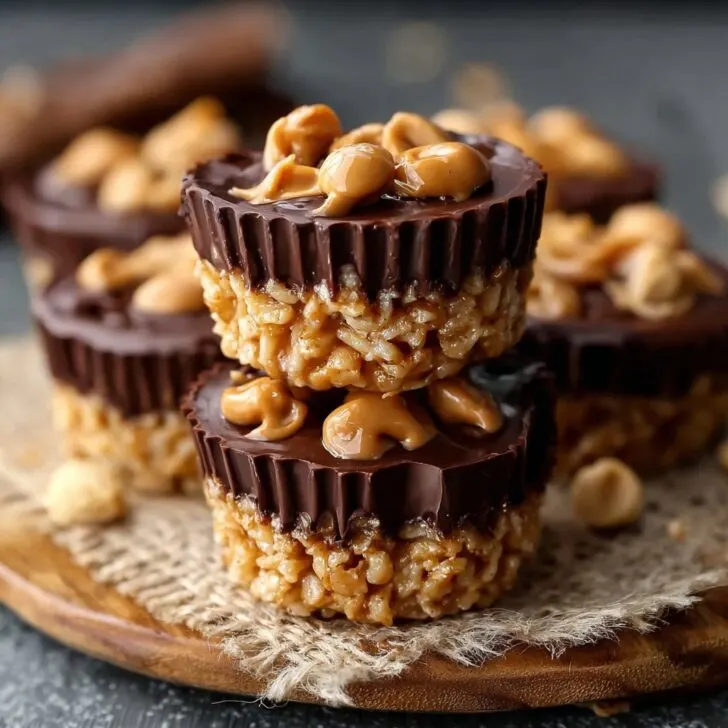
Let Me Tell You About These Little Cups of Joy
Alright, so picture this: it's a rainy afternoon and I'm craving something sweet—but the kind that's absurdly easy and doesn't require me to crank up the oven. That's when I remember my go-to, Chocolate Peanut Butter Rice Krispie Cups. I first made these after a friend brought them to book club, and honestly, I spent the whole evening sneaking bites when I thought nobody was looking (spoiler: people notice when you eat seven). These cups have since become my Netflix snack, my road trip treat, my just-one-before-dinner mischief. And the best part? You don’t need to be a pastry chef... or even a patient person. Oh, and there's no actual rice involved, but more on that later!
Why You'll Love Making (and Eating) These
I make this recipe whenever my sweet tooth and laziness team up, which is, uh, often. My family goes crazy for these, especially if I hide a couple in the fridge and pretend we’ve run out - keeps things interesting. Also, these are a minor miracle for anyone who hates laundry because you only dirty, like, one pot and muffin tin. Sometimes the chocolate gets a bit messy, and once I dropped a finished cup on the floor—chocolate side down, obviously. That was a sad day, but also one for the five-second rule. Plus, if you’re after something to bring to a potluck or school bake sale (remember those?) nobody ever complains about chocolate and peanut butter together. Well, unless they’re allergic. Then maybe pick another recipe.
Ingredients: What I Use (But Feel Free to Wing It)
- 2 cups Rice Krispies cereal (or whatever crispy rice cereal you can get—my grandma always said Kellogg's, but honestly, Aldi's works fine)
- 1 cup creamy peanut butter (I've been known to use crunchy in a pinch, gives it a lovely texture)
- ½ cup honey or light corn syrup (maple syrup works if you're feeling fancy, although it's a bit runnier)
- ¼ cup unsalted butter (salted is also fine; just watch the final taste—it'll be a bit bolder)
- ½ teaspoon vanilla extract (or skip it—half the time I forget and nobody notices)
- 1 and ⅓ cups semi-sweet chocolate chips (milk chocolate is okay if you’re that way inclined; I once used dark chocolate and, honestly, preferred it)
- Pinch of flaky salt (totally optional but I love a salty tingle against the sweet)
If you want to see a similar recipe—Sally is much more exacting than I am!
Alright, Here’s How You Throw These Together
- Line a 12-cup muffin tin with paper liners. Or, you know, just spray like mad with nonstick spray if you ran out. (Been there... it’s a little sticky but works.)
- In a medium saucepan—nothing fancy, just not your smallest saucepot—combine the peanut butter, honey/corn syrup, and butter over medium heat. Stir until it’s all smooth and blended. (This is where I usually sneak a spoonful. Quality control.)
- Off the heat, add the vanilla. It might bubble a bit—no stress. Then dump in the Rice Krispies and quickly stir to coat. It'll look gloopy and wrong, but I promise it sorts itself out.
- Spoon the mixture into the muffin cups, pressing down gently. You want a flat-ish base. Sometimes I press with a second sheet of parchment—it’s tidy, but your hands work just fine.
- In a microwave-safe bowl (or over a pot of simmering water—double boiler if you’re feeling ambitious), melt the chocolate chips. I do thirty seconds at a time, stirring between, because once I tried a full minute and scorched the lot. Oops. Pour or spoon chocolate over each cup, swirling to coat evenly.
- If you want, sprinkle a little salt on top. Don't go overboard unless you’re a big salt fiend.
- Pop the tin in the fridge and let set for at least 2 hours. Or, if you’re like me and can’t wait, eat one gooey and melt-y because life’s short.
Notes From Many (Many) Batches
- If you use natural peanut butter it can get a bit oily. Actually, I find it works better if you give it a good stir first, or add a smidge more cereal.
- Make sure you melt chocolate gently! Mine seized up once because I got cocky and zapped it too long.
- Don’t leave them somewhere warm; the chocolate will weep and turn sad—it’s still edible, but not as pretty.
- I think these taste better the next day, if they even last that long.
If You Want to Mix It Up (Or, The Time I Got Fancy)
- I’ve swapped peanut butter for almond butter; works fine! Sunflower butter for nut allergies, too.
- Once I mixed in mini marshmallows. It was... an adventure. Messy. Not for me, but you might be braver.
- I tried swirling white chocolate on top. Looked cool, tasted a bit sweet for my liking, but, your call!
Equipment: Use What You've Got
So, you’ll want a muffin tin, sure. But I’ve definitely made these in a square baking dish and just chopped them into squares after. If you’re short a saucepan, I once melted everything in the microwave in short bursts—took longer but didn’t burn. Silicon muffin liners? Top marks, but plain paper ones work. Or honestly, you can just go wild and make it a slab. Less dainty, more fun.


How to Store (Or Try To...)
Keep these in the fridge in an airtight container. They taste best cold, to me. They’ll last up to five days, but honestly, in my house it never makes it to day two. Once I left the box out on the counter overnight (whoops), and they got a little soft but were still wolfed down at breakfast. Breakfast of champions.
How I Like to Serve This (Not That Anyone Waits)
Okay, most days we just eat them fridge-cold and straight from the tin (sometimes with coffee, sometimes hovering in the kitchen). But for birthdays, I stick a candle in one and call it dessert. My cousin crumbles hers on top of ice cream, which—genius, honestly.
Pro Tips—Learned the Hard Way
- Don’t rush the setting step. I once tried popping them in the freezer for 10 minutes instead of the fridge for two hours—ended up with weird, chalky chocolate and sticky cups. Not worth it.
- Get everything ready before you start. The cereal mix goes sticky fast, so if you’re still fumbling with liners, it’s a sticky situation (pun intended).
Some Questions I’ve Actually Gotten
- Can you make these dairy-free?
- Yep! Use vegan butter and dairy-free chocolate chips—Earth Balance and Enjoy Life are my usual swaps. Texture’s a smidge different but nobody notices.
- Could I use puffed quinoa or something else instead?
- Sure, mate! Go ahead. I did it once—more wholesome, slightly chewier. Not bad!
- Do I have to use liners?
- I say yes, for sanity’s sake. But if you’re out, just grease the tin very thoroughly, or you might have to chisel them out. Happened to me, but hey—I ate the evidence.
- How do I make these with kids?
- Kids love getting involved. Let them stir in the cereal (probably outdoors unless you fancy a sweep), and let them spoon chocolate. It gets messy, but so what.
So, there you go! If you give these a go, let me know how you get on—or, erm, what you snack on while you wait for them to set. And if you need ideas for more treat recipes, I’m always browsing King Arthur’s baking site for inspiration (their flour never fails me, touch wood).


Ingredients
- 1 ½ cups Rice Krispies cereal
- ½ cup creamy peanut butter
- ¼ cup unsalted butter
- ⅓ cup honey or light corn syrup
- 1 cup semi-sweet chocolate chips
- ½ teaspoon vanilla extract
- Pinch of salt
- ¼ cup mini chocolate chips (optional, for topping)
Instructions
-
1Line a 12-cup muffin tin with paper liners.
-
2In a medium saucepan over low heat, melt the peanut butter, unsalted butter, honey, and salt, stirring until smooth and combined.
-
3Remove the saucepan from the heat and stir in the vanilla extract.
-
4Fold in the Rice Krispies cereal until evenly coated with the peanut butter mixture.
-
5Spoon the mixture evenly into the prepared muffin cups and press down gently to pack.
-
6Melt the chocolate chips in a microwave-safe bowl in 30-second intervals, stirring until smooth. Spoon melted chocolate over each cup and spread evenly. Sprinkle with mini chocolate chips, if desired. Chill in the refrigerator for at least 30 minutes or until set.
Approximate Information for One Serving
Nutrition Disclaimers
Number of total servings shown is approximate. Actual number of servings will depend on your preferred portion sizes.
Nutritional values shown are general guidelines and reflect information for 1 serving using the ingredients listed, not including any optional ingredients. Actual macros may vary slightly depending on specific brands and types of ingredients used.
To determine the weight of one serving, prepare the recipe as instructed. Weigh the finished recipe, then divide the weight of the finished recipe (not including the weight of the container the food is in) by the desired number of servings. Result will be the weight of one serving.
Did you make this recipe?
Please consider Pinning it!!