
Let’s Get Gooey: Why I Keep Making This Chocolate Dump Cake
Okay, so picture this: it’s a rainy Saturday, my hair’s a mess, wearing socks that don’t match. The oven’s on and I’m rummaging for something chocolatey, and boom—here comes my trusty Chocolate Dump Cake with Gooey Center. It’s not fancy, but it’s like a hug you can eat. The first time I made this was at my cousin’s birthday, and honestly, I was just hoping not to set the kitchen on fire. (Spoiler: I didn’t, but there was a close call with a potholder, ha!) Now it’s my secret weapon when I want something indulgent without dirtying half the kitchen. Or honestly, when I just want chocolate without thinking too hard about it.
Why You’ll Love This (Or At Least I Do)
I make this when I’m running late, or when my kids give me that look (you know the one—puppy dog eyes, heads tilted). My family goes absolutely bonkers for it because it’s both cake and pudding, and the gooey chocolate in the center is like some kind of edible magic trick. It’s also pretty forgiving; even if you mess up a step, it usually turns out edible. If you’ve ever tried to impress guests with a perfectly iced cake and ended up with a lopsided tower of doom, this one’s for you. Plus, if you’re feeling a bit lazy (no judgment!), you basically just dump everything together—hence the name.
What You’ll Need (Plus Some Swaps That Actually Work)
- 1 box chocolate cake mix (I use Devil’s Food when I’m feeling extra, but regular chocolate works. Grandmother swore by Duncan Hines, but really? Whatever’s on sale is fine.)
- 1 box (about 100g) instant chocolate pudding (sometimes I grab vanilla in a pinch; it’s still good, just not as chocolatey)
- 2 cups milk (I’ve swapped in oat milk and it didn’t ruin the day)
- ½ cup melted butter (or margarine… I won’t tell if you won’t)
- 1 cup chocolate chips (I go for semi-sweet usually, but if all I have is a handful of leftover Halloween candy bars, they get chopped up and tossed in)
- Optional: a handful of chopped nuts, or marshmallows if you’re feeling wild
How to Make It (With a Few Bumps Along the Way)
- First, preheat your oven to 180°C (350°F). Don’t forget to do this; I always do, and then end up waiting around twiddling my thumbs.
- Grab a 9x13 inch baking dish. No need to butter it up unless you’re worried about sticking—sometimes I do, sometimes I don’t, and it’s usually fine.
- Pour the dry cake mix right into the dish. Yup, straight from the box. Smooth it out a bit if you’re feeling fancy.
- Sprinkle the dry pudding mix evenly over the cake mix. If it clumps, just mash it with your (clean!) fingers.
- Slowly pour the milk all over. Try to cover the dry bits—but it’s okay if it looks patchy. This is the part that always looks a bit wrong, but trust me, it works out.
- Drizzle the melted butter as evenly as you can. I’m not a perfectionist here, so some corners get more butter, some less; it all sorts itself out in the oven.
- Scatter chocolate chips (and nuts/marshmallows if using) all over the top. This is where I maybe snack on a few. Quality control, right?
- Bake for 35-40 minutes, or until the top looks set but a bit wobbly underneath. Don’t overbake—gooey is the goal! (One time I left it in too long and it turned into a sad, dry brownie.)
Notes from My Kitchen (Trials and Triumphs)
- If your cake looks like a chocolate swamp when it comes out, that’s normal. It’ll set up a bit as it cools.
- I once tried it with cold butter cubes instead of melted—didn’t melt evenly, so I stick with melted now.
- Sometimes the edges get crisp while the middle stays gooey. Actually, that’s my favorite part.
The “I Wonder If…” Section: Variations I’ve Attempted
- Peanut butter chips instead of chocolate? Loved it, but maybe not for everyone. (My daughter said it tasted like a giant Reese’s cup.)
- Cherry pie filling randomly spooned in before baking—okay, but a bit too messy for me.
- Once tried adding instant coffee granules. Regretted it. Too strong. Maybe half a teaspoon next time?
What If I Don’t Have…? (Tools and MacGyver Moments)
You’re supposed to have a 9x13” baking dish, but I’ve used a big casserole pan or even a couple loaf pans in a pinch. The baking time changes a bit, so just keep an eye on it. No electric mixer needed—honestly, you can do the whole thing with a fork and a prayer.


Storing It (If You Actually Have Leftovers)
Just pop it in the fridge, covered, and it should keep for 3-4 days—though honestly, in my house it never makes it past breakfast the next morning. I actually think it tastes better the next day, but that might just be me.
How to Serve It (And What We Do Here)
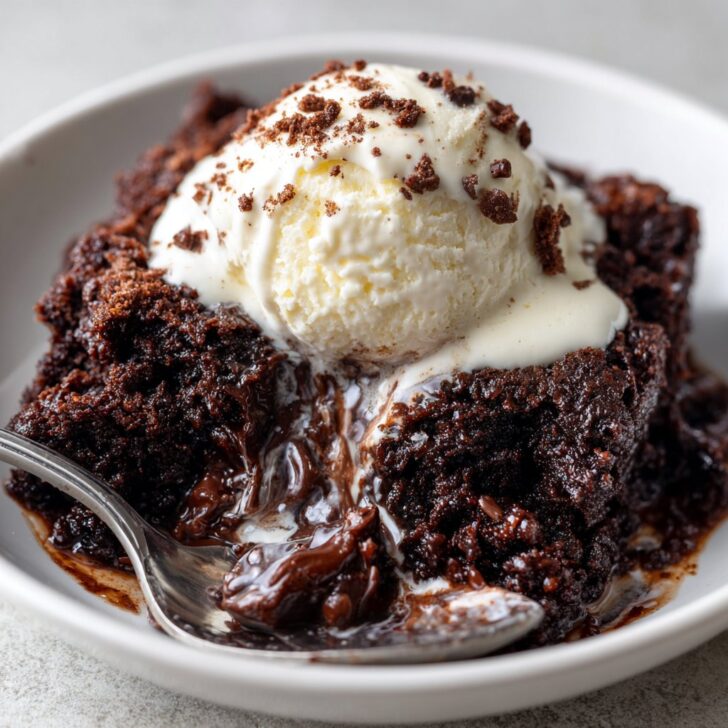
We usually eat it warm, scooped into bowls with a dollop of vanilla ice cream or a splash of cold milk (my gran used to insist on pouring cream, but that’s a bit posh for weeknights). Sometimes we add a drizzle of caramel if we’re feeling extra.
Lessons Learned (AKA Don’t Do What I Did)
- I once tried to skip the pudding and just use more milk—nope, not the same. Don’t do it.
- Let it cool for at least 15 minutes or you’ll burn your tongue and regret it for the rest of the night (been there, done that).
- Don’t try to cut perfect slices. Just scoop; it’s meant to be messy.
Some Real Questions I’ve Gotten (And My Honest Answers)
- Can I use low-sugar cake mix? Totally! It’s a bit less sweet, but still gooey. I’ve even used gluten-free mix once and it worked (here’s a gluten-free cake recipe I like for when I’m feeling fancy).
- Does it freeze well? Eh, not really. The gooey bit gets weird. I’d say just eat it fresh. Or invite friends; they’ll help.
- What if I don’t have instant pudding? Hmm, I’ve tried skipping it but the cake isn’t as gooey. You could try adding a splash more milk, or look for a homemade pudding mix—Sally’s Baking Addiction has a good one, though honestly it’s easier with the box.
- Is this like lava cake? Sort of, but lazier. It’s family-sized.
- Can I double the recipe? You could, but you’d need a really big pan (or two pans—and more hungry people).
Oh—and before I forget, if you’re in the mood for a proper baking deep dive, I sometimes lose hours browsing Serious Eats’ cake guides. But honestly? This dump cake is the one I whip up most, because it’s impossible to mess up and everyone loves it. If you try it, let me know—unless you hate it, in which case, maybe don’t tell me; my feelings are fragile.


Ingredients
- 1 box (15.25 oz) chocolate cake mix
- 1 can (21 oz) chocolate pudding or chocolate pie filling
- 1 cup semi-sweet chocolate chips
- ½ cup unsalted butter, melted
- 1 cup whole milk
- 2 large eggs
- 1 teaspoon vanilla extract
- Pinch of salt
Instructions
-
1Preheat your oven to 350°F (175°C). Grease a 9x13-inch baking dish with butter or nonstick spray.
-
2Pour the chocolate pudding or pie filling evenly into the bottom of the prepared baking dish.
-
3In a large bowl, combine the chocolate cake mix, milk, eggs, melted butter, vanilla extract, and salt. Mix until just combined.
-
4Pour the cake batter over the pudding layer in the baking dish. Sprinkle the chocolate chips evenly on top.
-
5Bake for 35 minutes, or until the edges are set but the center remains gooey. Let cool for 10 minutes before serving.
Approximate Information for One Serving
Nutrition Disclaimers
Number of total servings shown is approximate. Actual number of servings will depend on your preferred portion sizes.
Nutritional values shown are general guidelines and reflect information for 1 serving using the ingredients listed, not including any optional ingredients. Actual macros may vary slightly depending on specific brands and types of ingredients used.
To determine the weight of one serving, prepare the recipe as instructed. Weigh the finished recipe, then divide the weight of the finished recipe (not including the weight of the container the food is in) by the desired number of servings. Result will be the weight of one serving.
Did you make this recipe?
Please consider Pinning it!!