
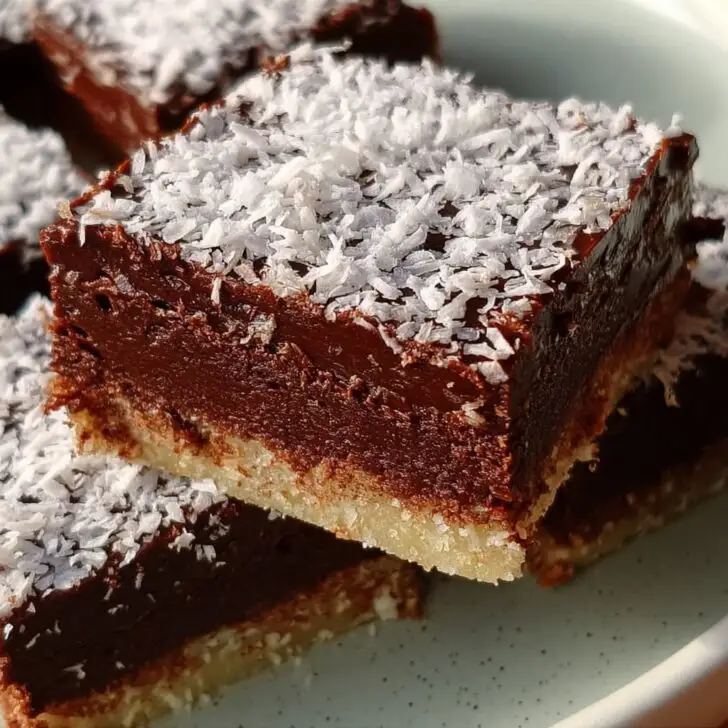
Let Me Tell You About My Choc Coconut Slice Obsession
Okay, imagine this: It’s 3pm, the school bell’s just rung, my hands are covered in dirt (from the garden, not detention — this time!), and I burst through the kitchen door to the smell of melted chocolate and toasted coconut. Mum’s already got the kettle on. Choc coconut slice cooling on a rack. If you’ve never had it, it’s basically the food equivalent of a warm hug from a friend you haven’t seen in ages.
I still make this choc coconut slice now — sometimes just for the smell. Oh, and because it’s dead easy. I’ll admit, once I tried to impress a date by calling it a ‘layered tropical cocoa bar’, but honestly, it’s just good, simple, classic stuff. If you want a recipe that feels like nostalgia, but won’t have you faffing with six different bowls, you’re in the right spot.
Why I Keep Making This Choc Coconut Slice
I make this whenever someone in the family is (not so) subtly hinting for "something sweet, but not too fancy" — you know the type. My sister claims she could eat half a tray if she didn’t have to share (yep, she’s probably right). And when I’m in a rush, I love that you don’t even have to drag out the mixer — just a bowl, a spoon, and a sense of mischief.
Plus, there’s no waiting for butter to come to room temperature. I once tried making it with cold butter straight from the fridge, and it basically laughed at me — now I just zap it in the microwave and call it good.
What You’ll Need (Plus Some Swaps I’ve Tried)
- 1 cup (150g) plain flour — I’ve used wholemeal when I’m feeling virtuous; honestly, not much difference.
- ½ cup (45g) cocoa powder — Dutch process is nice, but store-brand works fine (grandma insisted on Cadbury, but I reckon she just liked the tin).
- 1 cup (90g) desiccated coconut — shredded works if that’s all you’ve got, but slice will be a bit chewier.
- 1 cup (220g) brown sugar — white sugar in a pinch, though the slice ends up a touch less fudgy.
- 125g (about ½ cup + 1 tbsp) butter, melted — margarine works, though I think it’s not quite as rich.
- 2 eggs — I’ve forgotten these before; slice still holds together, but it’s a bit crumbly.
- Pinch salt
- For the top: 150g dark chocolate, melted (milk choc totally fine), plus a handful of extra coconut for sprinkling. I once used white chocolate and it looked a bit wild!
How I Actually Make My Choc Coconut Slice
- Preheat your oven to 180°C (about 350°F). Or 175°C if your oven runs hot like mine. Grease and line a slice tin (roughly 18x28cm) — but honestly, I’ve just used a brownie pan and it’s all good.
- Grab a big mixing bowl. Chuck in the flour, cocoa, coconut, sugar, and salt. Give it a quick whisk (or just use your hands if you’re feeling rustic — I do sometimes, saves washing up).
- Pour in the melted butter, then crack in the eggs. Mix until just combined. It’ll look a bit thick and clumpy. Don’t panic! This is where I usually sneak a little taste — not that I’m recommending it, but you do you.
- Scoop the mixture into your prepared tin. Press it down with the back of a spoon or your (clean-ish) hands. It won’t spread much, so don’t worry if it looks a little rough around the edges.
- Bake for 20-25 minutes. You’re looking for set edges and a slightly soft middle — it’ll firm up as it cools. Don’t overbake or it gets dry, trust me.
- Let it cool in the tin. I know, waiting is hard. But if you try to tip it out too soon, it’ll fall apart and you’ll end up eating it with a spoon (been there, not sorry).
- Once cool, melt your chocolate — I just use the microwave in 30 second bursts, stirring in between. Pour it over the slice, smooth it out, and sprinkle on the extra coconut. Give it 20 minutes to set (fridge speeds this up if you’re impatient, like me most days).
- Cut into squares. Eat at least one while still a tiny bit warm. It’s the law (or maybe just my law...)
Stuff I’ve Figured Out the Hard Way
- If you use baking paper to line your tin, leave a bit hanging over the sides — makes lifting the slice out a total breeze. Unless you forget, then it’s a spatula job.
- Mixing the wet and dry separately is what recipes always say, but honestly, I just throw everything in one bowl and it’s fine.
- The slice will seem underdone when you take it out. It’s not. It’ll firm up, promise. Maybe just don’t try eating it straight away or you’ll burn your tongue (yep, I’ve done it).
Things I’ve Tried (Not All Were Winners)
- Chucking in a handful of chopped nuts (walnuts are tasty, pecans a bit posh). My nephew hated it, but more for me, right?
- Adding dried cherries or cranberries for a Christmassy twist. Actually, it was pretty good — but I think I overdid it on the fruit once and it got a bit sticky.
- One time, I tried making it with coconut oil instead of butter. Don’t bother. Came out greasy as a chip shop counter.
Do You Really Need Fancy Equipment?
I use a basic slice tin, but a brownie or lamington tin is fine too. Once I even used a lasagne dish (don’t tell Mum). If you don’t have baking paper, just grease the heck out of the tin and hope for the best. Oh, and a microwave makes melting butter and chocolate way easier, but a stovetop does the trick — just keep an eye on it, or you’ll be scraping burnt bits out of the pan like I did last Christmas.


How to Store It (Though Mine Vanishes Fast)
Keep your choc coconut slice in an airtight container at room temp. If it’s really hot out, the chocolate gets a bit melty — fridge works then, but the slice goes firmer. To be honest, it never lasts more than a day here. I think it tastes better the next day, but I hardly ever get the chance to prove it!
Bit of a tangent, but I once tried freezing a batch for a friend who was moving house; it defrosted fine, but the coconut topping went a bit chewy. Just so you know.
How We Eat It (And Weird Family Traditions)
Honestly, I love a square of this with a strong cup of tea — or Milo if it’s winter. My sister swears by microwaving her piece for 12 seconds so the chocolate gets melty again; my uncle puts his in the fridge and eats it cold (can’t please everyone). My mate Dave used to dunk his in coffee until it almost dissolved. To each their own, eh?
Things I Wish I’d Known Earlier
- Chill the slice before cutting if you want neat squares. I once tried rushing this bit and the whole thing crumbled. Frustrating, but still tasty.
- If you line your tin, don’t skimp on the baking paper — the corners will glue themselves down otherwise.
- Don’t skip the salt! I used to think it was optional, but it really makes the chocolate pop. (I suppose you could try sea salt flakes on top, but I always forget.)
Real Questions I’ve Been Asked (And My Honest Answers)
- Can I make it gluten free? Yep, just sub in your favourite gluten-free flour blend. Actually, I find it works better if you add a tiny bit more coconut for extra stickiness.
- Does it freeze? Sure does, but like I said earlier, sometimes the coconut topping gets chewy. Not a deal-breaker, just different.
- Can I use milk chocolate? Absolutely. It’ll be sweeter, though, so maybe cut back on the sugar if you’re not into super-sweet things.
- What about vegan? I haven’t tried, but I’d guess plant-based butter and flax eggs would work — there’s a pretty good write-up here if you want to experiment.
- Where did you learn this recipe? Half from my mum, half from peeking at Taste.com.au, and half just winging it.
- Can I double the recipe? Sure — just use a bigger tin, or two tins. It’ll need a bit longer in the oven. Don’t ask me how much longer, though; I always just check and hope for the best.
One Last Thing (Before I Forget)
If you’re after a proper step-by-step video, there’s a great one on YouTube that’s pretty close to how I do it. Or just dive in and make it your own — that’s half the fun.
Alright, time for a cuppa and a cheeky square before anyone else notices the tray has cooled. Enjoy!


Ingredients
- 1 cup self-raising flour
- ½ cup unsweetened cocoa powder
- 1 cup desiccated coconut
- ¾ cup brown sugar
- 125g unsalted butter, melted
- 2 large eggs
- 1 teaspoon vanilla extract
- 1 cup icing sugar (for topping)
- 2 tablespoon cocoa powder (for topping)
- 2 tablespoon milk (for topping)
Instructions
-
1Preheat the oven to 180°C (350°F). Line a 20cm x 30cm baking pan with baking paper.
-
2In a large bowl, combine self-raising flour, cocoa powder, desiccated coconut, and brown sugar.
-
3Add melted butter, eggs, and vanilla extract to the dry ingredients. Mix until well combined.
-
4Spread the mixture evenly into the prepared pan. Bake for 25 minutes or until firm to the touch. Allow to cool completely in the pan.
-
5For the topping, mix icing sugar, cocoa powder, and milk until smooth. Spread over the cooled slice. Sprinkle with extra coconut if desired. Cut into squares to serve.
Approximate Information for One Serving
Nutrition Disclaimers
Number of total servings shown is approximate. Actual number of servings will depend on your preferred portion sizes.
Nutritional values shown are general guidelines and reflect information for 1 serving using the ingredients listed, not including any optional ingredients. Actual macros may vary slightly depending on specific brands and types of ingredients used.
To determine the weight of one serving, prepare the recipe as instructed. Weigh the finished recipe, then divide the weight of the finished recipe (not including the weight of the container the food is in) by the desired number of servings. Result will be the weight of one serving.
Did you make this recipe?
Please consider Pinning it!!