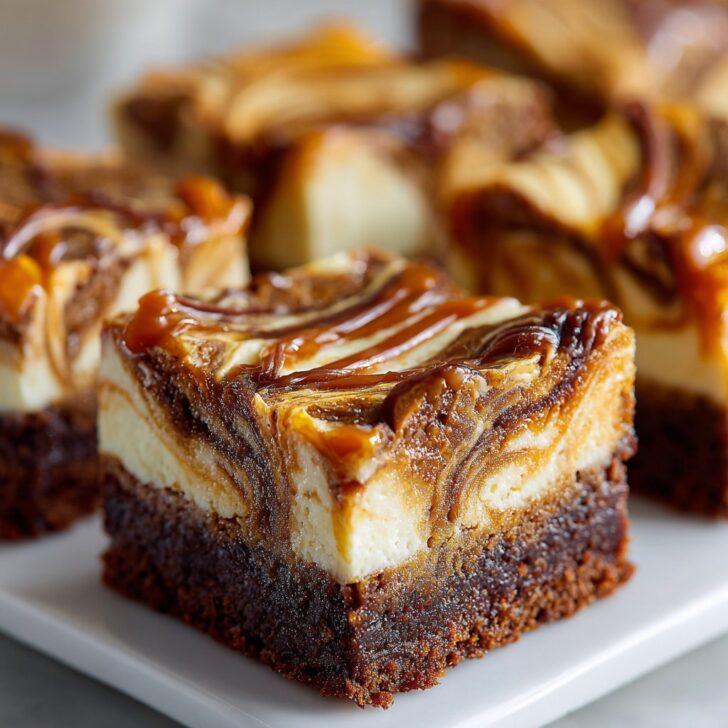

Let Me Tell You About These Brownie Bites (Spoiler: They're Dangerously Good)
So, storytime: The first time I made Caramel Swirl Cheesecake Brownie Bites, I was honestly just trying to avoid making a whole cake for my sister's birthday (she claims she doesn't like cake—lies). What started as a last-minute “what can I do with these random bits of cream cheese and brownie mix?” experiment turned into a family favorite. Now whenever someone mentions “those bites with the caramel,” people appear out of nowhere, like I've rung some kind of dessert dinner bell. I even caught my neighbor Nick (you know, the one who swears off sugar) sneaking three on his way out the door. Anyway, let's get into it.
Why You'll Love These (Or, Why I Make Them Whenever I Can)
I make these Caramel Swirl Cheesecake Brownie Bites when I'm after something that looks fancier than the effort it actually takes—like, they seem impressive but secretly they're super forgiving. My family goes a bit mad for the salty-sweet caramel on top (I've seen actual squabbles over the last one). Oh, and here's a confession: I used to dread swirling two batters, but it turns out it doesn't matter if they're perfect, just smoosh them together and call it “rustic.” And if you've ever tried to marble cheesecake and brownie and ended up with a big ol' mess—welcome, friend, you're not alone, and it still tastes amazing.
What You'll Need (Plus a Few Cheeky Swaps)
- ½ cup (115g) unsalted butter, melted – though sometimes I grab salted if that's all I've got, just skip the extra pinch of salt later
- 1 cup (200g) granulated sugar (my grandmother swears by a mix of white and brown—do what feels right)
- 2 large eggs
- 1 teaspoon vanilla extract (imitation is totally fine—I mean, who's judging?)
- ⅓ cup (40g) unsweetened cocoa powder
- ½ cup (65g) all-purpose flour (I've tried a gluten-free blend, and it's honestly just as good!)
- ¼ teaspoon salt
- 4oz (about 110g) cream cheese, softened – sometimes I use mascarpone if I'm feeling fancy/flush
- 2 tablespoon sugar (for the cheesecake bit)
- 1 egg yolk (I save the white for scrambled eggs—no waste, right?)
- ¼ teaspoon vanilla extract
- About ¼ cup caramel sauce (homemade is great, but honestly, store-bought is fine—I like the Smucker’s caramel sauce when I’m in a pinch)
- Pinch of flaky sea salt (optional, but I've become a little obsessed)
Making 'Em: Step-By-Step (With Some Tangents)
- Preheat your oven to 350F (180C). Line a mini muffin tin with paper liners or just grease it well. I used to skip the liners but prying stuck-on brownies out is... character building.
- In a bowl, whisk together melted butter and sugar until it looks a bit like wet sand. Crack in the eggs and vanilla. Whisk again. (This is usually where I get distracted and forget the cocoa, don't be like me.)
- Stir in the cocoa powder, flour, and salt. Don't overmix—just until it's together. It'll look thick, almost like chocolate frosting.
Sidebar: If you see lumps, that's fine. Perfection is overrated. - In another bowl, beat cream cheese, sugar, egg yolk, and vanilla until smooth. If it's a little lumpy, that's okay. Sometimes I accidentally under-soften my cream cheese and it turns out fine, just looks more "rustic."
- Spoon about a tablespoon of brownie batter into each muffin cup (try to keep it even, but no need to break out a ruler unless you love precise snacks).
- Dollop a little cheesecake mixture on top of each—maybe a teaspoon-ish, but you know, eyeball it.
- Drizzle a bit of caramel sauce over each (be generous—nobody has ever complained about too much caramel).
- Take a toothpick or skewer and swirl it all together. Don't worry if it looks... chaotic. Swirls are like snowflakes, none of mine are ever the same.
- Bake about 12–15 minutes, until the edges are set but the centers are a little wobbly. They'll firm up as they cool. (I once took them out way too early and they were basically goo, but hey, still tasty.)
- Sprinkle with flaky salt while they're warm (optional, but seriously, just try it once).
Some Notes From the Trenches
- If your brownie bites stick a bit (mine do sometimes), run a butter knife around the edge and gently pry them out—don't panic.
- These taste great warm but I think they taste even better after a night in the fridge. I know, patience, right?
- Don't skimp on the caramel—I've done it and regretted my life choices.
Variations (aka Experiments and Oopsies)
- Peanut butter swirl instead of caramel: delicious, though a bit messier to swirl (worth it, but don't wear white).
- Hazelnut spread in place of caramel: super rich, but my crew found it a bit too much—your mileage may vary.
- Skipped the cheesecake layer once (by accident); honestly, still good but not as wow-worthy.
What You'll Need: Equipment (and MacGyver Moves)
- Mini muffin tin – but I've used regular muffin tins and just made fewer, chunkier bites. Or in a pinch, a square pan and cut into squares, though they aren't bites at that point, are they?
- Mixing bowls
- Electric mixer (or a strong whisk and some elbow grease—I sometimes forget where I put my mixer...)
- Toothpick or skewer (a chopstick works too, or the handle of a spoon if you're desperate)


How To Store (If They Last...)
Pop them in an airtight container in the fridge, they'll keep for up to four days. But, honestly, in my house they've never survived past breakfast the next day—so storage is usually theoretical.
Serving Suggestions (Do What Feels Right)
We usually pile them on a platter and let people dive in, but if I'm feeling a bit posh I'll dust them with powdered sugar and set out toothpicks. My cousin drizzles extra caramel over them and tops with crushed pretzels—I'm not mad about it. Oh, and with coffee? Next level.
Pro Tips (From My “Learning Moments”)
- I once tried to rush the cooling step and burned my tongue—the caramel holds heat like a stubborn radiator. Patience is a virtue, apparently.
- Don’t over-swirl. I used to think more was better but then you lose the pretty marbling; just a few figure-8s and call it good.
- Actually, I find it works better if you let them cool in the pan for 10 minutes before popping them out—they're less likely to fall apart.
FAQ: Real Questions, Real Answers
- Can I freeze these? Yep! Freeze in a single layer, then pop into a bag. They thaw surprisingly well, though a tad sticky—just let them sit at room temp for a bit.
- Can I double this recipe? Oh for sure! Just use two mini muffin tins or bake in batches. Or, make them in a brownie pan and cut into squares (that's what I do when I'm feeling lazy).
- Can I use homemade caramel? Absolutely. I love this recipe from Sally's Baking Addiction when I can be bothered (which, let's be honest, is rare).
- What if I don't have cream cheese? I've used mascarpone, and it was lush. Greek yogurt works in a pinch too, but it's tangier—just a heads-up.
- My swirls aren't pretty, help? Listen, mine rarely are. It's dessert, not an art show. They’ll taste great, promise!
And, a quick side note: If you ever find yourself out of cocoa powder, I've tried melting down some dark chocolate with the butter, and it worked. A bit unconventional, but hey, that’s half the fun in the kitchen, right?
If you get stuck, or just want to vent about sticky caramel mishaps, the Baking subreddit is full of good folk and even better ideas. Or just drop me a note. Happy baking! I hope your bites are as messy and delicious as mine always are.


Ingredients
- ½ cup unsalted butter, melted
- ¾ cup granulated sugar
- 2 large eggs
- ⅓ cup unsweetened cocoa powder
- ½ cup all-purpose flour
- ¼ teaspoon salt
- 6 oz cream cheese, softened
- ¼ cup powdered sugar
- ½ teaspoon vanilla extract
- ¼ cup caramel sauce
Instructions
-
1Preheat oven to 350°F (175°C). Line a mini muffin tin with paper liners or lightly grease.
-
2In a bowl, whisk together melted butter and granulated sugar. Add eggs and mix until smooth. Stir in cocoa powder, flour, and salt until just combined.
-
3Spoon brownie batter evenly into prepared mini muffin cups, filling each about halfway.
-
4In a separate bowl, beat cream cheese, powdered sugar, and vanilla extract until creamy. Drop a small spoonful of cheesecake mixture onto each brownie cup.
-
5Drizzle caramel sauce over the cheesecake layer and use a toothpick to swirl gently.
-
6Bake for 18-20 minutes or until set. Cool completely before serving.
Approximate Information for One Serving
Nutrition Disclaimers
Number of total servings shown is approximate. Actual number of servings will depend on your preferred portion sizes.
Nutritional values shown are general guidelines and reflect information for 1 serving using the ingredients listed, not including any optional ingredients. Actual macros may vary slightly depending on specific brands and types of ingredients used.
To determine the weight of one serving, prepare the recipe as instructed. Weigh the finished recipe, then divide the weight of the finished recipe (not including the weight of the container the food is in) by the desired number of servings. Result will be the weight of one serving.
Did you make this recipe?
Please consider Pinning it!!