
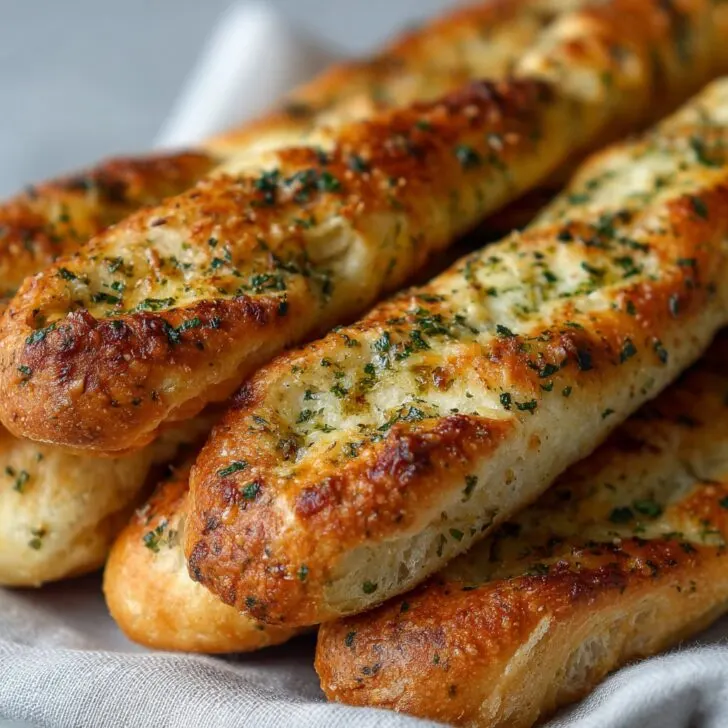
So, You're Craving Buttery Garlic Breadsticks?
Alright, pull up a chair—let me tell you about the first time I made these breadsticks. It was a rainy Tuesday; my kitchen looked like a flour bomb had gone off, and I accidentally used twice as much butter (which, honestly, turned out to be a happy accident). The smell alone had my neighbor popping in on the pretense of borrowing sugar. You know that feeling when you open the oven, the buttery garlic smell hits you, and suddenly everyone in the house is "just passing through" the kitchen? Yeah, that's what these do.
Funny thing—I can't even remember why I decided to make breadsticks from scratch that day. Maybe just stubbornness, or I was out of the frozen kind? Either way, it's become my go-to for game nights and, well, basically every time someone comes over and I want to look like I've got my life together. (Spoiler: I don't.)
Why You'll Love Making These
I make this recipe when I want to impress guests, but also on lazy Sundays when my family is craving something cozy. My teens go wild for them; honestly, I think they'd eat them for breakfast if I let them. (I caved once. Not my proudest parenting moment, but no regrets.) And, every single time I serve these, someone asks for the recipe or says, "Wait, you actually made these?" which is always nice for the ego. Oh, and the dough is surprisingly forgiving—I once forgot to set a timer, and they still turned out fine. If you ever feel a bit nervous about yeasted dough, don't stress. If I can do it, so can you. Even my dog seems to know when they're baking—he's always underfoot.
What You'll Need (aka The Ingredient Parade)
- 2 cups all-purpose flour (I've subbed in bread flour—makes it chewier, but honestly, plain flour is what I reach for 90% of the time)
- 1 tablespoon sugar (brown sugar works in a pinch, gives a faint hint of molasses, which is...interesting?)
- ¾ teaspoon salt (My grandmother always insisted on kosher salt, but table salt is fine. Sorry Grandma.)
- 2 ¼ teaspoon active dry yeast (or one of those little packets—instant yeast also works, just skip the proofing step)
- ¾ cup warm water (Not too hot, not too cold; I just use the old wrist test—like for a baby bottle)
- 2 tablespoon unsalted butter, melted (I've used margarine in a pinch—no one noticed, except maybe me)
- 2 cloves garlic, minced (Or honestly, garlic powder when I'm feeling lazy—about 1 teaspoon does the trick)
- 2 tablespoon fresh parsley, chopped (Totally optional. Sometimes I swap in dried Italian herbs, or just skip it if I'm out. No one has ever complained)
- Extra butter for brushing (at least 2 tablespoon more)
Let’s Get to the Good Stuff: Directions
- Mix the Dough: In a big bowl, combine warm water, sugar, and yeast. Give it a quick stir and let it hang out for 5 minutes till it’s foamy. (If it doesn’t foam, your yeast is probably old. Or maybe the water was too hot. Happens to the best of us.)
- Add the Rest: Toss in the flour, salt, and 2 tablespoon of melted butter. Stir with a wooden spoon—I always start with good intentions and switch to my hands halfway through. Dough will be a bit sticky; that's exactly right.
- Knead It: Tip the dough out onto a floured counter. Knead for 5-6 minutes. If it sticks to your hands, add a sprinkle more flour. (This is where I usually sneak a taste—raw dough is totally safe, right?)
- First Rise: Pop the dough back in the bowl, cover with a tea towel, and let it rise somewhere warm for about an hour. Sometimes it takes longer if the kitchen’s chilly—no biggie.
- Shape 'Em: Punch the dough down (the best part). Divide into 8-10 pieces—more if you want skinny breadsticks, fewer for chubby ones. Roll each piece into a rope, about as thick as a Sharpie. Arrange on a parchment-lined baking tray.
- Second Rise: Cover loosely (I use cling film or another tea towel) and let them puff up for about 20-30 minutes. They don’t need to double; a little rise is plenty. If they look a bit wonky at this stage, don’t worry—they’ll even out in the oven.
- Bake: Preheat the oven to 375°F (190°C). Bake breadsticks for 13-16 minutes, until just golden. Watch the last couple minutes—they go from pale to perfect quickly.
- Garlic Butter Magic: While they bake, melt the extra butter, stir in minced garlic and parsley. As soon as the breadsticks come out, brush them generously. I mean, really slather it on. (This is where I sometimes burn my fingers. Worth it.)
Some (Probably Too Honest) Notes
- I've tried skipping the second rise when in a rush—honestly, they're still decent, just a little less fluffy.
- If your breadsticks are super dense, next time, let the dough rise longer. Or maybe check your yeast expiration. Learned that the hard way.
- I always end up making extra garlic butter. It's never wasted—try dipping the finished breadsticks in it. No judgement here.
- On second thought, maybe don't double the butter like I did that first time, unless you want finger-licking, napkin-needing results.
Weird Variations I’ve Actually Tried
- Cheesy Breadsticks: Sprinkle grated mozzarella or cheddar before baking. Melty, stringy goodness. (But I once used blue cheese. Mistake! My kids still talk about it, and not in a good way.)
- Whole Wheat: Sub in half whole wheat flour. They’re a bit denser but feel more virtuous. I like them for soup.
- Spicy: Add a pinch of chili flakes to the garlic butter. My husband thinks I overdo it, but I say live a little.
If You Don't Have All the Equipment...
I use a stand mixer with a dough hook when I'm feeling fancy (or lazy), but honestly, hands are just fine. No parchment? Just oil the tray and call it good. Rolling pin MIA? I just use my hands to roll ropes—works a treat. I even "borrowed" my daughter's Play-Doh rolling pin once. Resourcefulness or madness? You decide.


Keeping 'Em Fresh (Not That They Last Long)
Store any leftovers in an airtight container at room temp. They'll stay soft for maybe two days, but honestly, in my house, they usually disappear the same day. (If by some miracle you have leftovers, toast them lightly the next day—honestly, I think they taste better on day two, but maybe that's just me.)
How We Serve These (Totally Optional, but Fun)
We love these with marinara sauce for dipping, or alongside soup (especially creamy tomato—see Smitten Kitchen's version). Sometimes I just pile them on a platter and let everyone grab their own. Oh, and my aunt likes them with honey butter. I don't get it, but hey, to each their own.
Pro Tips That Came the Hard Way
- Don't rush the rising time. I once tried to speed things up by blasting the oven—result? Dense, sad sticks.
- Actually, I find that brushing with butter as soon as they come out keeps them soft. Wait too long, and it just sits on top.
- Use a sharp knife to cut dough pieces. I tried tearing them once; messy disaster.
FAQ—Answering Real Questions (and One Odd One)
- Can I make these ahead of time?
- Totally. You can shape the dough, cover, and refrigerate overnight. Then just let 'em come to room temp before baking. Or bake, cool, and reheat in a low oven.
- Can I freeze them?
- Yep! Freeze after baking, then rewarm in the oven. They aren't quite as dreamy, but still way better than storebought.
- What if I don't have fresh garlic?
- Garlic powder totally works. Actually, some days I prefer it because there's less risk of burning.
- Help! My dough isn't rising. What did I do wrong?
- Could be old yeast, or maybe the water was too hot/cold. Or maybe the room was cold. Don't throw it out—just give it more time in a warmer spot (an oven with the light on works).
- Can I double the recipe?
- Oh for sure, but I'd split into two bowls or trays—it gets tricky kneading a giant blob.
- Do these taste like Olive Garden?
- Honestly, I think they're better (maybe I'm biased). They're definitely less sweet and more...homemade? Not as uniform, but that's the charm.
- Is there a gluten-free version?
- I've tried a couple, but none I loved enough to share. If you find a great one, let me know!
So that's my not-quite-perfect, but absolutely delicious, guide to making buttery garlic breadsticks from scratch. If you try these, let me know how they go—or if you invent a wilder variation. And if anyone ever asks, "Why make these from scratch?" just tell them your kitchen smelled so good you couldn't help yourself.


Ingredients
- 2 cups all-purpose flour
- 1 packet (2 ¼ tsp) active dry yeast
- ¾ cup warm water
- 2 tablespoon granulated sugar
- ½ teaspoon salt
- 3 tablespoon unsalted butter, melted (plus more for brushing)
- 2 cloves garlic, minced
- 1 tablespoon chopped fresh parsley (optional)
Instructions
-
1In a large bowl, combine warm water, sugar, and yeast. Let sit for 5 minutes until foamy.
-
2Add flour, salt, and 2 tablespoons melted butter to the yeast mixture. Mix until a soft dough forms.
-
3Knead the dough on a floured surface for 5-7 minutes until smooth and elastic. Place in a greased bowl, cover, and let rise for 30 minutes or until doubled in size.
-
4Preheat oven to 400°F (200°C). Divide dough into 8 equal pieces and roll each into a breadstick shape. Place on a parchment-lined baking sheet.
-
5Bake for 16-18 minutes or until golden brown. While baking, mix remaining melted butter with minced garlic.
-
6Brush hot breadsticks with garlic butter and sprinkle with chopped parsley if desired. Serve warm.
Approximate Information for One Serving
Nutrition Disclaimers
Number of total servings shown is approximate. Actual number of servings will depend on your preferred portion sizes.
Nutritional values shown are general guidelines and reflect information for 1 serving using the ingredients listed, not including any optional ingredients. Actual macros may vary slightly depending on specific brands and types of ingredients used.
To determine the weight of one serving, prepare the recipe as instructed. Weigh the finished recipe, then divide the weight of the finished recipe (not including the weight of the container the food is in) by the desired number of servings. Result will be the weight of one serving.
Did you make this recipe?
Please consider Pinning it!!